|
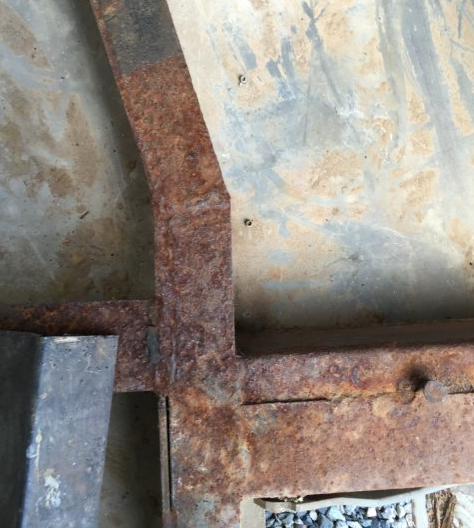
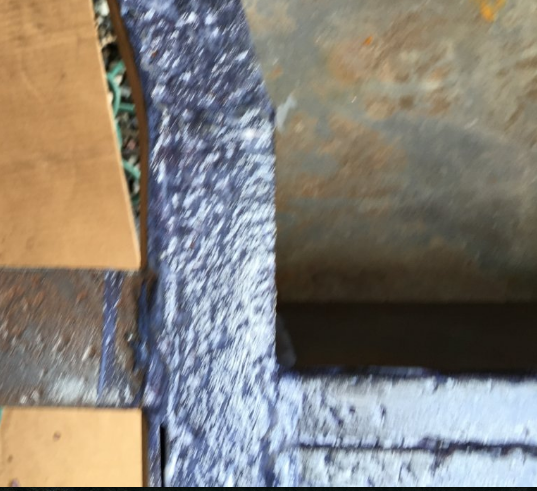
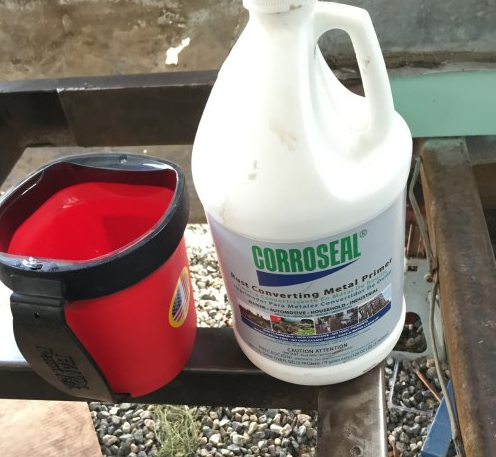
I'm often pretty grubby when I'm done with a day's work on the Airstream, but my reflection in my shaving mirror was so black that that I took a selfie in the shower. I'll post that at the end. I was so dirty because I removed the aluminum belly pan and wire brushed the rust off the whole frame. I was going to leave the bellypan attached to the banana wrap (real terms, I'm not making this up), but I realized that I needed to removed it. The bellypan is the section of aluminum down the middle of the airstream. The banana wraps are the sections that curve in surprisingly complicated ways from the sides to the middle. There are two seams that run front-to-back where the layers of aluminum overlap. 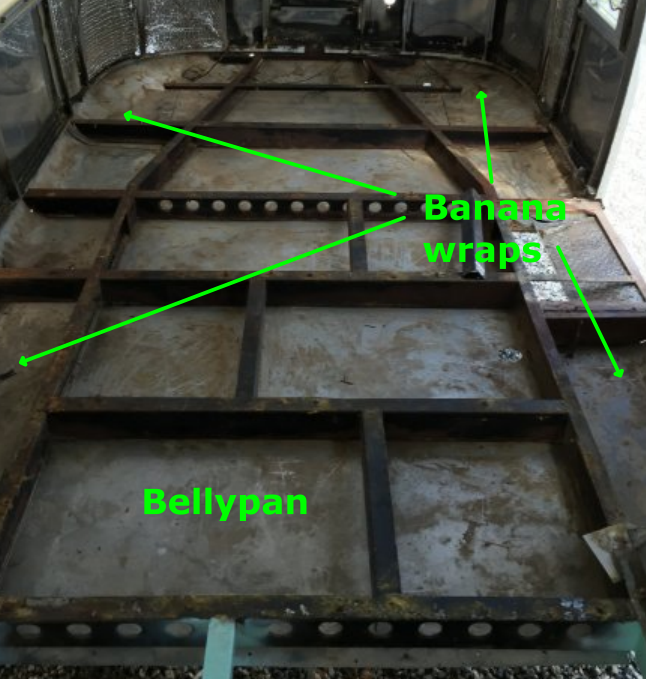 I don't want to mess with the banana wraps on this end. They will need to be patched, but I've read that actually replacing them is miserable. The rear ones unfortunately do need to be replaced, so we'll see. Here's a pic of the same angle with the belly pan removed, you can see it still rolled up underneath in this photo. The banana wraps are attached at the sides, but not along the frame anymore: 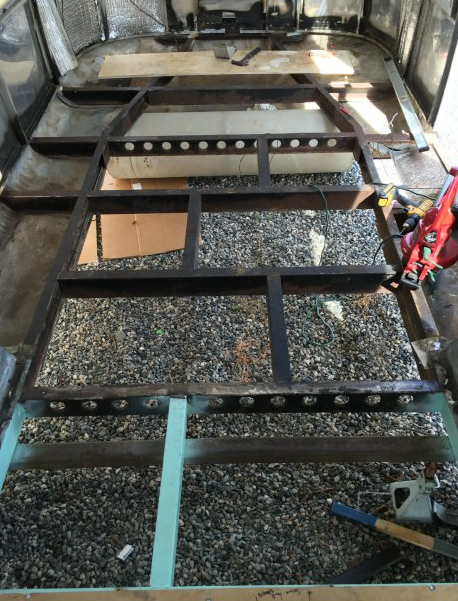 In order to remove the belly pan, I had to remove about 50 pop rivets from the seams. I found it was easiest if I ground them off from the inside. I tried hard not to damage the aluminum, but a few places got scored. There are a bunch of holes I'll need to seal anyway. (Incidentally, this is why I could never build an airplane like my friend Mike. I'm all about "good enough".) So after the bellypan was out, I was able to get to the underside of the frame with my grinder and wire wheel. I took most of the rust off the frame. There were a few places I couldn't reach with the wheel, but, again, "good enough". I used Corroseal again on this side and was amazed again at the stuff. It converts rust into not-rust and becomes a rather hard coating. It feels like magic. It is an acid-based product that soaks in and chemically changes the rust. I took a series of photos of the same part of the frame. I had thought it was going to be the most-rusted part. (I was wrong, there is another part that actually did rust completely through. There's a hole about the size of a dime. But I didn't get pictures and it is in an unimportant place.) Corroseal is very easy to apply, the trick is making sure you really soak the metal with lots of product, but avoid drips. It meant I kept reapplying more product as the previous coat soaked in. So, after a very long day of work, my arms are shot and my back is angry with me. But, I'm satisfied. Its one of those days that I feel like I might actually do this. Yeah, I'm not posting that selfie. I can't believe you came looking for it. Here's proof I was that grimy though: 
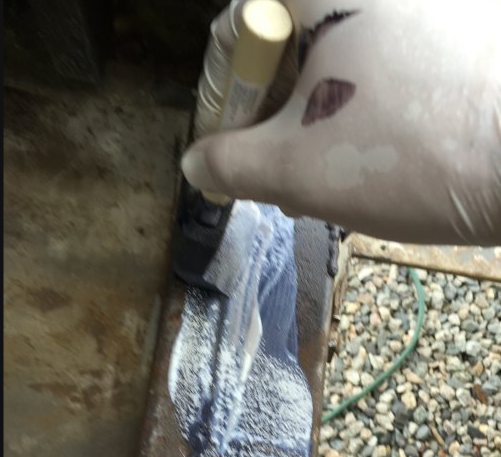
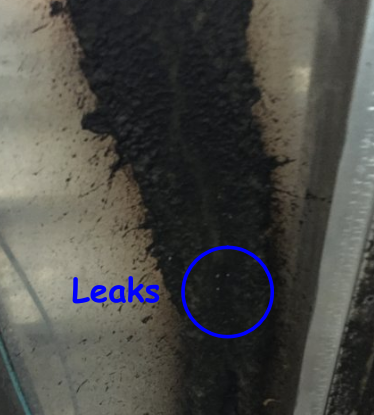
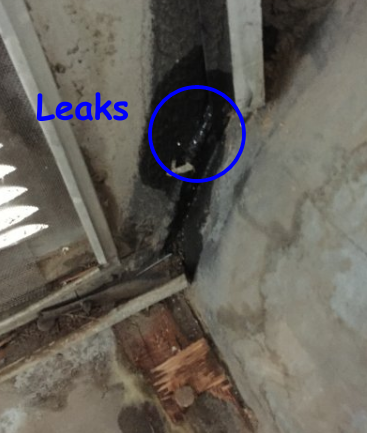
0 Comments
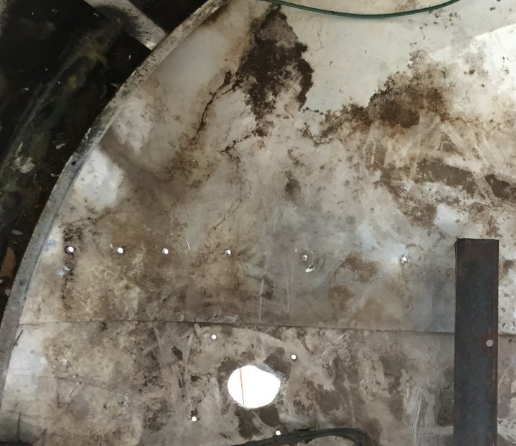
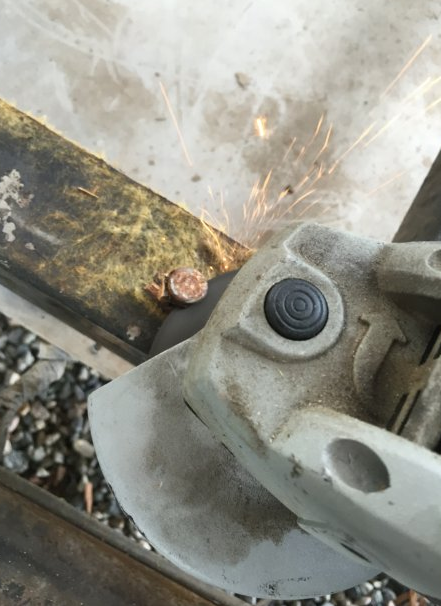
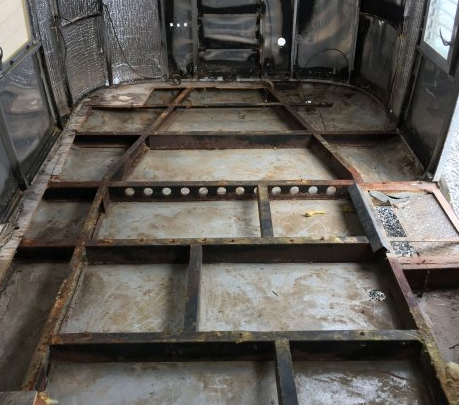
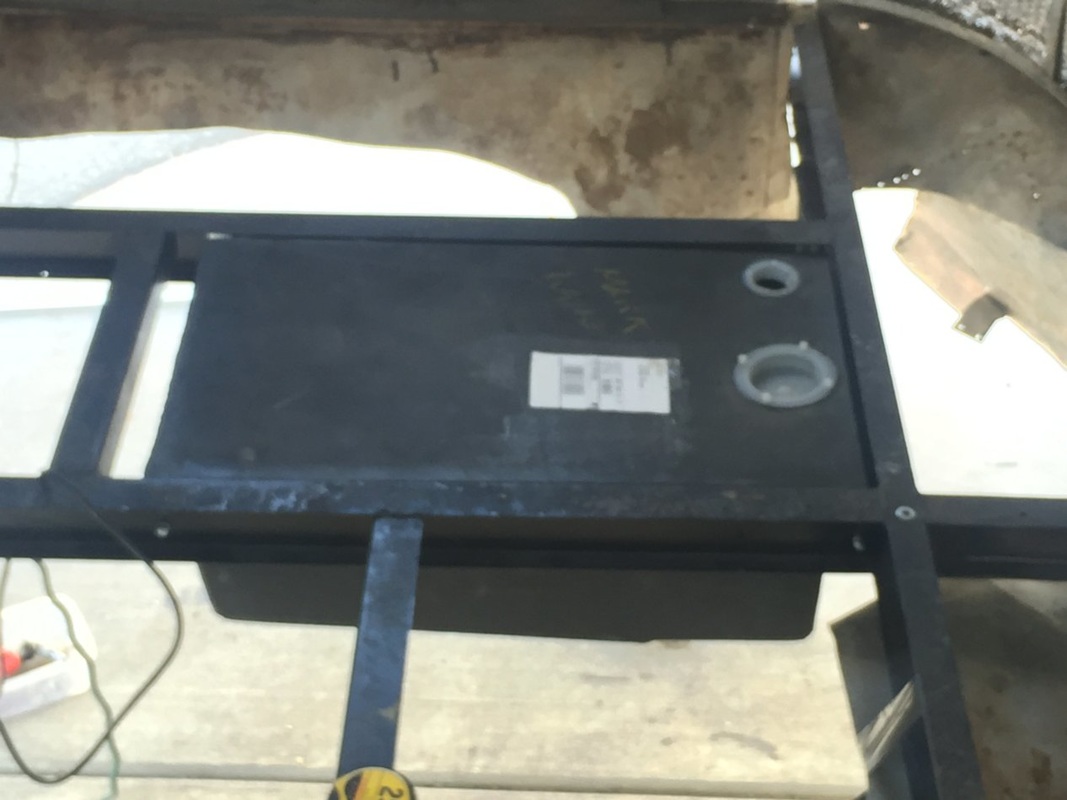
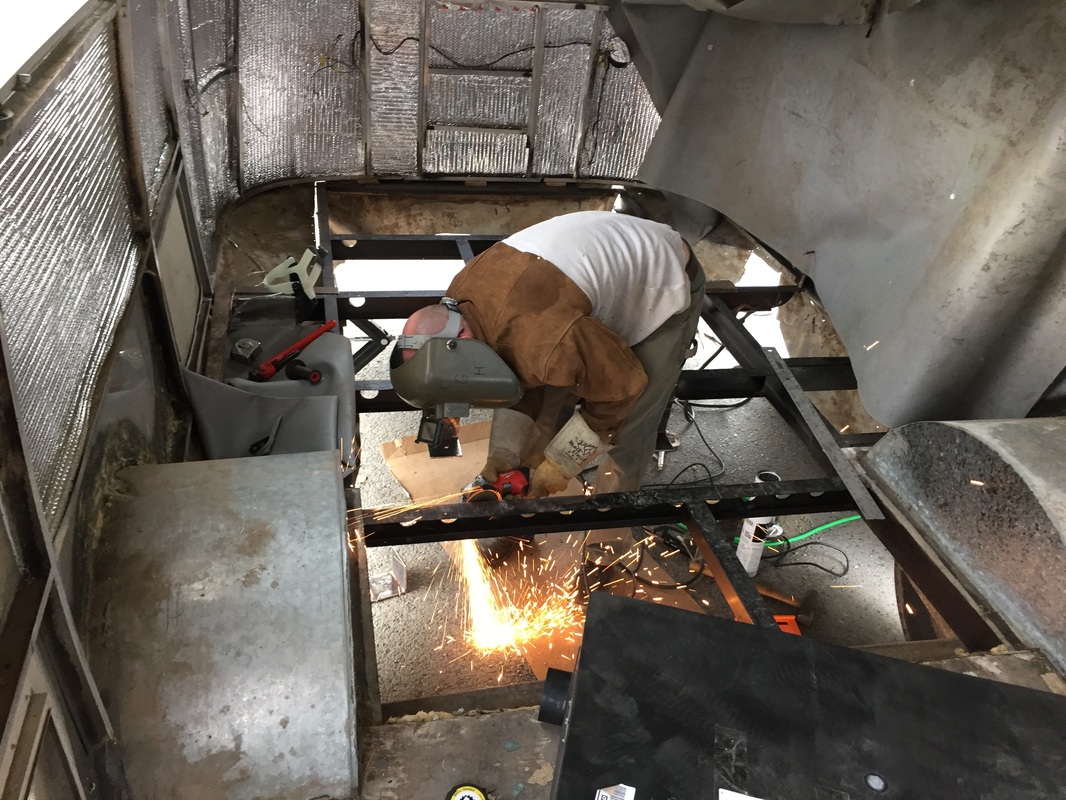
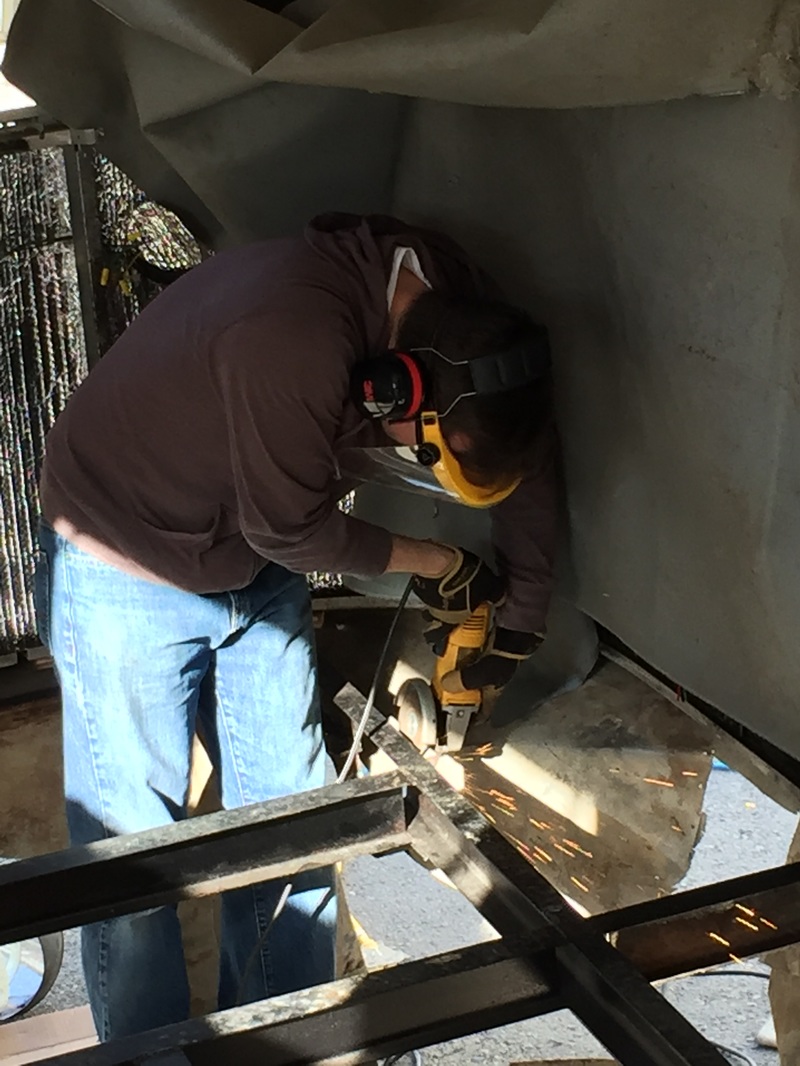
Grinding Using the angle grinder is probably my favorite task so far on the airstream. Well, using the cutting torch was fun too. It feels powerful to see the shower of sparks as I grind through metal. The camera doesn't really capture the image well, though. There's far more sparks as the grinder cuts than the picture below seems to show. Like on the previous side, the wood floor was held on by carriage bolts. The factory bent all of the bolts below the nut so it would be impossible for the nut to back out. I can't be upset because on the other side I used a chemical called lock-tight to do the same thing for the new floor's bolts. But each bolt has to be ground off. No big deal, it's fun work. Sealing (Again!) It's been raining for two days (of course it is; it's Labor Day.) But, I love rainy days. Every time it rains I try to run out and check for leaks. The rear, with the new floor already installed, is watertight now. This past spring I found all of the leaks <knock on new wood subfloor> on that side. But I didn't know about the front of the trailer because the floor was so rotten I couldn't tell leaks from rot. With all of the rot out today, I found three pools of water on the floor on the inside of the bellypan. From there it was simple to trace the leak up the wall to pinholes by rivets and window frames. Most of the leaks are/were in places that Airstream knew they would be. The black paint on the images below is a seam-sealer from the factory. Unfortunately, it didn't last 50 years. It might not have lasted 20, given the rot. But who knows. I feel very thankful for the lack of rust - I think the western climate had a huge part of that. Most frames in 60's era Airstreams with floors in the same condition as my old floor have massive holes and degraded frames. The rain was enough to rot the floor, but the dry air kept the steel from rusting through. Well, that's my unscientific guess. This week I will wirebrush the worst spots to get a better look. 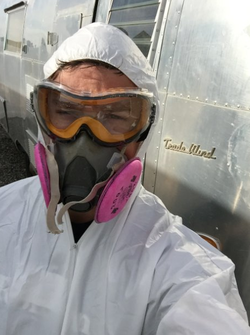 Phew! The nasty, dirty work is done! Today I removed pounds of feces. Pounds. I used my 16 gallon shop vac and filled it about halfway. Granted, some of that was road debris and powdered fiberglass, but there was a ton of shit. Knowing it was going to be gross, I went and got a tyvek white suit to keep some of that away from my clothes. It was as dirty as I suspected it would be and I was glad for the extra protection. I also used a crappy (puns!) saw from harbor freight to cut out the bolt heads under the c-channel. It took forever, but it was what I had. I've decided I'm never buying knock-off tools again. It is not worth it. Anyway, those bolts held the last bit of old subfloor. When they were cut off, I was able to remove the last bits of rot and poo. I'm not totally sure, but I think the frame is in pretty good condition. It is at least as good as the rear was, with no holes on this side. I'm going to ask Cory to check it. The aluminum underbelly is in good condition, too, with very few holes. The few holes that are there can be plugged with rivets and Trempro. So as I worked, my plans changed. I think that I'm going to treat the frame the same way I did on the other side with rust inhibitor and paint, but I'm not going to totally remove the belly skin. Keeping the belly skin on this side will save me at least a couple hundred dollars -- and no one looks at the belly skin. It just needs to be watertight. That seems possible here.
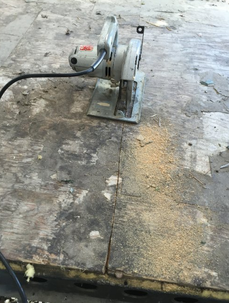
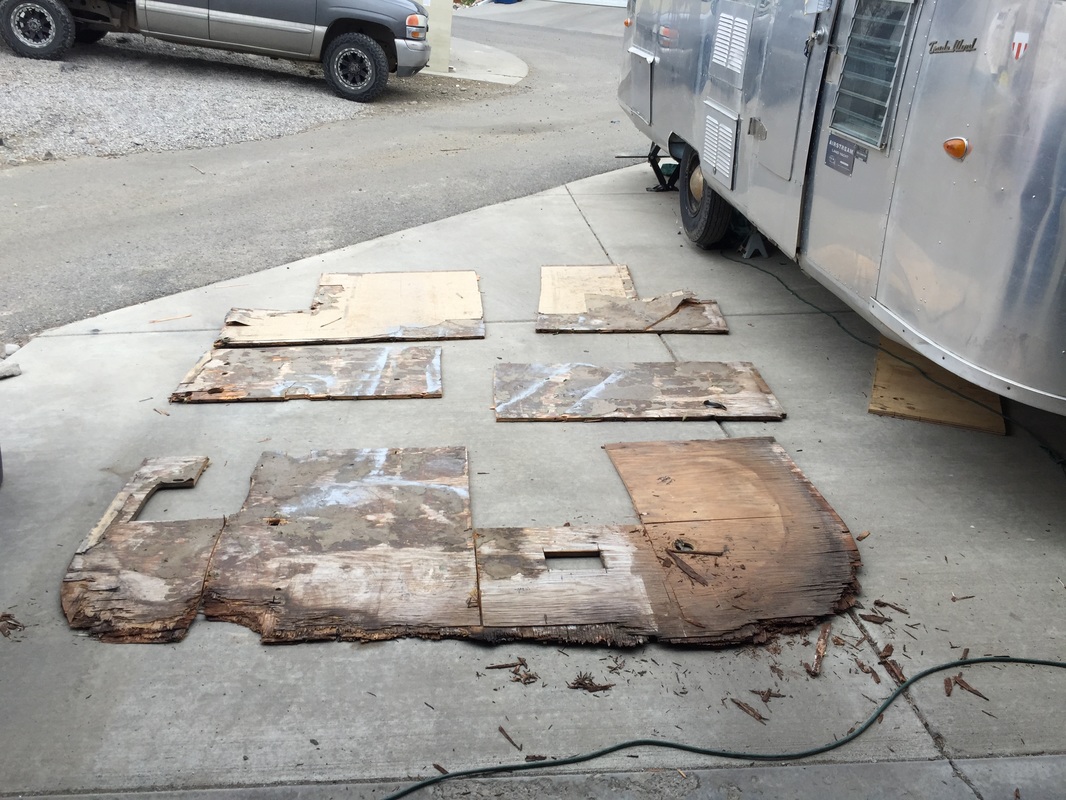
I'll remove enough rivets to hopefully let it sag out of the way for painting. Before painting, I'll need to remove all the bolt heads in the center with a grinder and then wire brush the bad spots. Then I can remove rivets and prep for paint. I'm glad that this work is done. Disgust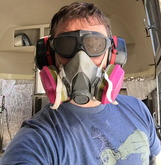 One more disgusting day still-to-come, that is. I removed the subfloor on the remaining side yesterday. I was really hoping it would be a one-day operation, but alas, no such luck. If anything, this was the most disgusting demo-day yet (and I quit before dealing with the rodent's nests). The amount of nastiness below the floor was shocking. Maybe time caused me to forget the other side. 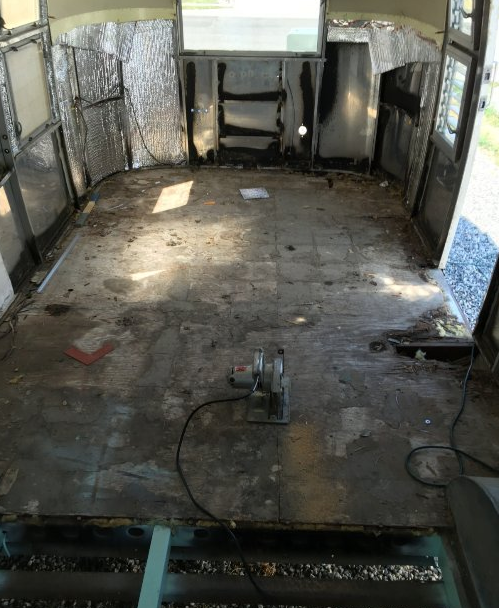 The other side. So I tried a new technique for removing the old flooring. I had realized last time that I used too much effort trying to pry the old floor up (where it wasn't rotten through). So this time I set the circular saw to about 1/16" less than the thickness of the wood and cut a checker board along the floor frame joists.
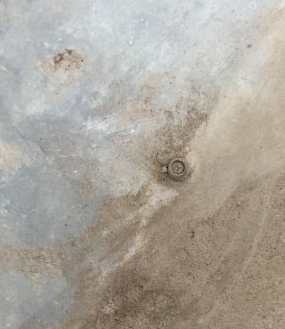
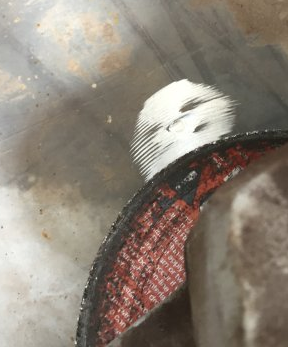
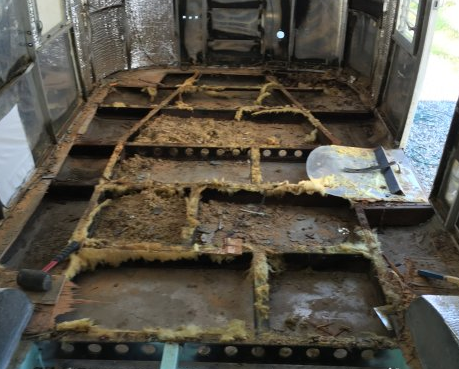
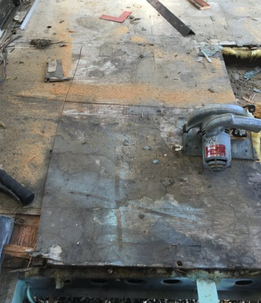
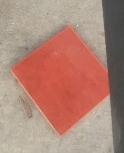
It worked well, but I was actively cutting the floor out from under me. So, I needed to keep a careful eye out for where the frame would support my weight, despite not being able to see it. A frame joist runs under every subfloor seam and obviously underneath all of the flat bolt heads. I put a picture below of them. These are where I was careful to step. By the end of the day, my ankles and calves were on fire from balancing. 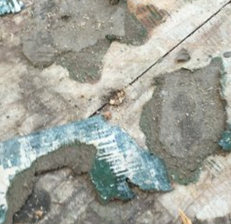 The seam and bolt tells me it is a safe place to stand. The first panel I pulled up was an omen for the rest. I didn't remove the insulation missing in the center of that ring. 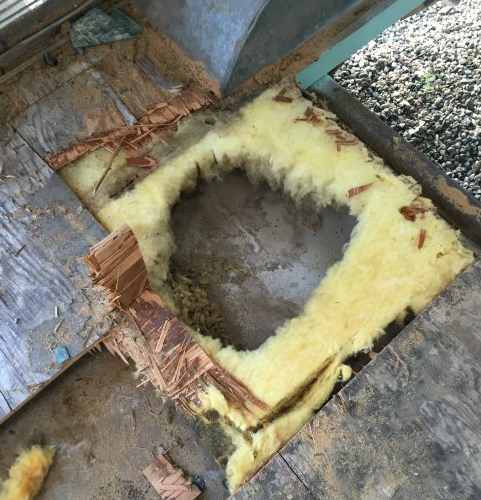 It wasn't a human who made that hole. Rats! (or mice, squirrels, etc.) As I went, it was clear that this end of the airstream was favored real estate for rodents. Granted I found nests in the walls and in the other side, but there was nearly no insulation left under this side at all. There are at least four nests left in it right now; I had to quit before getting to them. 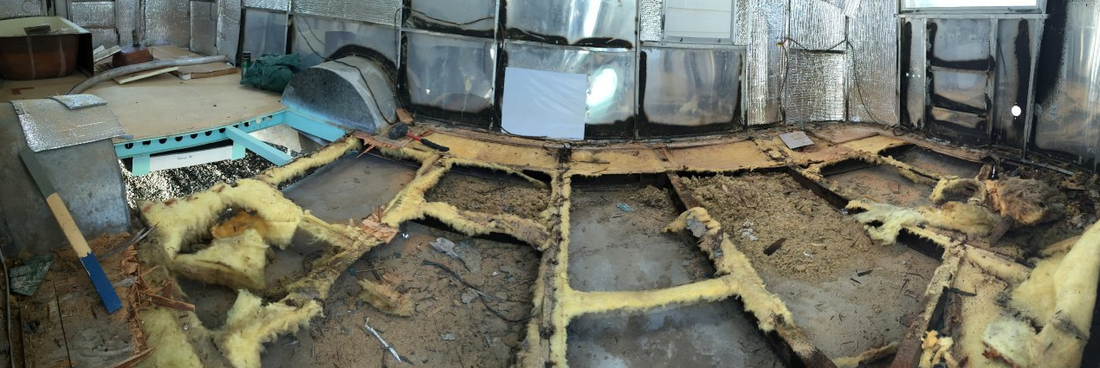 I had not removed any insulation when this was taken. Rodents removed it all. You can see two of the nests in this photo and, on the far side, insulation that went mostly unmolested. AsbestosBut the rodents' nests was not the worst concern of the day. Sometime in the past year I discovered that the tiles in my airstream were made out of asbestos. Asbestos is no big deal, right? As long as you don't disturb it... oh right. I cut the flaking, disintegrating tile out with a circular saw. That might make it dangerous. If you're reading this for your project some time in the future, here is the best pic I have of the asbestos tiles: 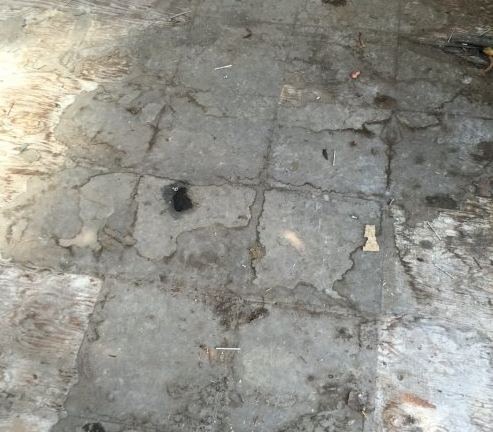 Asbestos tiles: approximately 8 inches square. I hope I followed enough safety precautions! I used a respirator, wet down all of the debris before bagging it, and wet myself down before throwing my (old) clothes away. Then I took a shower. The tiles pictured above were about half of the tiles left, so I was really not willing to pay for professionals. I'll probably spray down the walls and new floor of the interior just before I'm ready to completely close this side. Until then I'll use a respirator inside.
I'll leave you with the thought that kept me up one night a few months ago: I can't remember if I even wore a respirator on the other side. 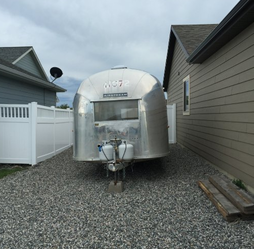 Two months ago our airstream moved into a new home. Fortunately we went with it. The new house has a large gravel RV pad and, if airstreams had feelings, ours would feel much less claustrophobic, but very neglected.
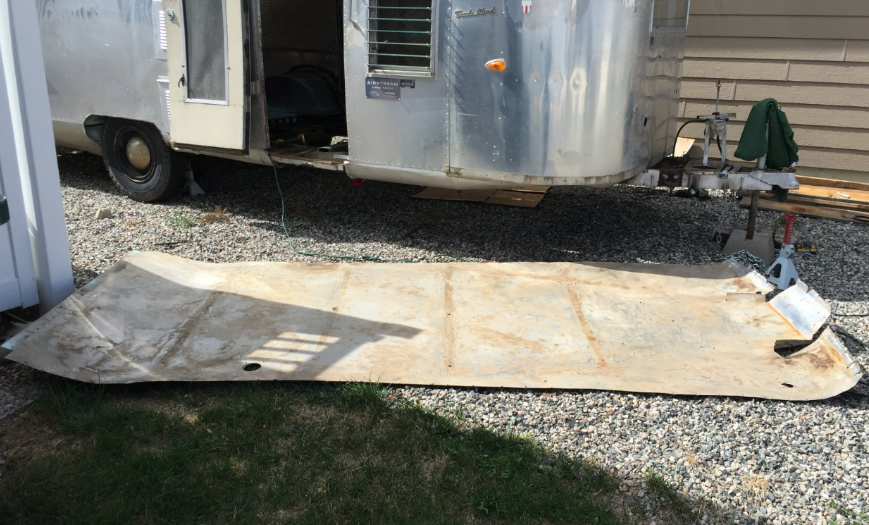
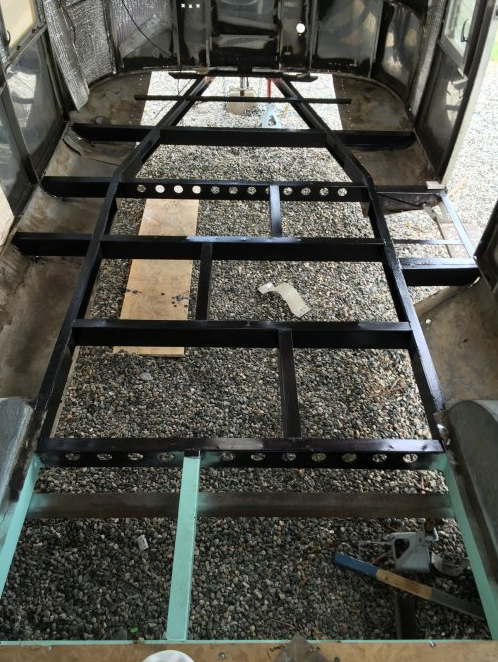
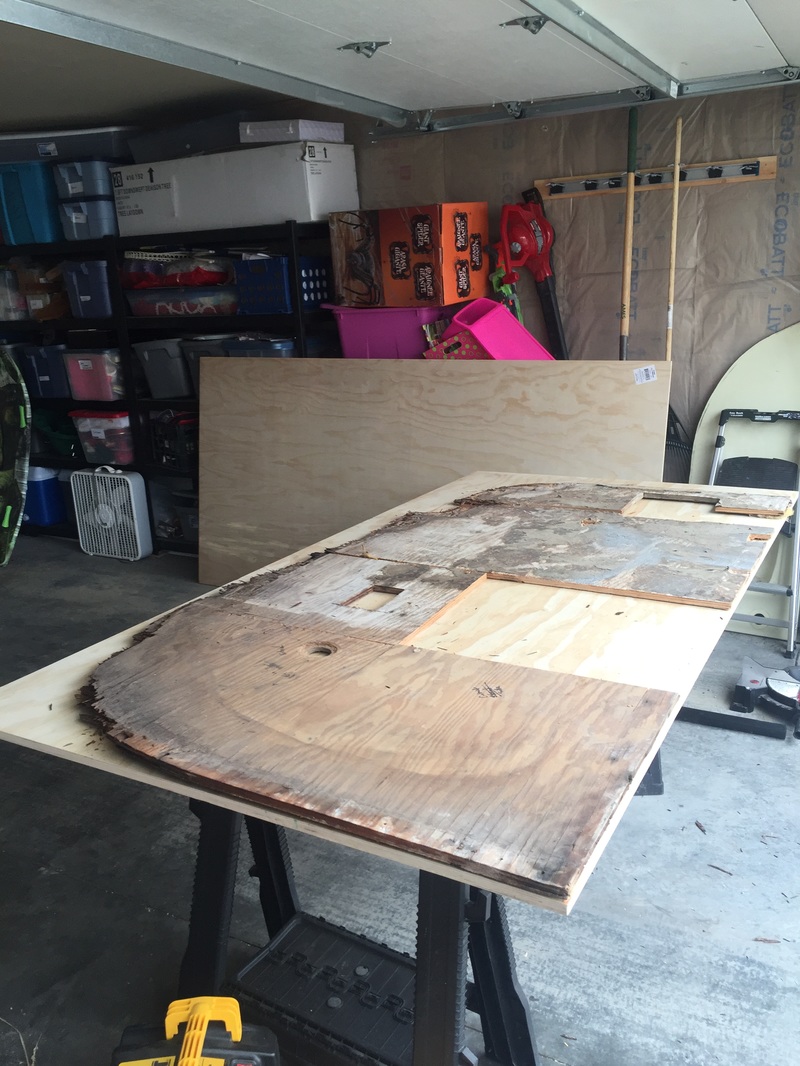
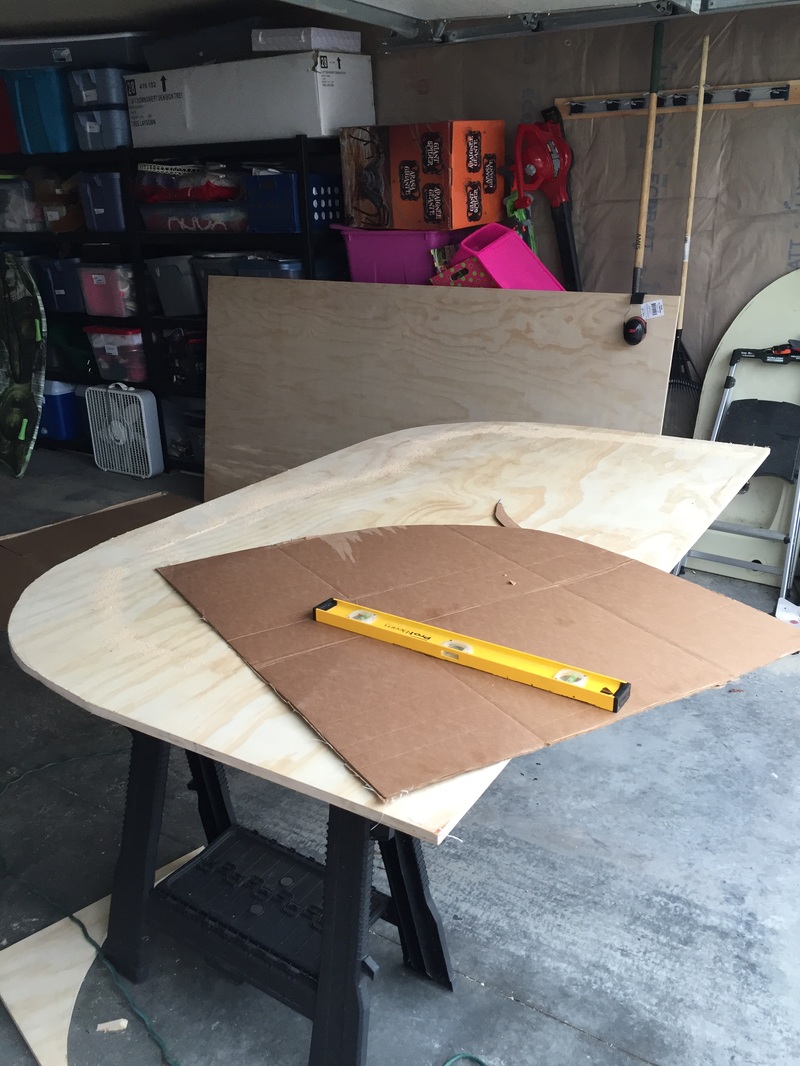
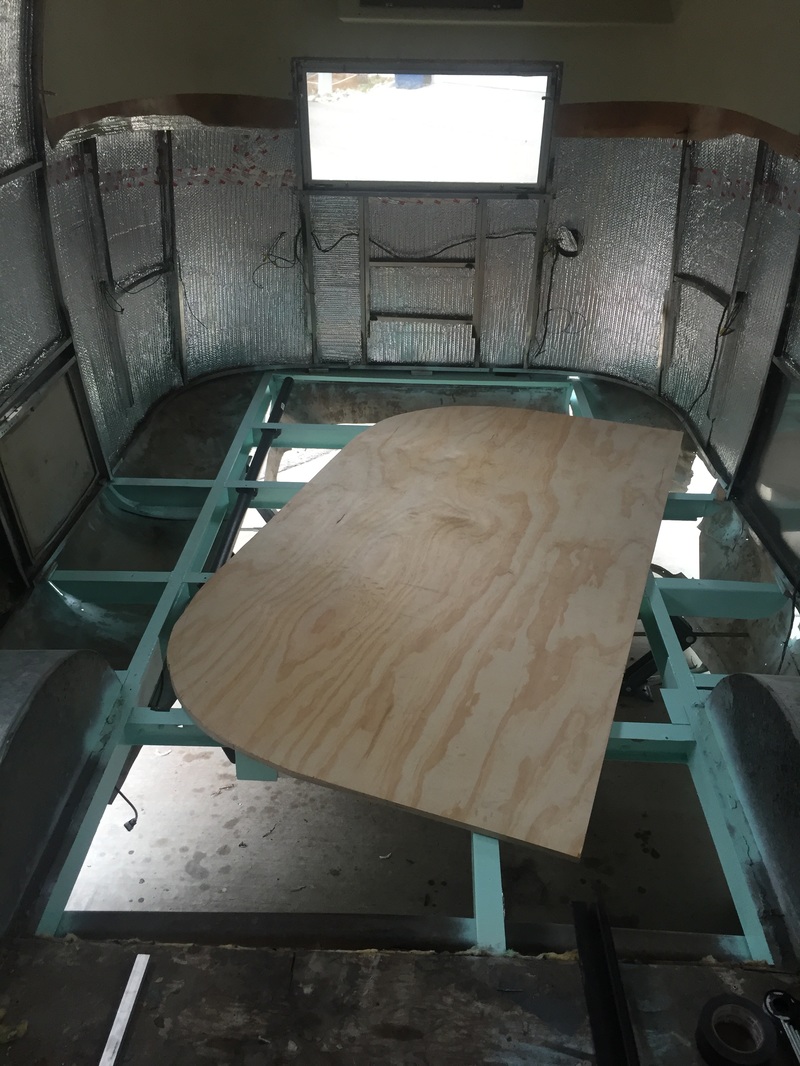
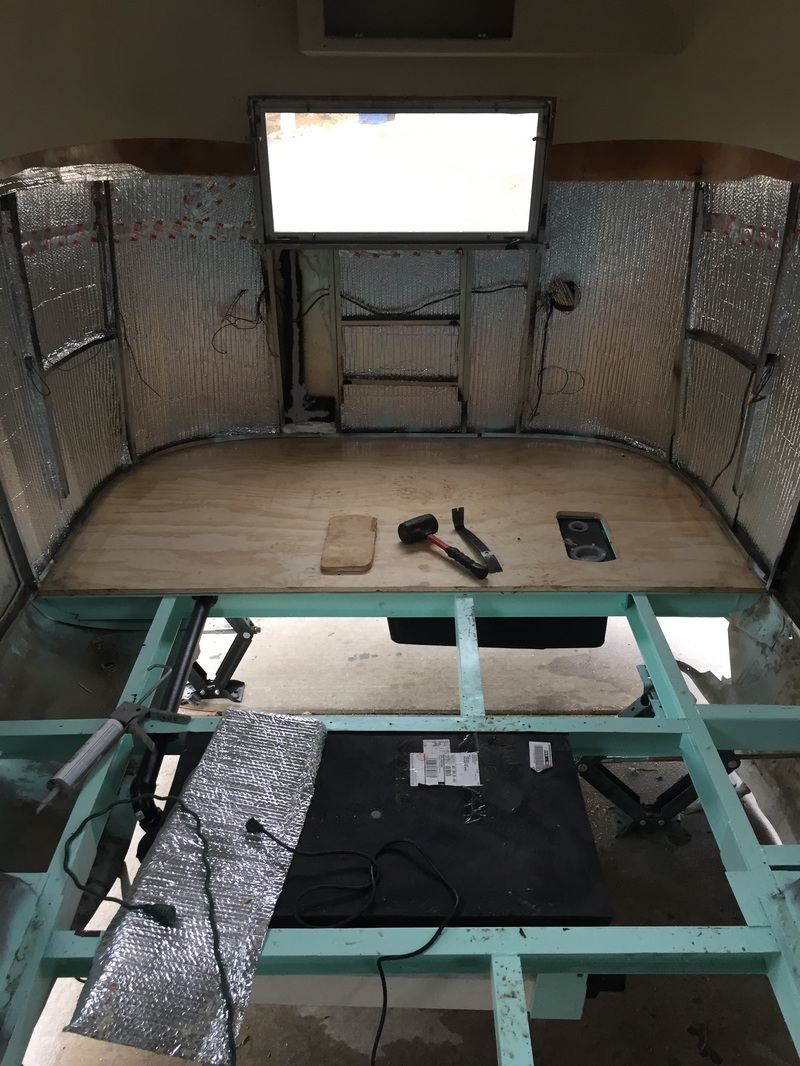
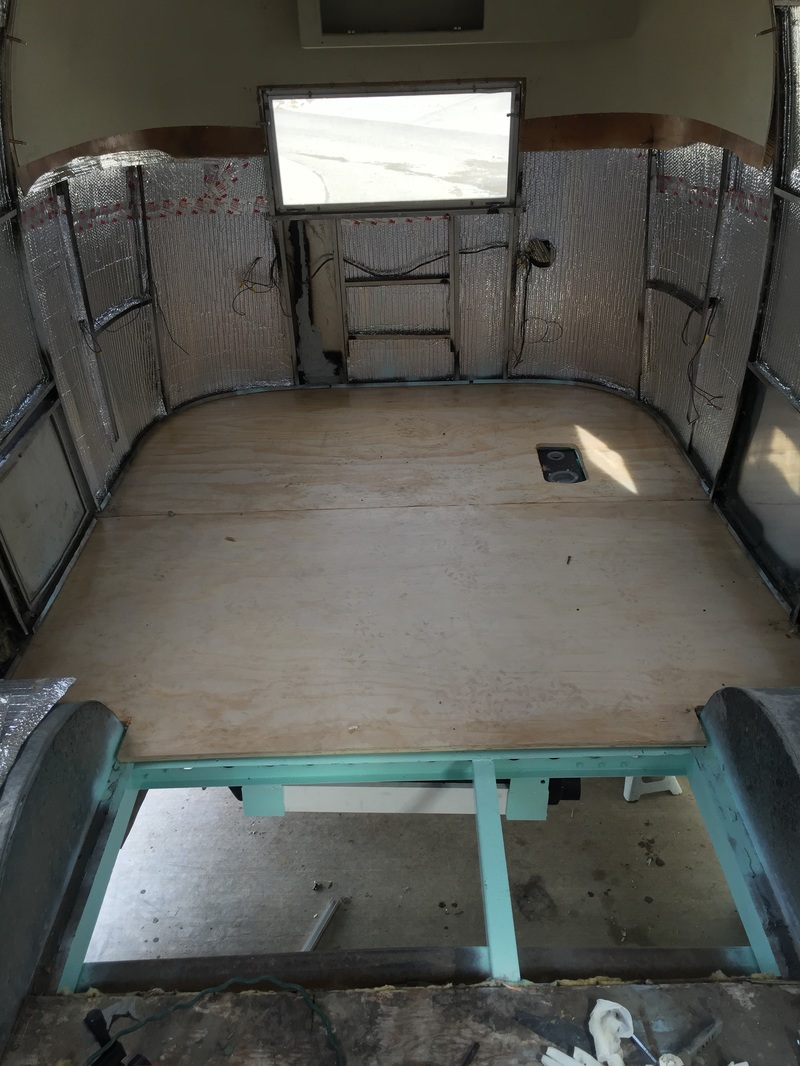
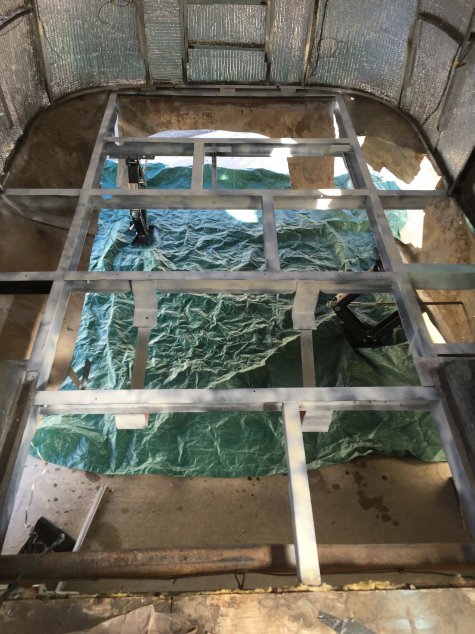
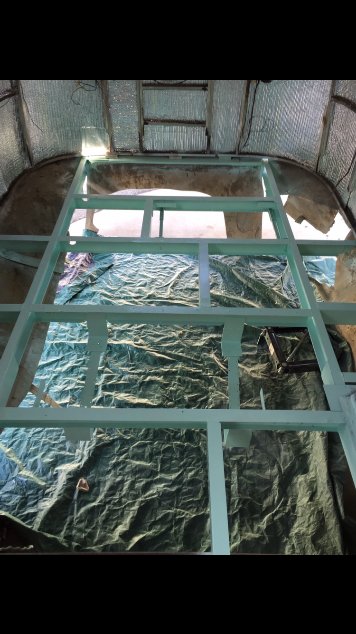
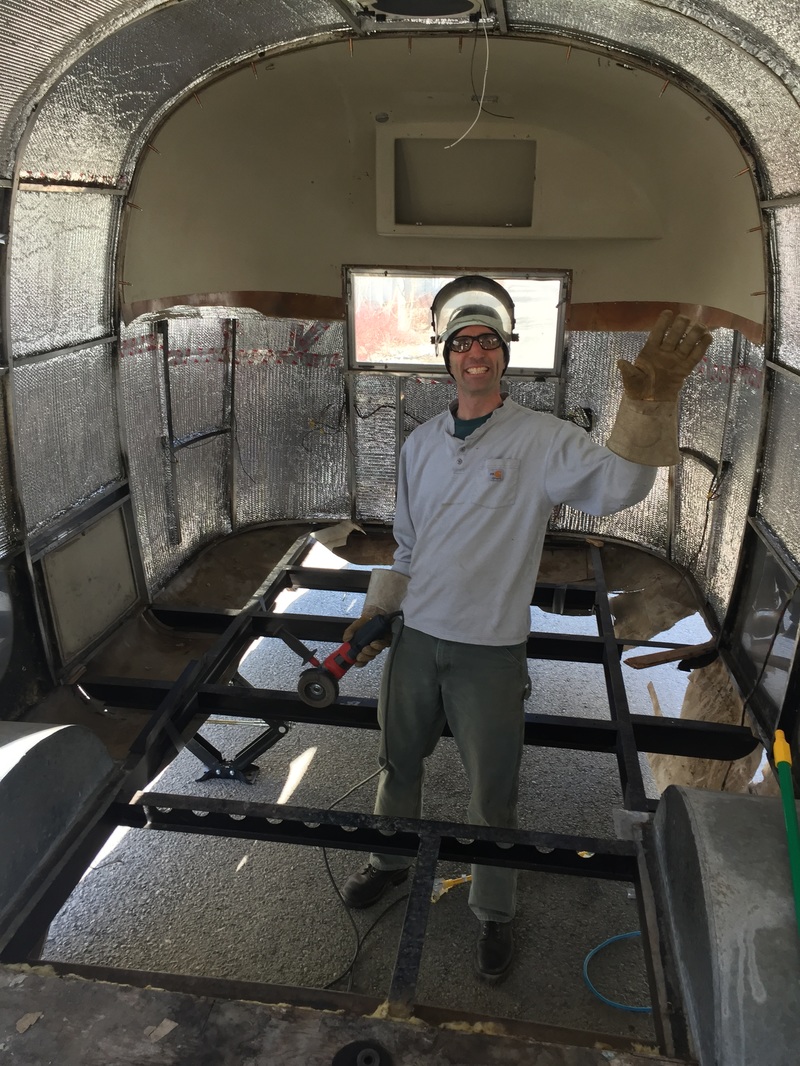
I have done nothing substantial since my last post in March! It turns out that new homes are expensive and part of our airstream savings got diverted to the new house. But even more than the finances, since I have already bought materials for some of the most expensive next steps, I've been super busy with the new home. It takes time to make a house a home! One more realization, everyone says renovating an Airstream will cost 50% more in time and money than you expect. I anticipated it being done by now, both in time and in money. So I guess this illustrates that I'm far worse at planning than average. I think it will end up double in both categories, maybe triple. I hope not more than that. So being one year into this, here's my commitment: We will be camping in it next summer. It might not have all the bells and whistles finished, but we will be camping in June! No one will see my best work so far (I hope!). This week I began reflooring. First, though, I plumbed the drain to the bathtub location. I'll get the rest of the plumbing from below. I used ABS plastic pipes and fittings. The ABS plastic is supposed to be a bit more forgiving of the bumps and bounces that happen in travel. It is lighter and cheaper, too. Next, I got the old floor out and puzzled it together. Ultimately, the only piece that mattered was the round end. I used the rotting old subfloor to help make a cardboard template on the new 3/4" plywood. I had to shave down the cardboard a few times until it fit well. Then I transferred the shape onto the wood. I almost forgot to seal the edges of the plywood, but remembered after the photos above were taken. I used triple-thick polyurethane to seal the edges against future leaks. Getting the panel installed in one piece was a feat. I had to flex the aluminum sides out about 1/2" so that the plywood could slide under the u-channels of the aluminum sides, but above the steel frame. It's like a sandwich. The plywood is like the meat; the frame and u-channel are the bread. They all get attached together and provided the actual structural strength.  Next step is to bolt down the floor and then rip out the floor on the other side! Hopefully the front side will be easier without the tanks to worry about. If I get really lucky, there won't be any welding to do at all!! <knock on wood>
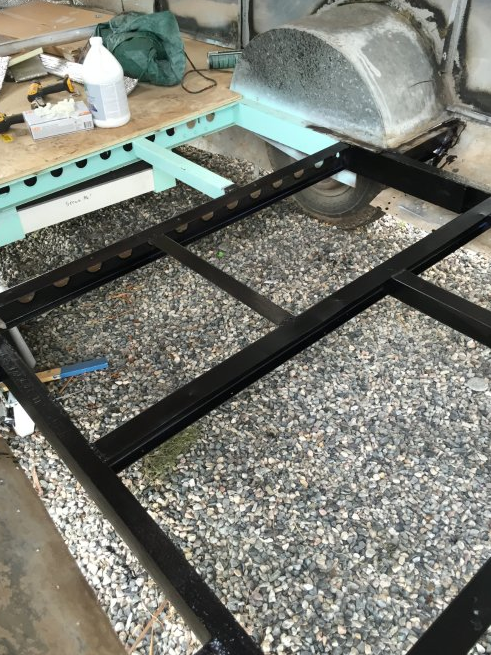
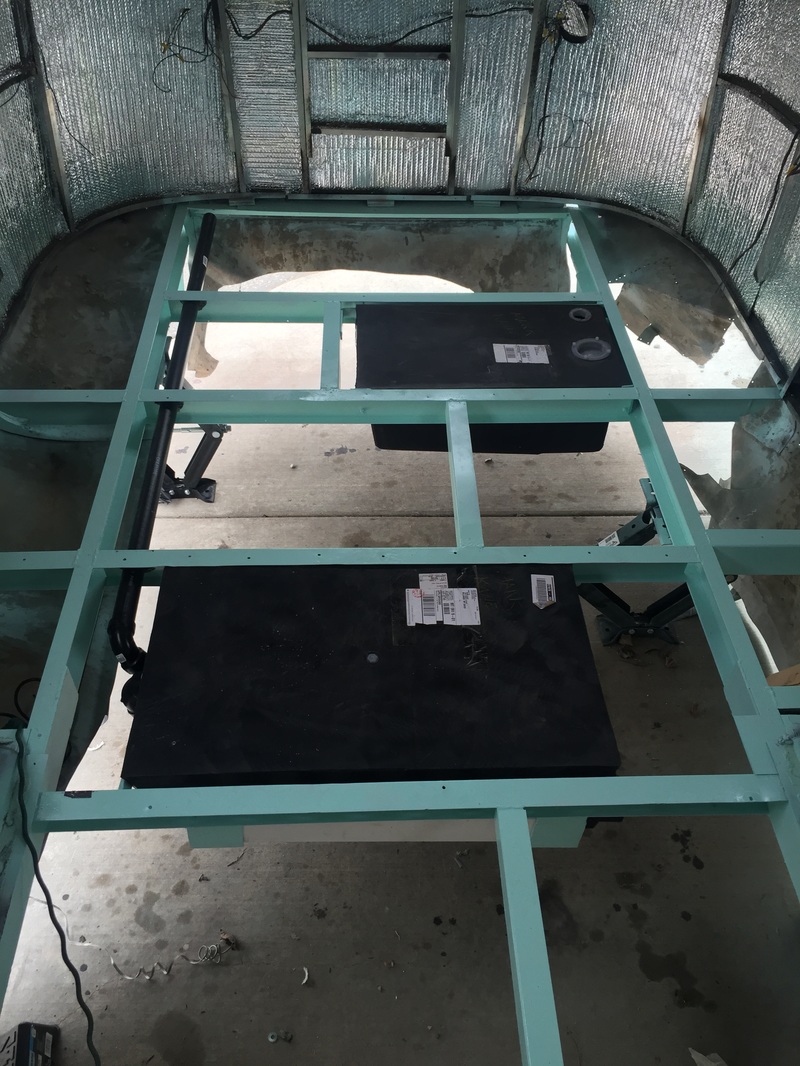
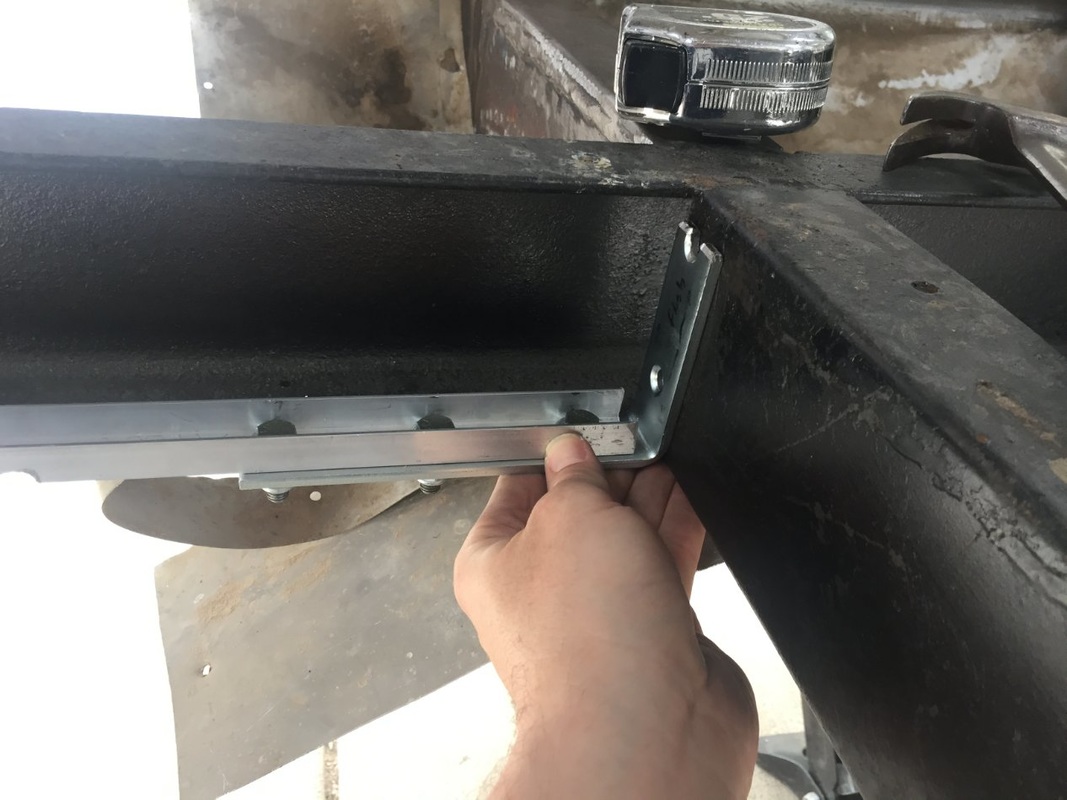
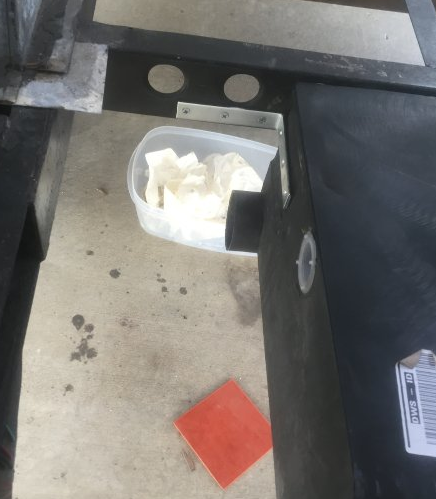
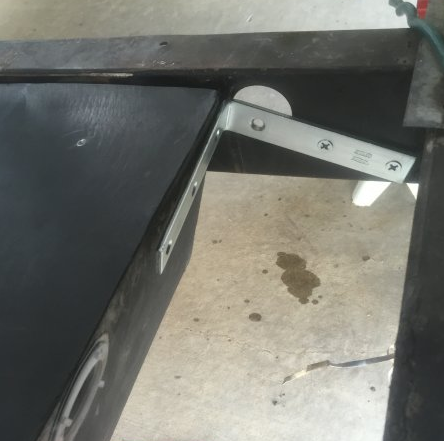
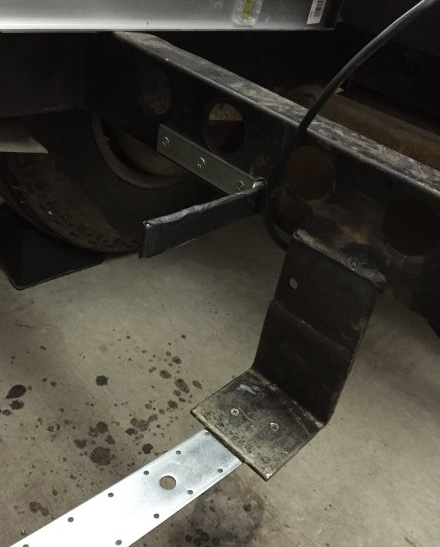
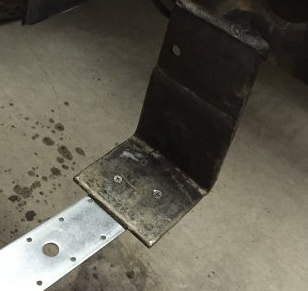
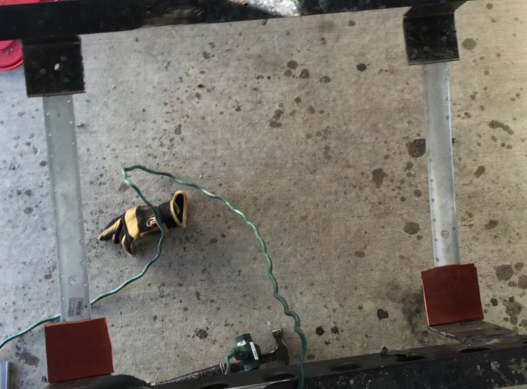
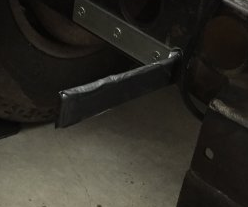
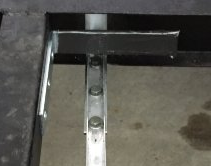
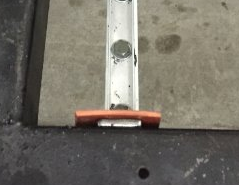
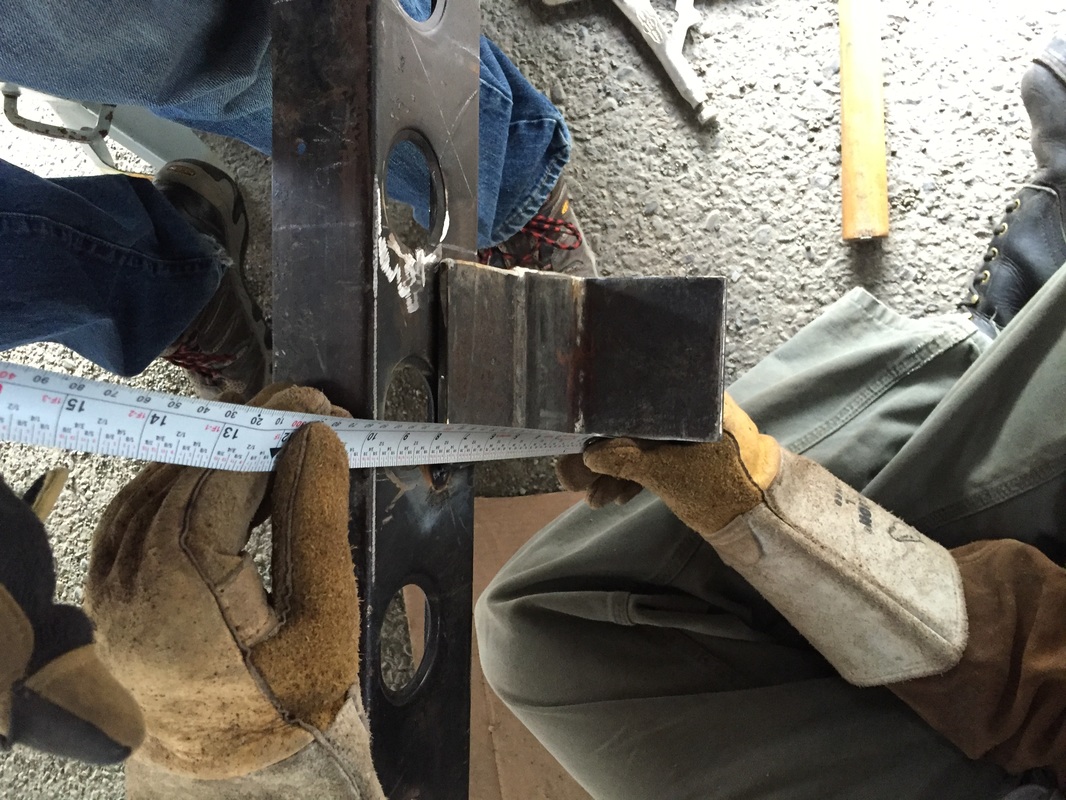
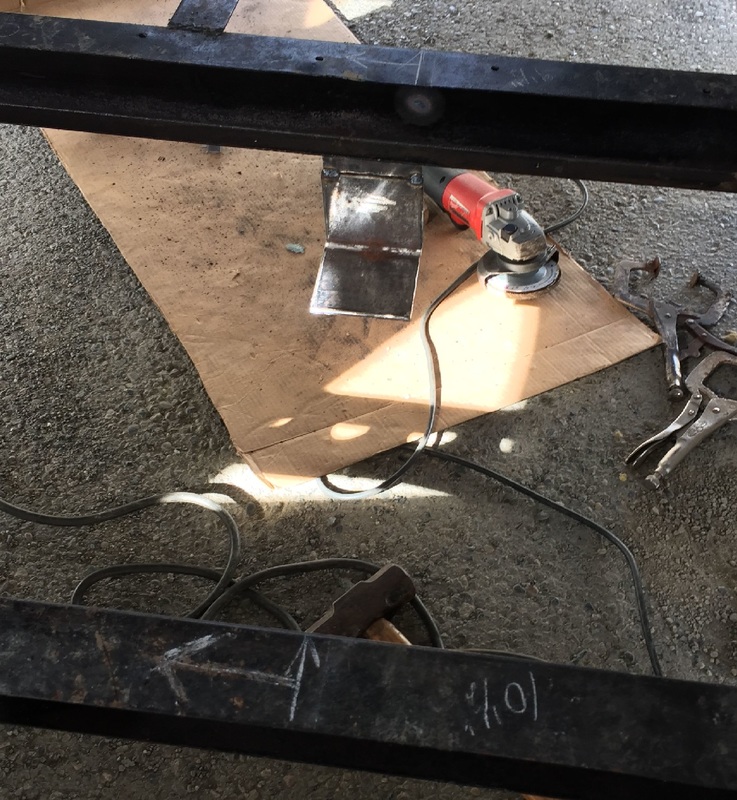
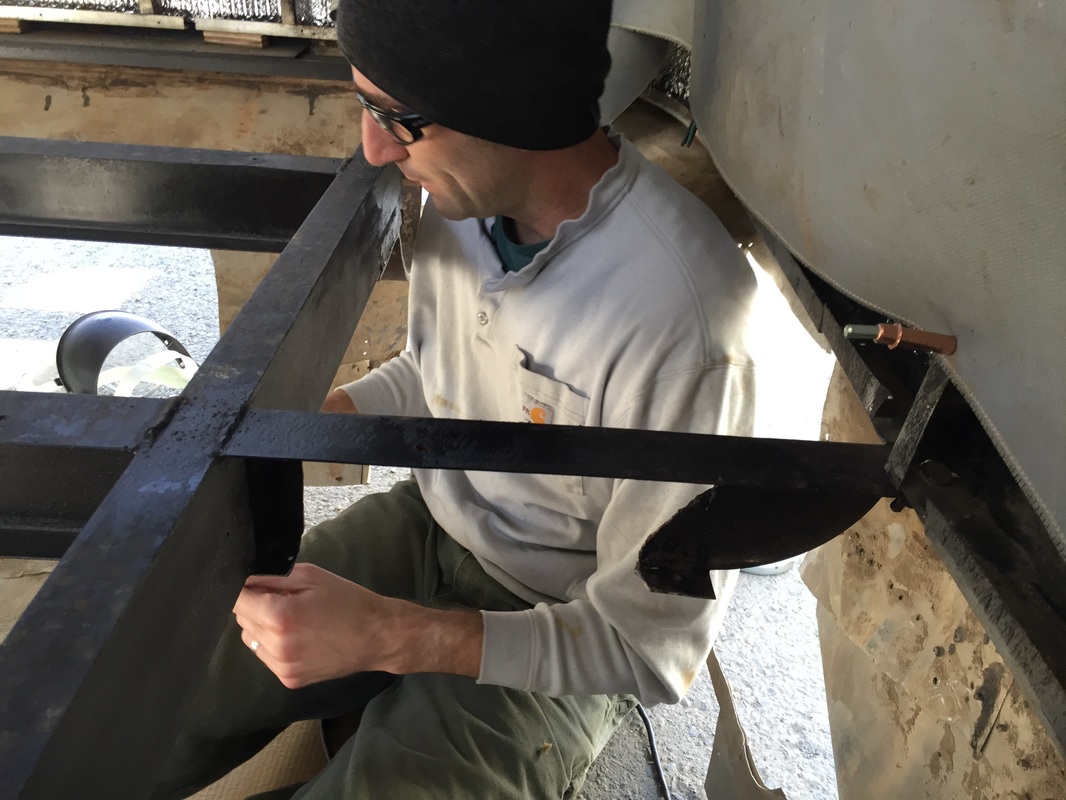
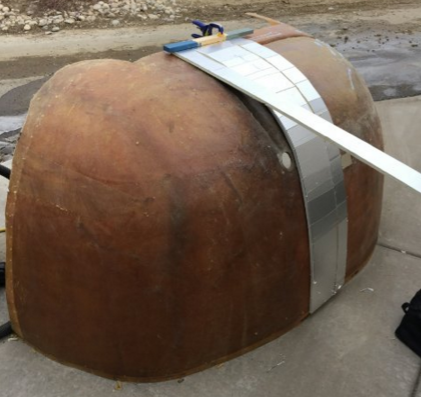
"Duct tape is not a perfect solution to anything. But with a little creativity, in a pinch, it's an adequate solution to just about everything." — Jamie Hyneman, MythBusters So the last few weeks have been frustrating, putzy work. I've been hanging the supports for the black tank, shoring up the grey tank brackets, and putting in angle brackets to keep the tanks from moving. Let me show you: In the pictures above, I had to build a rack with angle brackets and aluminum u-channel and then drill holes in the frame and secure it. In reality, I had to repeat the process several times. I'm working with tolerances of about 1/4" or less, so it was painstakingly slow. I'd be a terrible carpenter; I don't measure well. On one end, after getting it all in, the last bolt kept breaking and I realize I had measured the u-channel just wrong enough (which was right about 1/4" off) to snap the bolt. I had to take the whole thing apart and redo it. Ugh. After that was in, I built these: I had to keep the tanks from shifting sideways as the trailer moves. I used 6" steel angle brackets to hold them, like a bookend holds books. Lastly, I needed to grind the rough edges and figure out how to keep them from rubbing holes in the tanks as they bounce down the road:
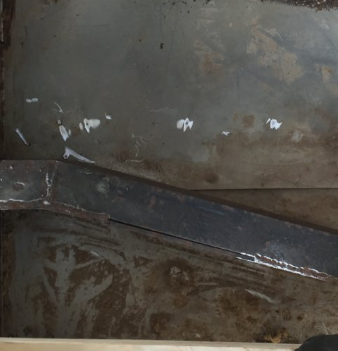
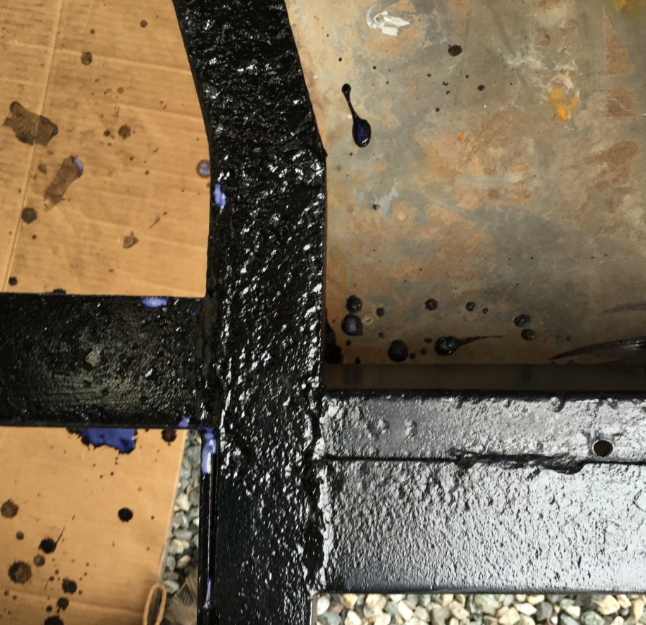
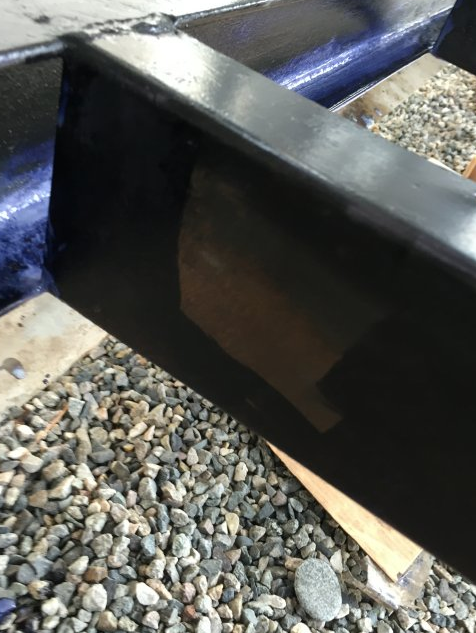
Everywhere I could, I used the orange rubber pad. But there are several places that the system was too tight. Duct tape. Lastly, I washed the frame, primed it, and painted. The color doesn't matter because if I've done everything else right no one will ever see it, but we chose it because it will eventually be the accent color of visible things. I used Corroseal rust-inhibitor, Rustoleum primer, and Rustoleum paint. The best practice of the automotive restoration industry is something called POR-15, but it is expensive and a nightmare to use. Since my frame made it this far for 50 years, I figured this work will outlast me. With the frame finished in the back (YAY!), I'll reinstall the tanks, plumb the pipes and put the subfloor back in. I'm so excited. It feels like I'm actually accomplishing this!
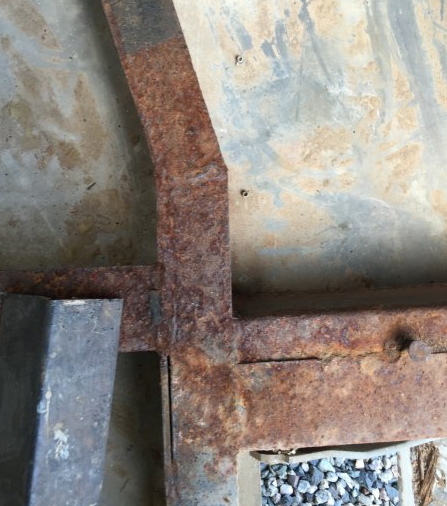
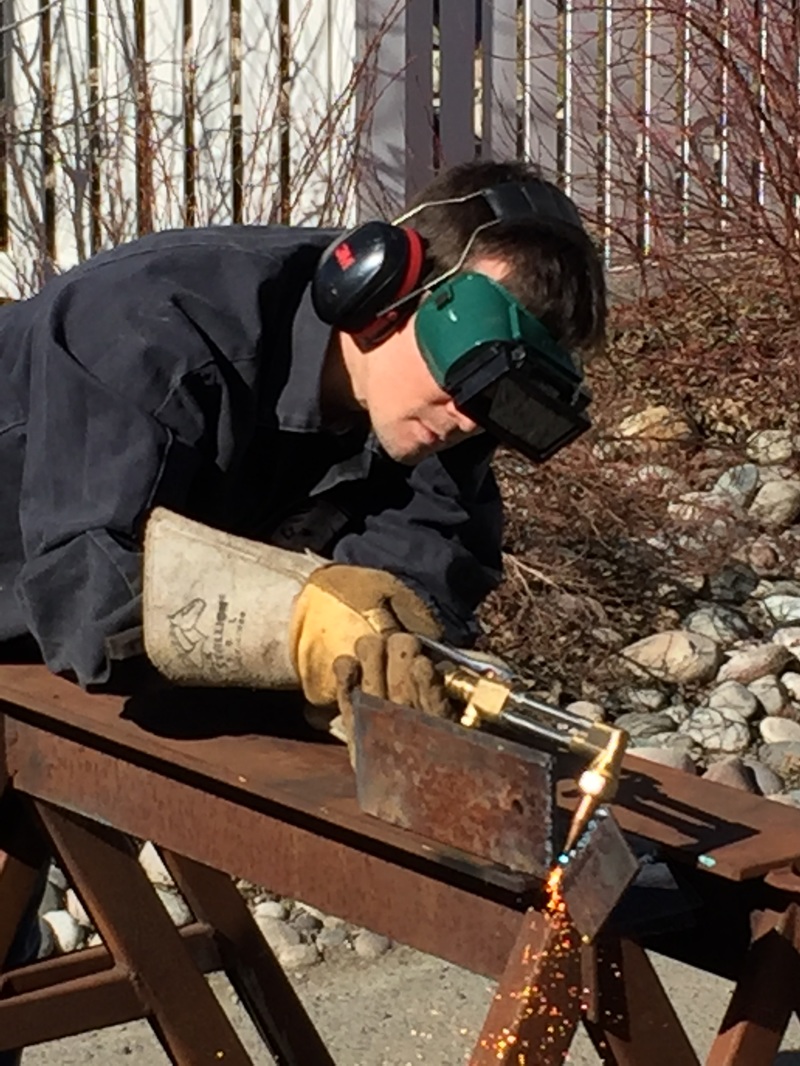
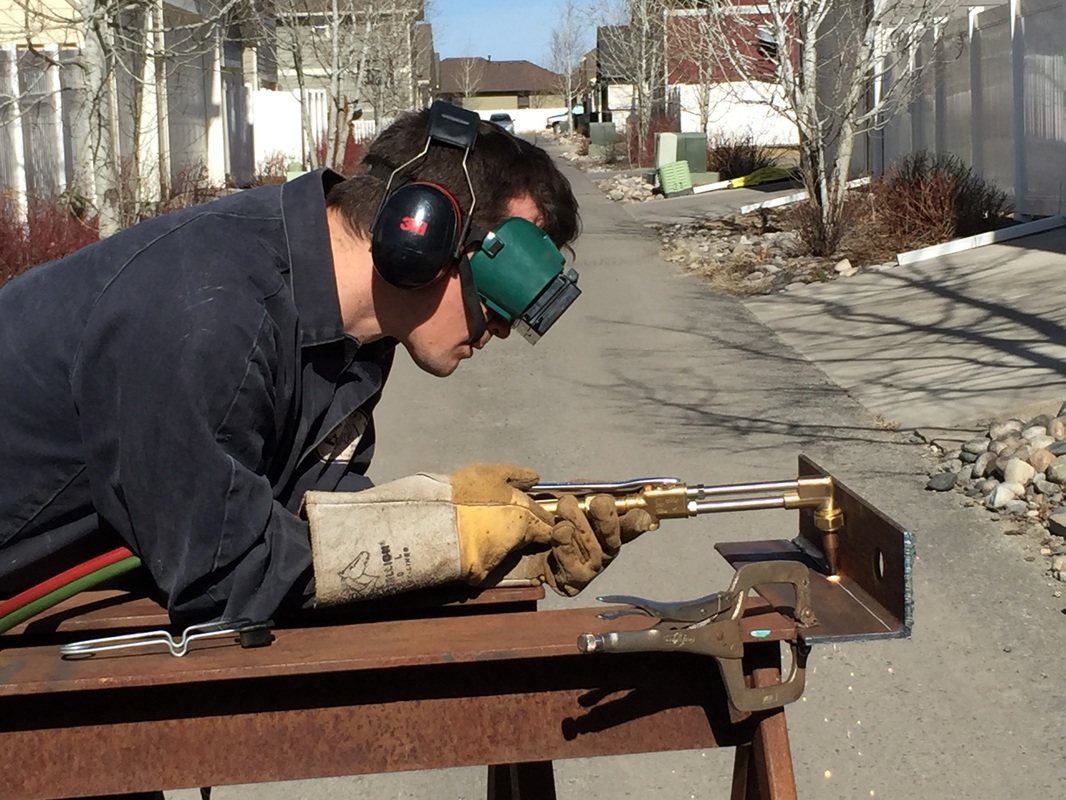
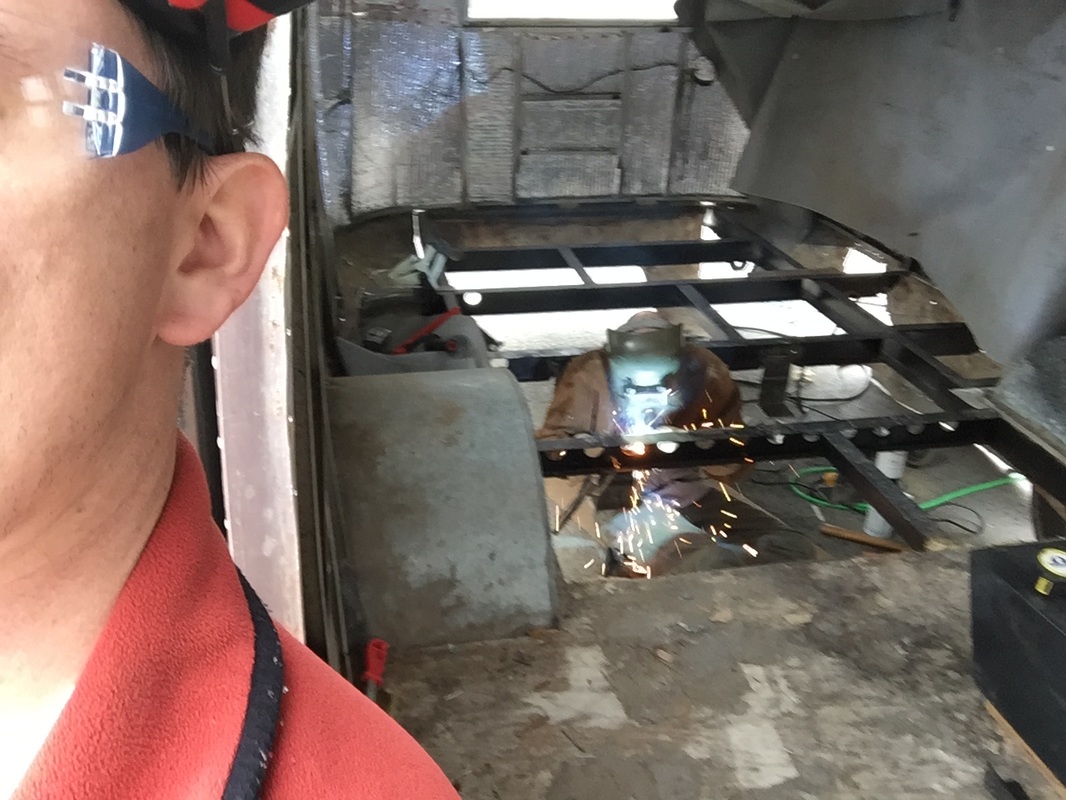
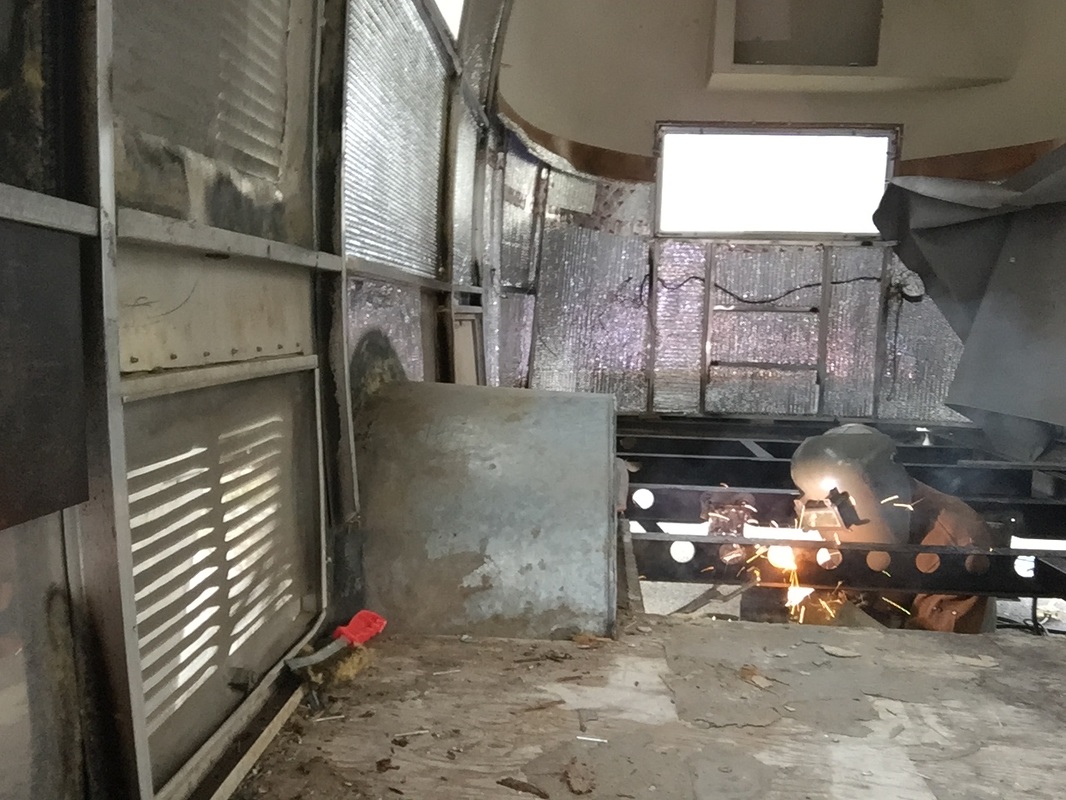
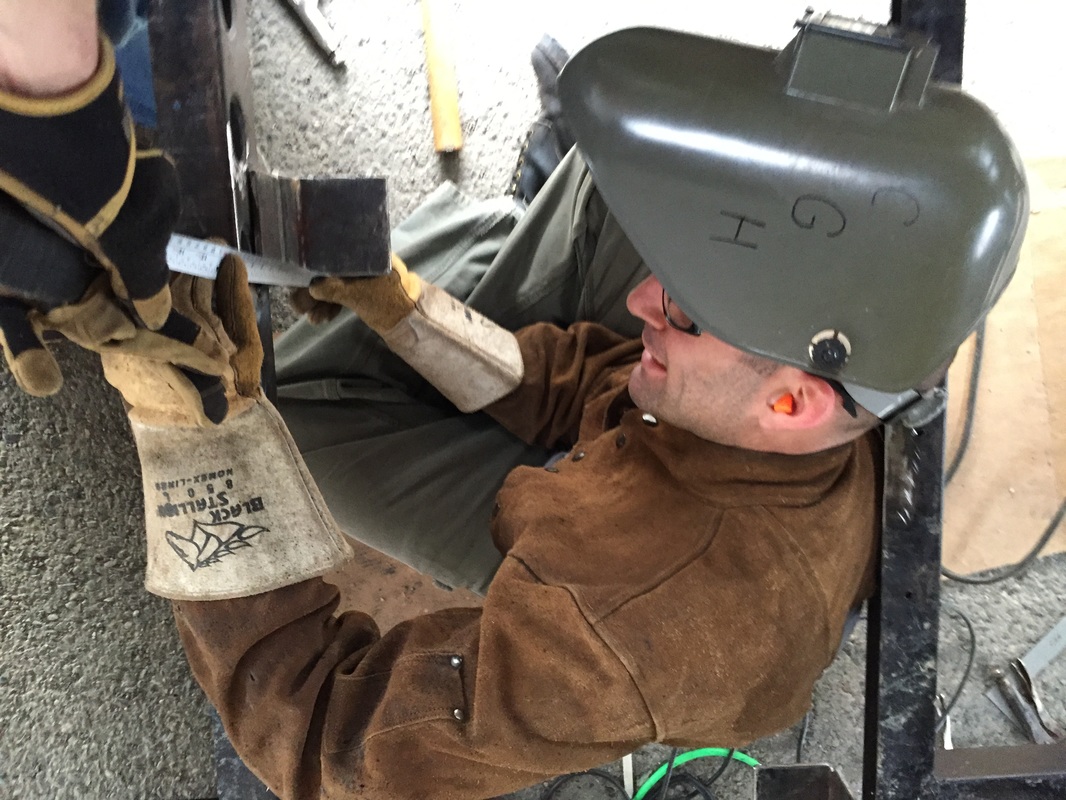
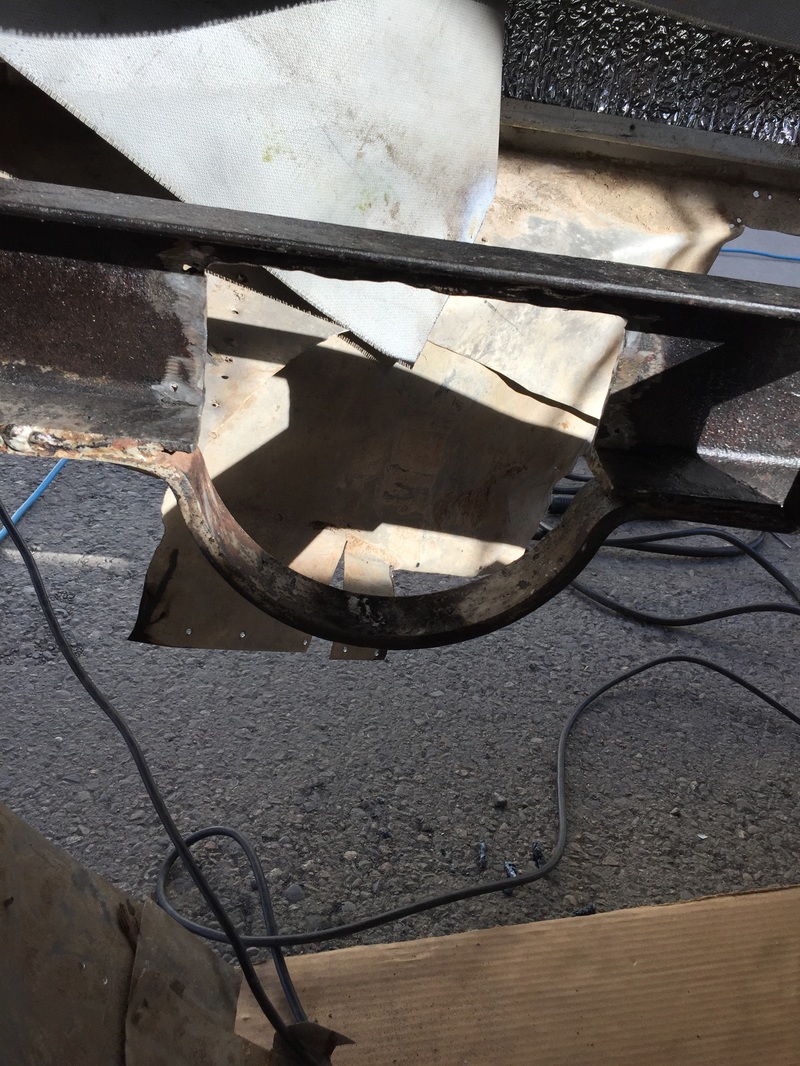
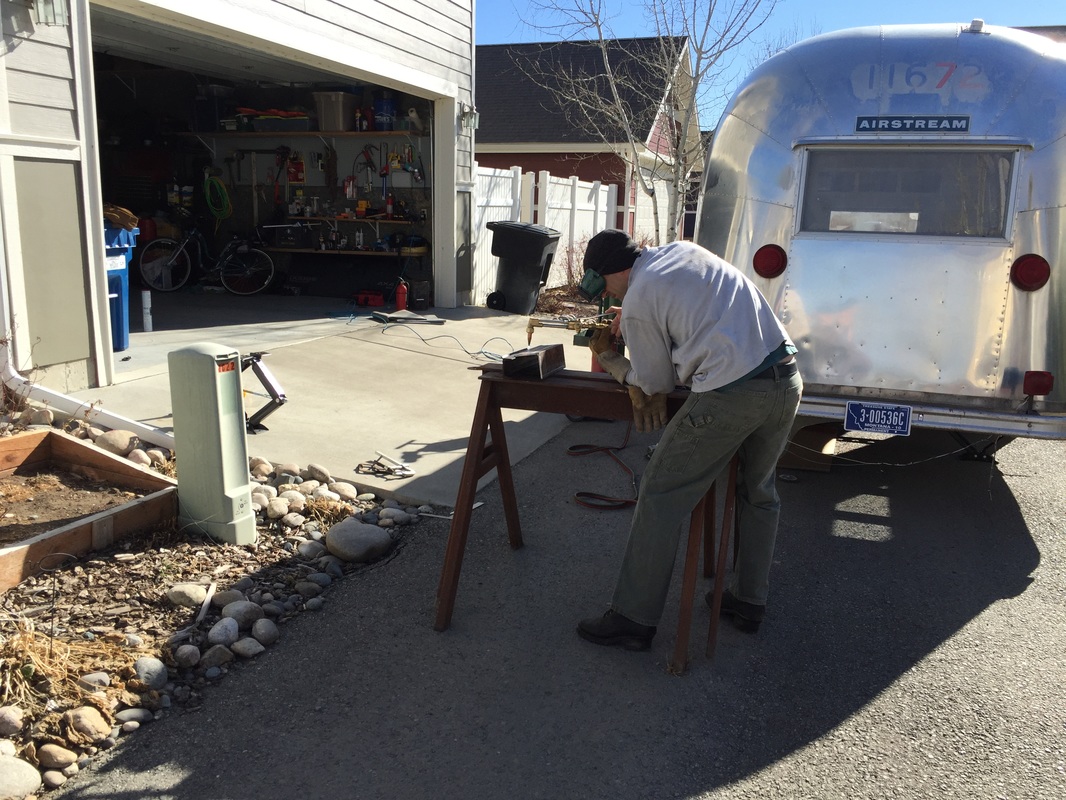
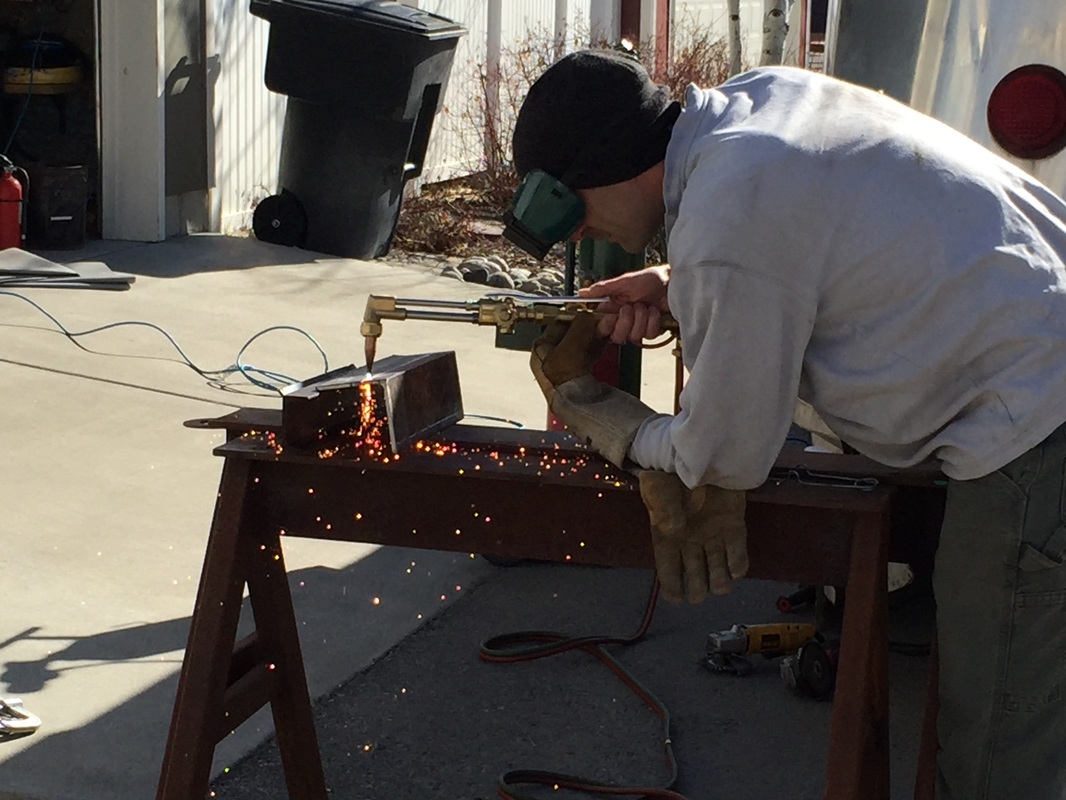
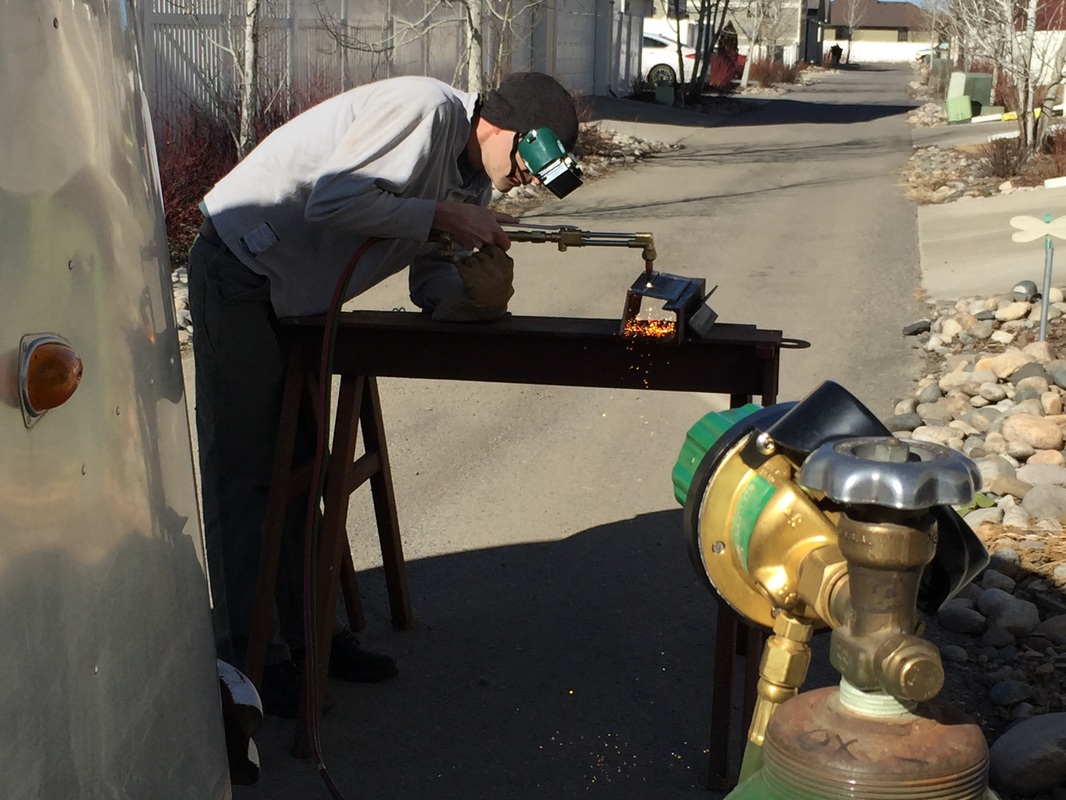
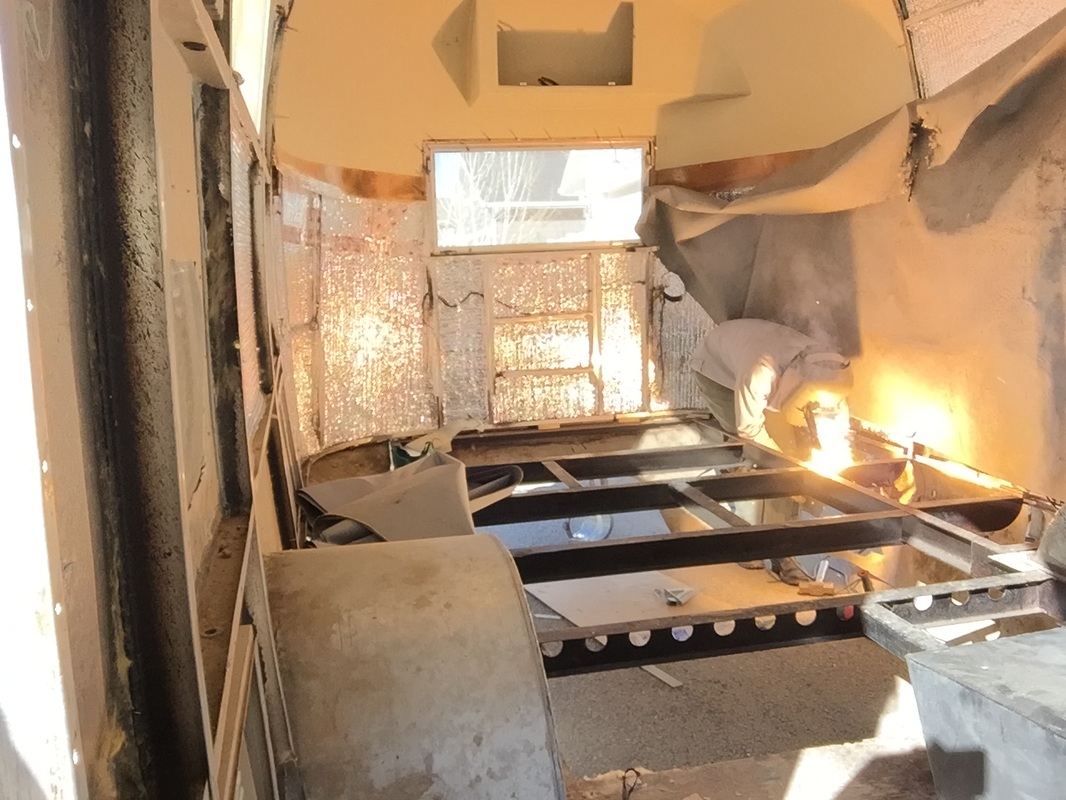
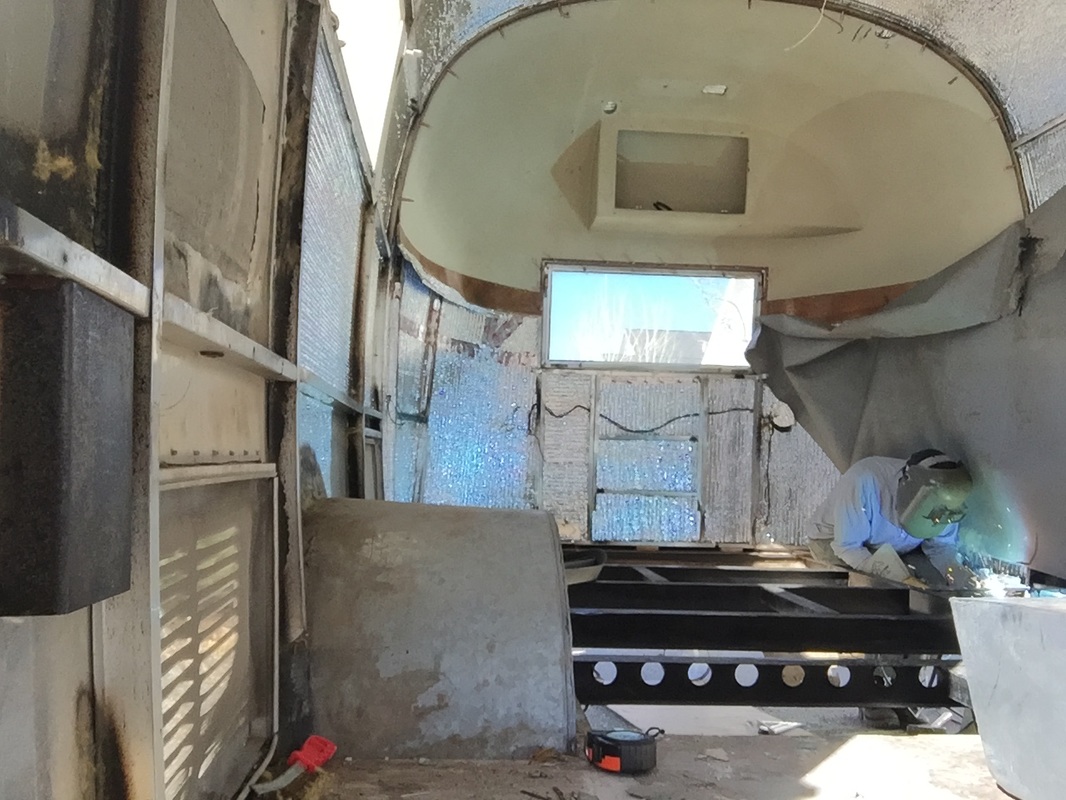
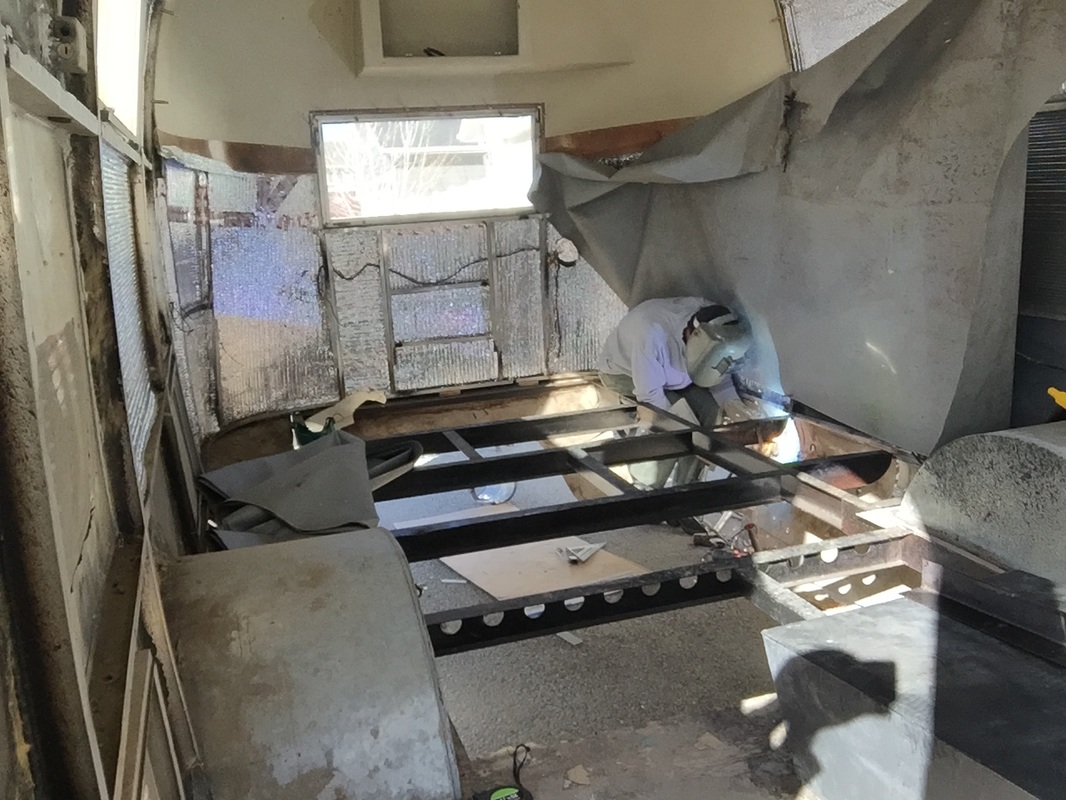
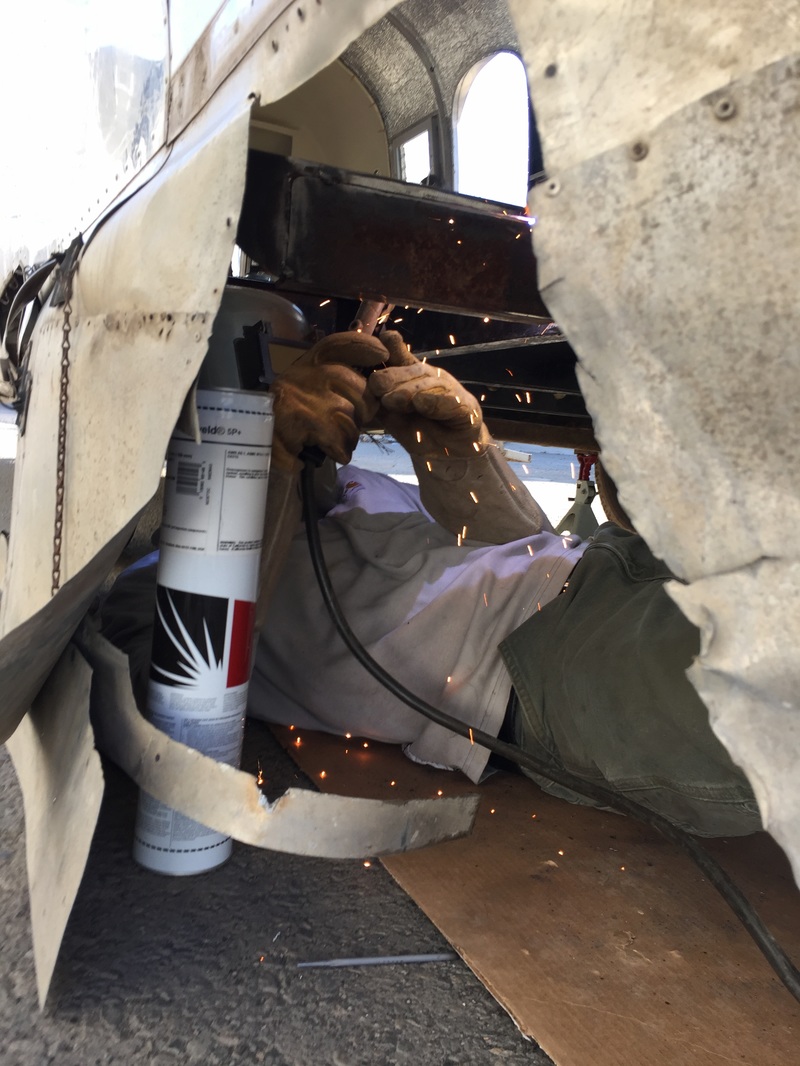
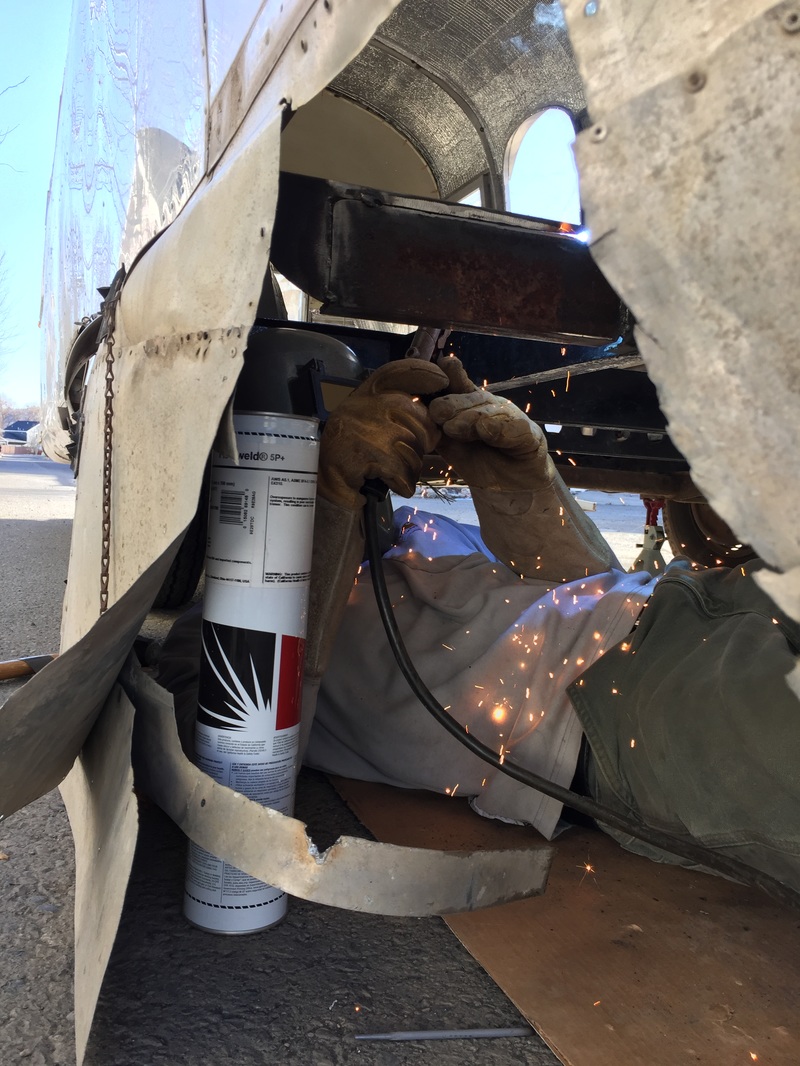
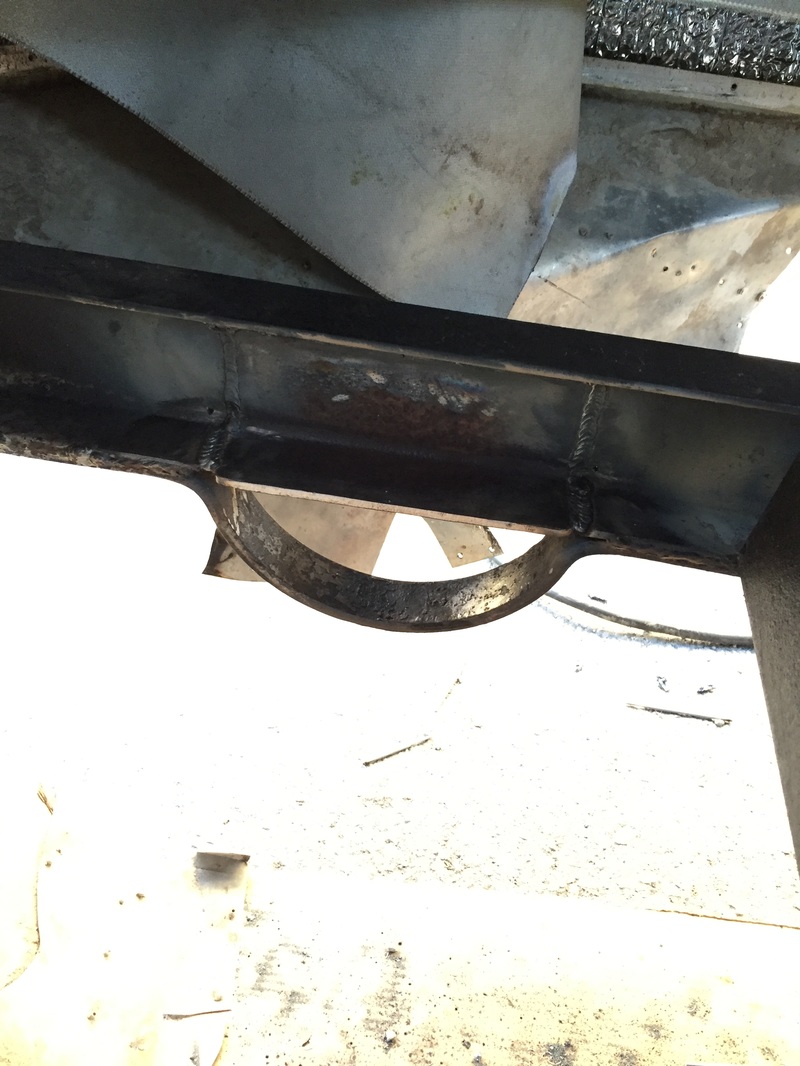
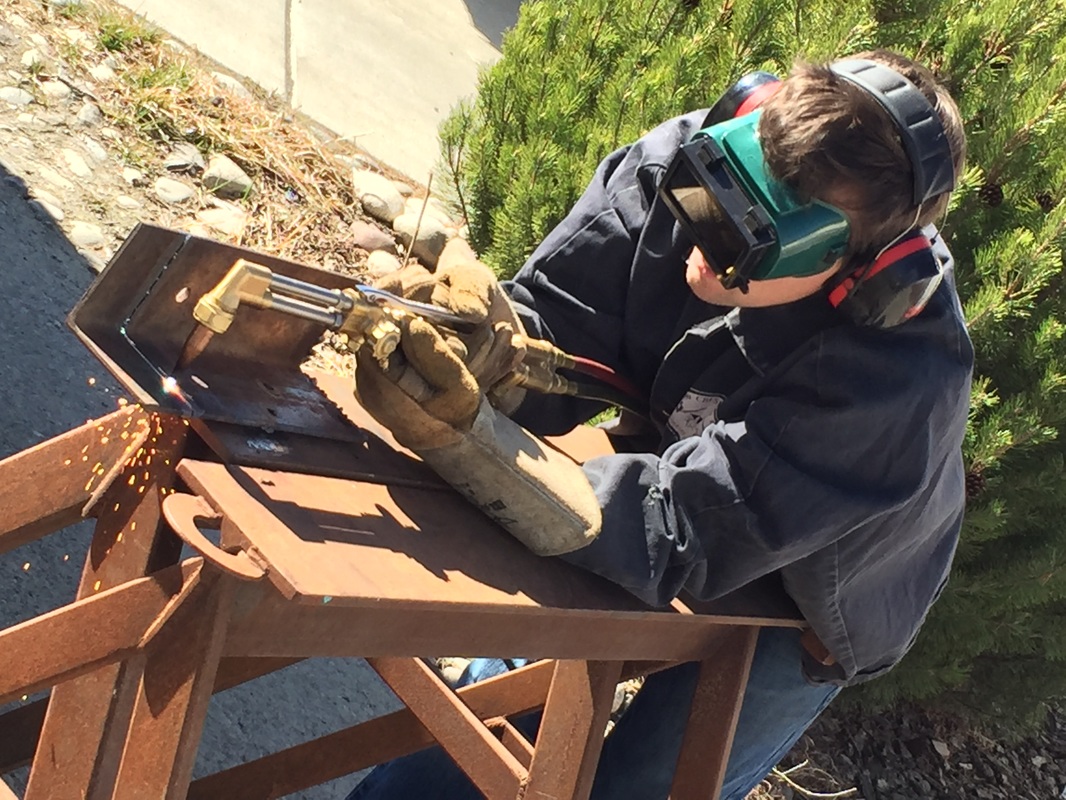 I learned to use the cutting torch and cut part of the braces we used for the grey tank. Last weekend (I'm posting about a week behind) we cleaned up the welds from the previous week and created a system of four brackets for the grey water tank. The grey water tank is the biggest of the two waste tanks and it will be the heaviest. Plus the black tank has some integrated supports that made it easier to manage. It won't need welded supports. These 4 brackets took a lot of meticulous planning. We spent almost as much time measuring as everything else. Each bracket needed to be welded on at a different height and also needed a specific slope on the horizontal. The height/slope issue comes because the bottom of the tank is sloped from all 4 corners to the drain. We do want the waste water to drain! The top of the tank will be just below flush with the floor and level with it. So Cory and I got each bracket clamped just right and Cory tacked it on a corner. Then we hammered on the opposite end while the metal was still somewhat molten and got the slope. Finally Cory tacked the other side, measured again, and finished the weld. Six hours later, we were done! One thought about the photo gallery below: I love the pic where the camera didn't auto-dim the light sensitivity on Cory welding. All the photos of welding make it look like there was only a tiny light because the camera adjusted; in reality, it was bright like the sun. I could only take the photos over my shoulder, looking at the camera screen. "If my clothes catch on fire, just pat me out." That is quite possibly the most badass instruction someone has ever given me. Given that the welding slag and sparks were landing on his chest, he wasn't kidding. 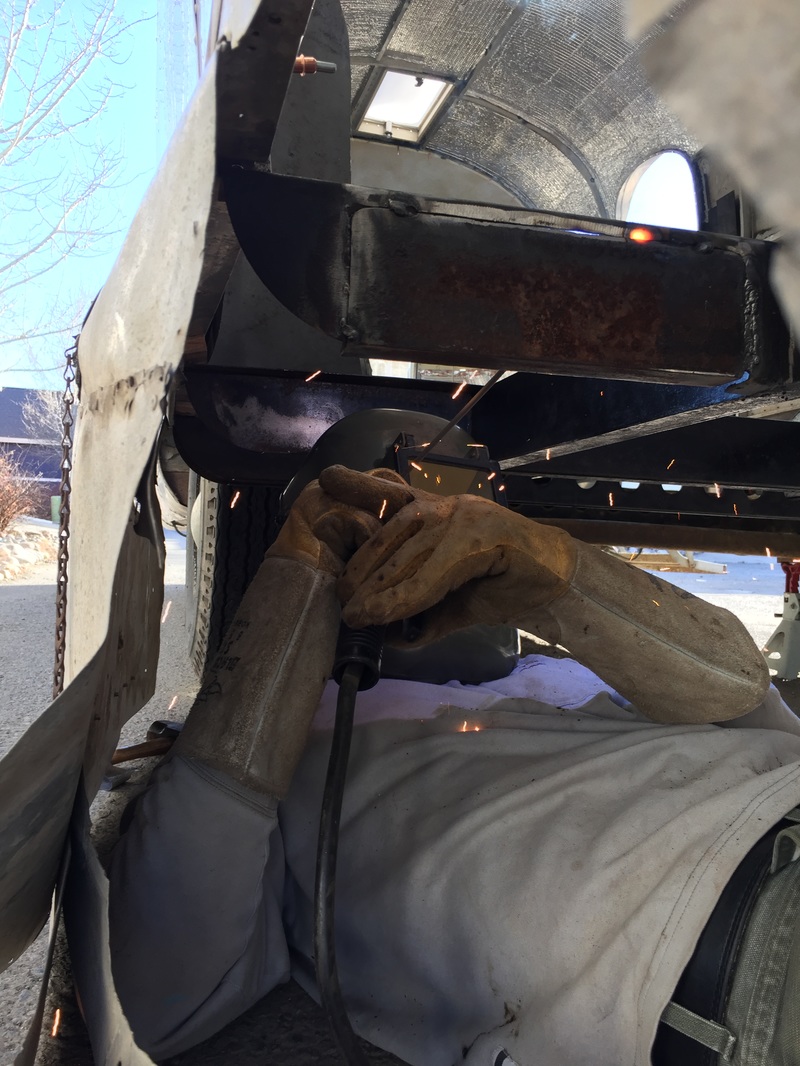 If you remember from a post last year, the frame is generally in great condition, but a previous owner cut a few gaping holes to run plumbing. Since I'm running plumbing by a different route, and because the holes are egregious, I asked my neighbor to help. Actually, when he moved in six months or so ago, Cory saw me working and volunteered his help, if I needed it. Cory is a welding engineer; I just about fell trying to do a happy dance while on a ladder. Here were the two biggest holes in the frame (noticed the past tense, huh?!): Actually, I missed the opportunity to get good "before" photos. Here both holes in the frame have had some clean-up work done. But, it is pretty easy to see how little steel was left to support the weight of the floor and everything above it. Since I know nothing about welding, it was a ton of fun to learn. Cory taught me the basic physics behind the cutting torch and the welding inverter, but the best part was watching someone use skills I've never seen first-hand before. I had lots of fun today. Both patches are now in place, with just a little bit more welding to go. Next weekend we will finish up these two holes (Cory says one of his first welds needs reworking. He is a meticulous kind of guy.) We will also weld up some supports for the black and grey tanks that hang below the floor. I'm still nervous about the tanks hanging below the belly pan, but if the shit hits the fan, I'll replace the tanks later. (Well, the fan is installed in the roof, so if it actually hits the fan, it might be the least of my problems.) BUT, lest you think I spent the day twiddling my thumbs, here are a few photos of me working the grinding wheel:: And here's a fun gallery from today: 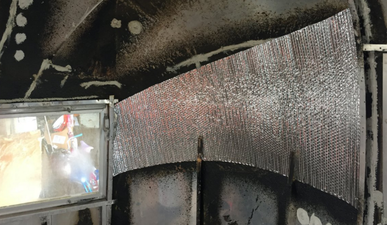 It was 67 degrees today! The meteorologist had been predicting it for a week, so I couldn't miss the opportunity to work on the Airstream. I did what any good teacher would do when they have a fantastic student-teacher at the helm. I took the day off. I've been slowly plinking away at the reflectix insulation. It is not particularly time consuming, or not much more than any other step, but there is a lot of measuring. Basically, I am using industrial contact cement from 3M. (I am a big fan of just about everything 3M makes. Everything that company produces seems to work.) I spray both the inside of the aluminum skin and the backside of the reflectix, wait two minutes, carefully align the piece, and press. The glue holds instantly, but it usually stays workable for a second or two. 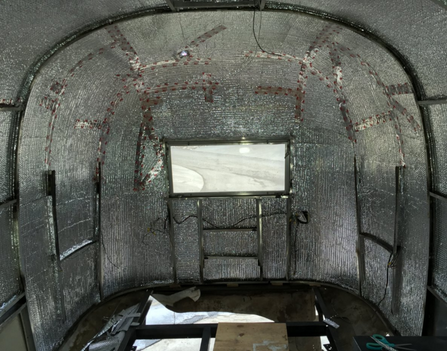 With my free day (no kids! no lists! no distractions!) I nearly finished the reflectix. In the pic, you can see the 3M cold weather tape on all of the seams that are not against a beam. I'm not sure if I'm supposed to tape the seams along the beams, but I overlapped the corners with reflectix and they are glued solid. It seems pretty airtight. So I'm skipping it; it would cost at least $100 and take most of a day to foil tape all the reflectix along the metal beams. There is one spot on the opposite end yet to do, along with several panels where I have yet to repair the exterior skin on the side of the trailer. (More to come on that step soon.) Unfortunately, I wasted at least an hour trying unsuccessfully to use foam board to insulate the fiberglass encaps before putting them back on. I wrote last time that I'm using rigid foam board to complete the insulation. I also remember mentioning that I'm terrible at geometry. Hey what is harder to make curve, bubble wrap or rigid foam board? 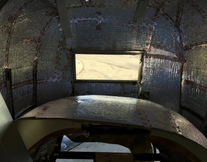 It actually looks pretty slick in the photos, but the amount of time it took to make four strips of foam was way, way too much. Then every strip would need each seam (both vertical and horizontal) sealed with tape. I figured by the time that was done, it would be more expensive and less warm than just using reflectix on the back of the endcaps. I'll still use the foam board on the rest - all the rest of the interior curves are round in only one direction. I forgot to take a good photo of the reflectix on the endcap above; I have one more to do, so I'll try to remember. BUT this is the milestone: The first original material went back in! I've demolished and tossed, remade pieces, and put in brand-new stuff, but this is the first part that's from 1962 that I took out that I get to replace. I'll need to partly remove it again in order to fish electrical wires behind it, so it is just held up with clecos. But it is in! 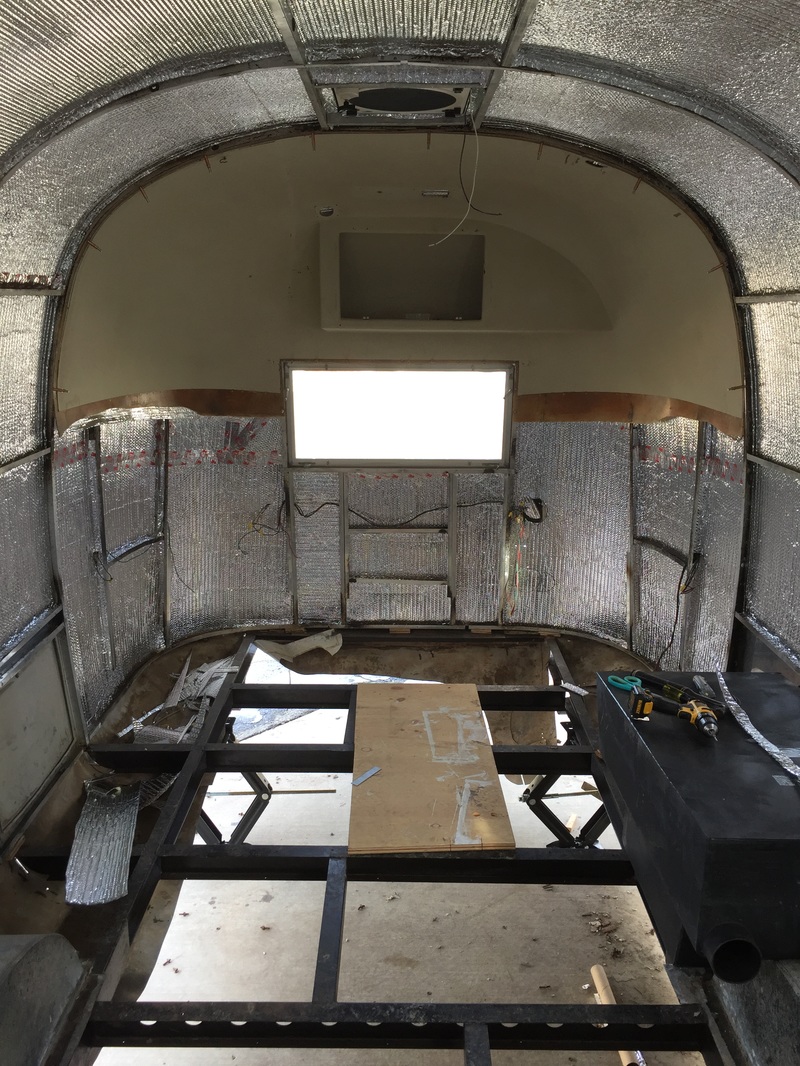 That floor is calling my name... |
AuthorI'm not an Airstream Jedi, yet. Airstream Jedi would have sounded presumptuous, like I know what I'm doing. That couldn't be further from the truth. Padawan is a title I can hope to live up to. Favorite Links:Knots Per Hour
My friend Mike is building an airplane. Check it out. Archives
August 2018
Categories |


 RSS Feed
