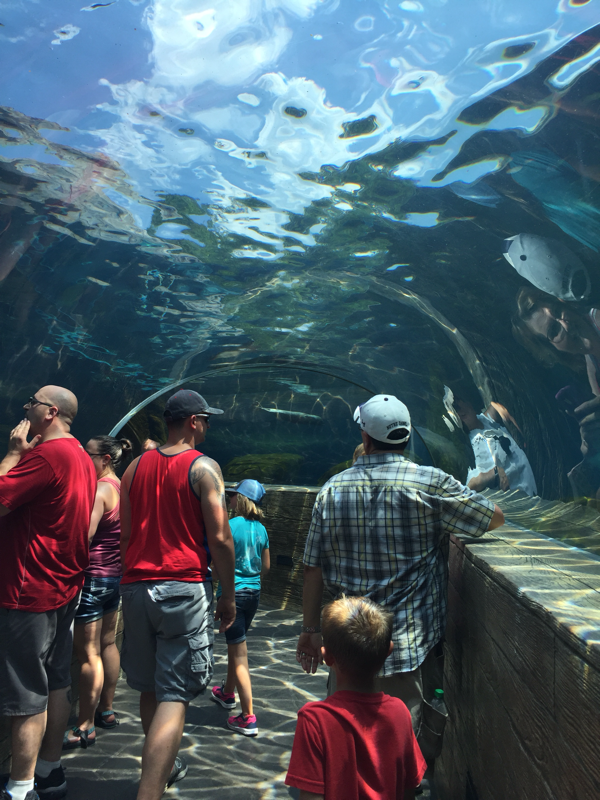
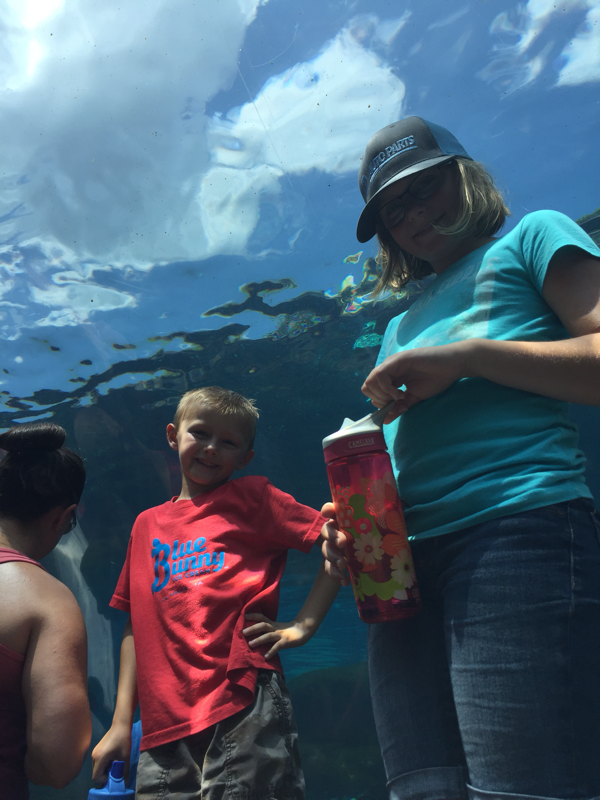
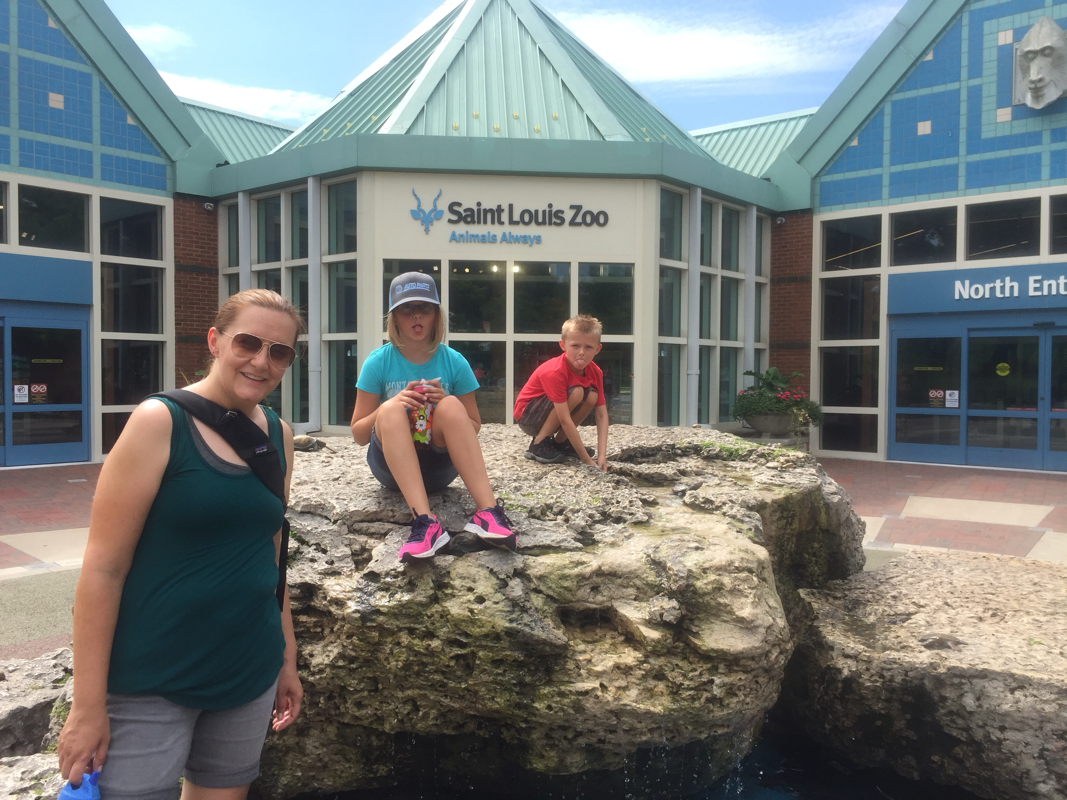
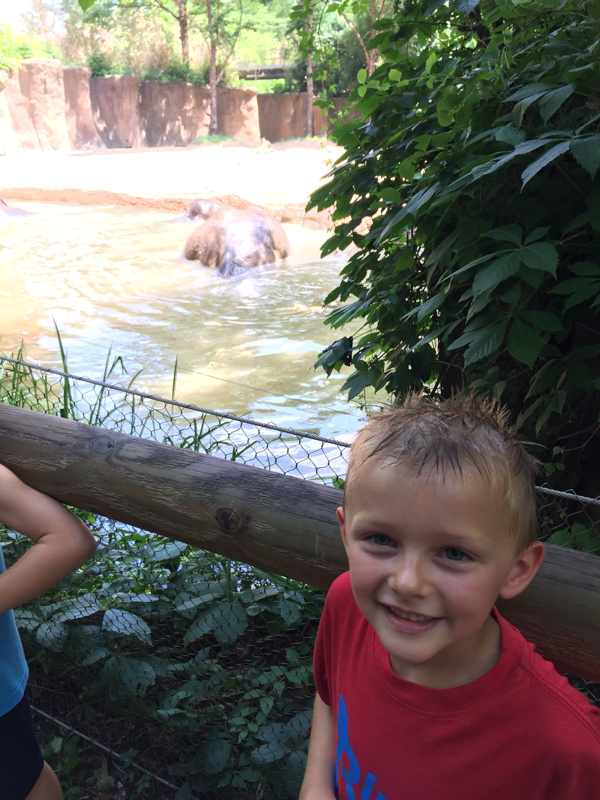
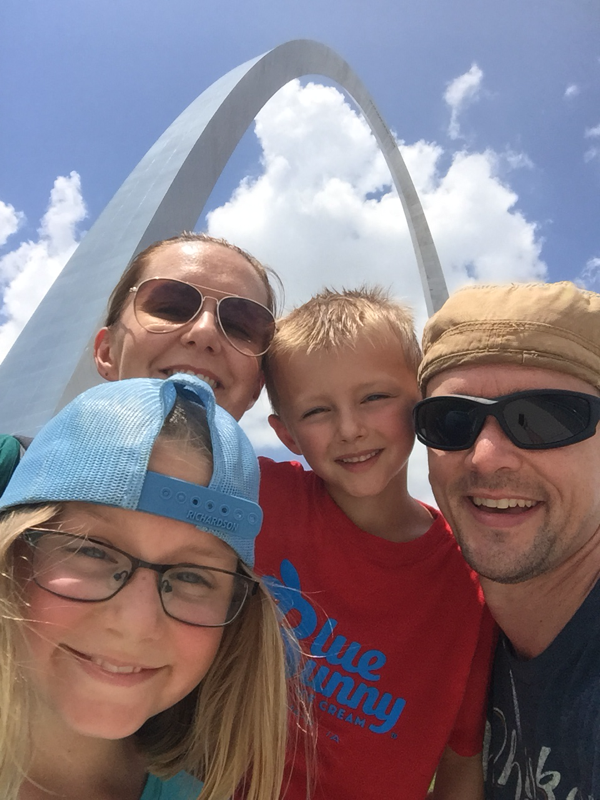
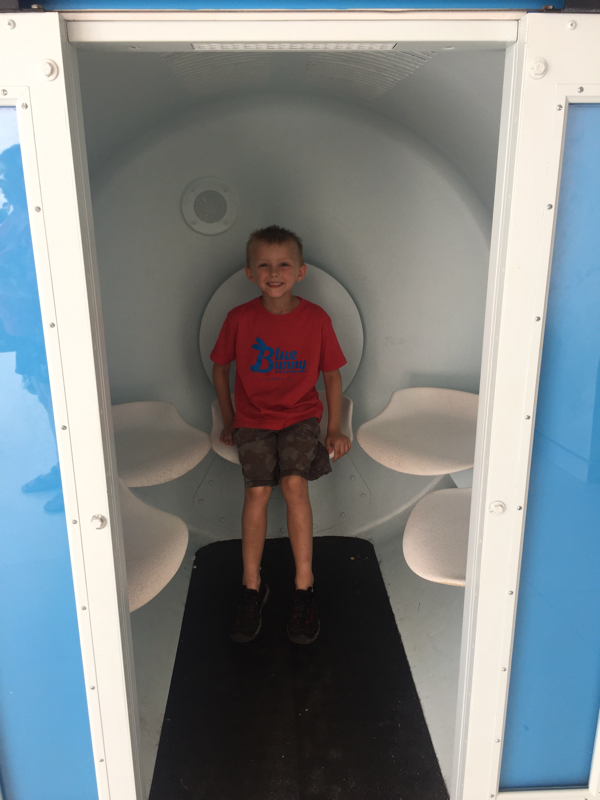
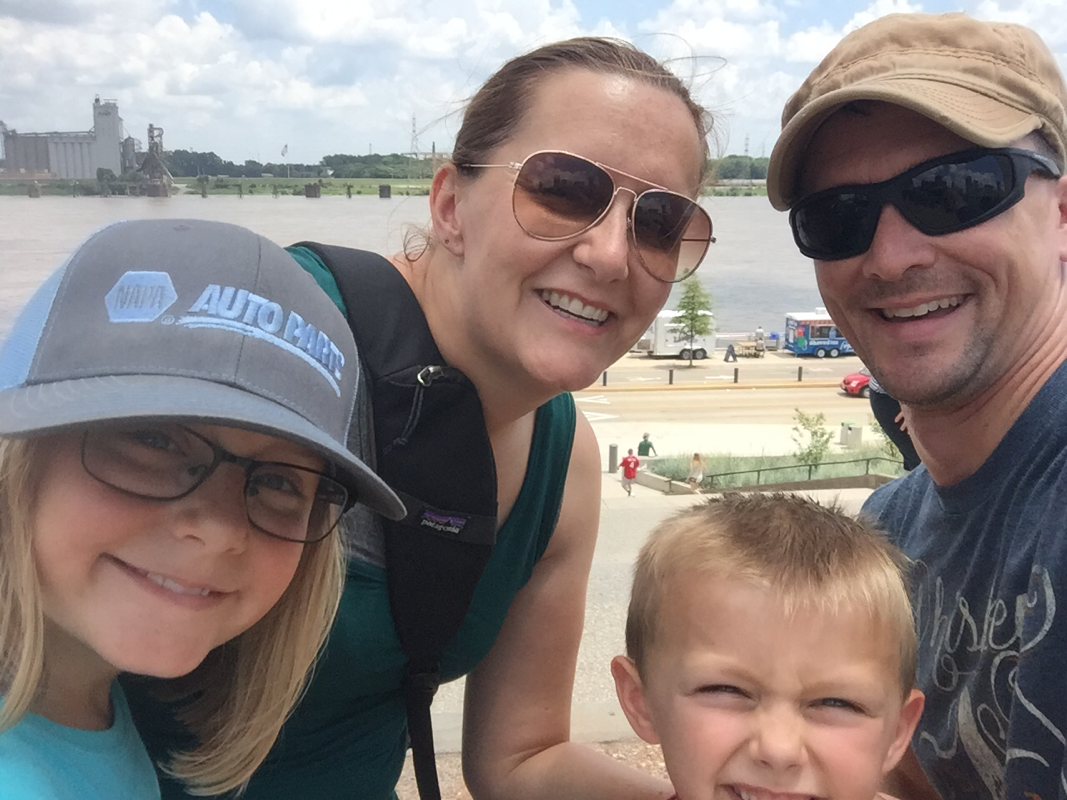
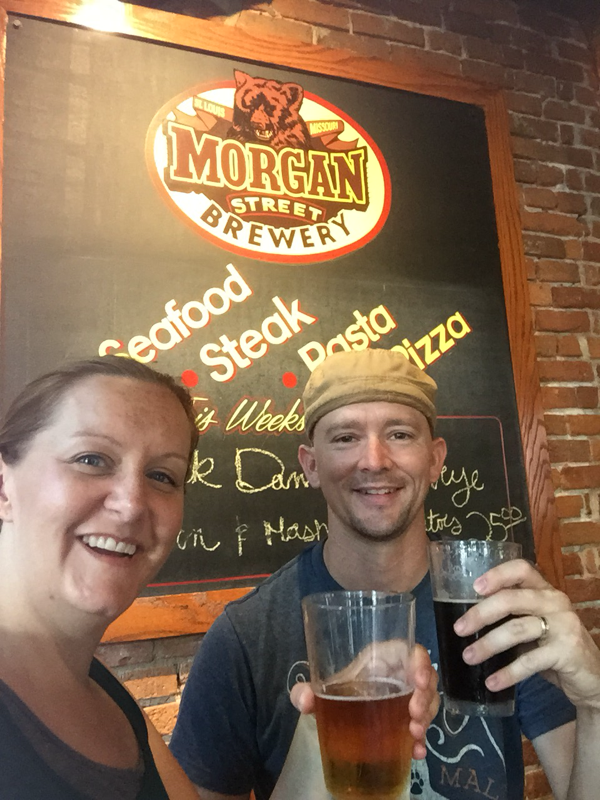
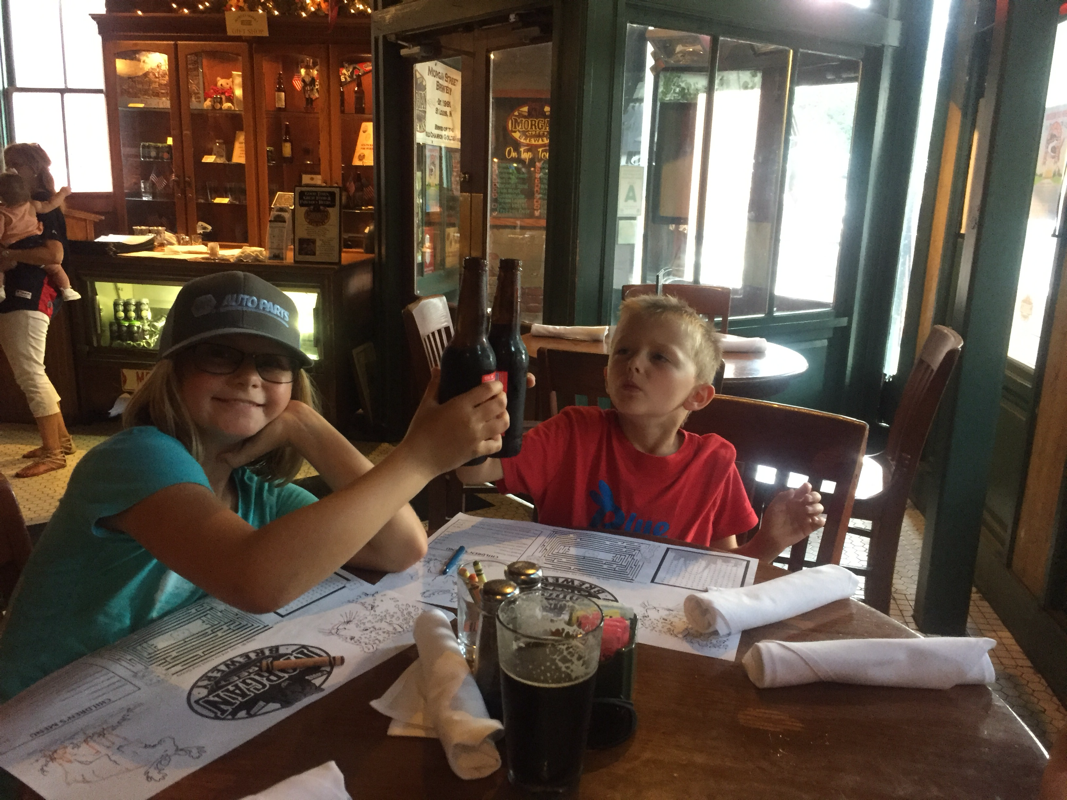
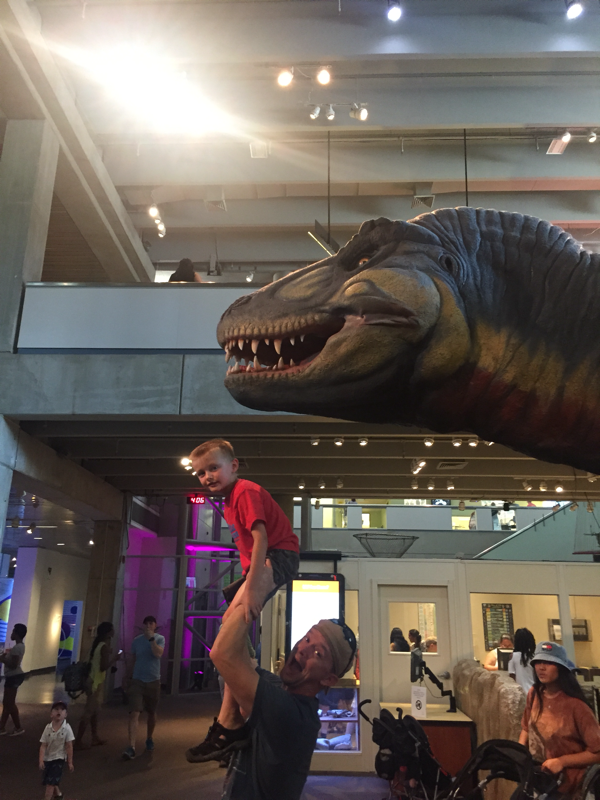
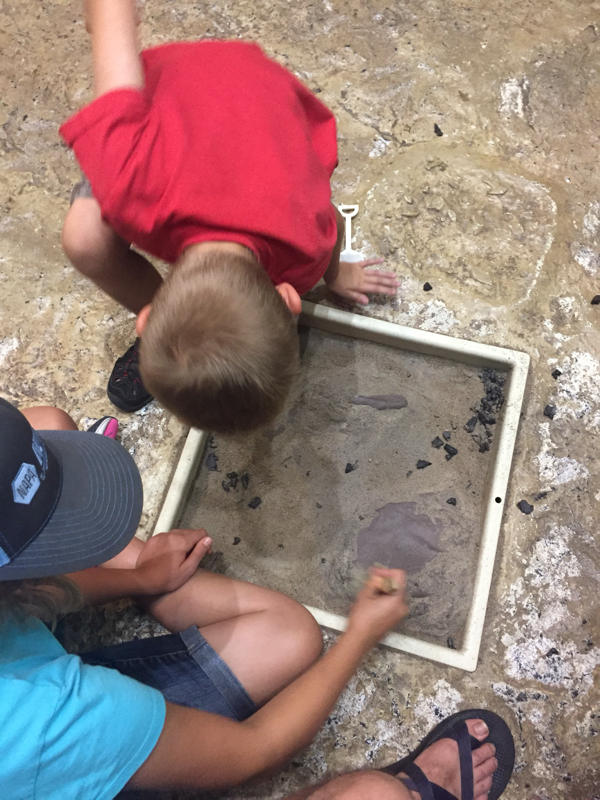
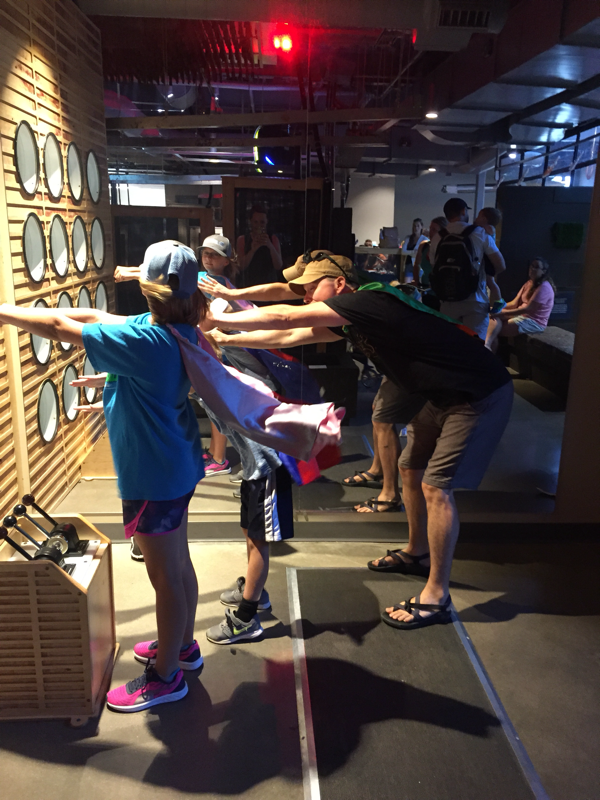
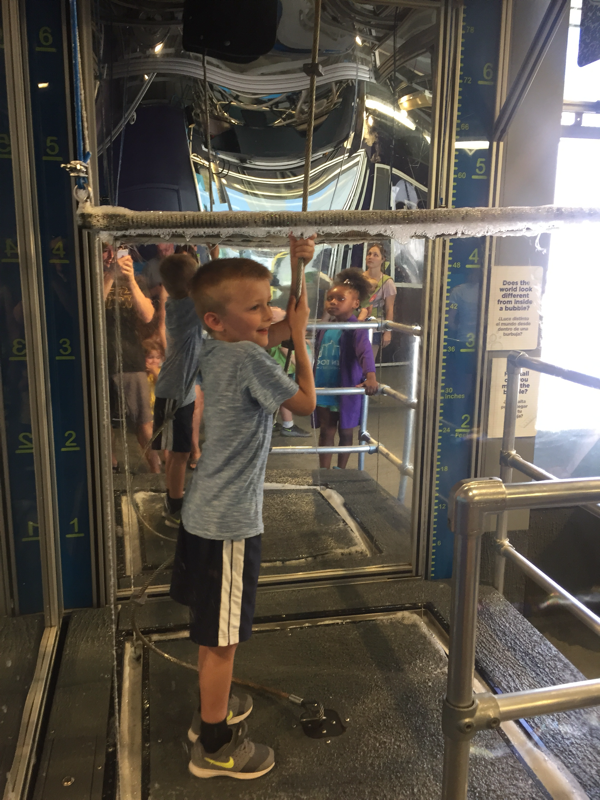
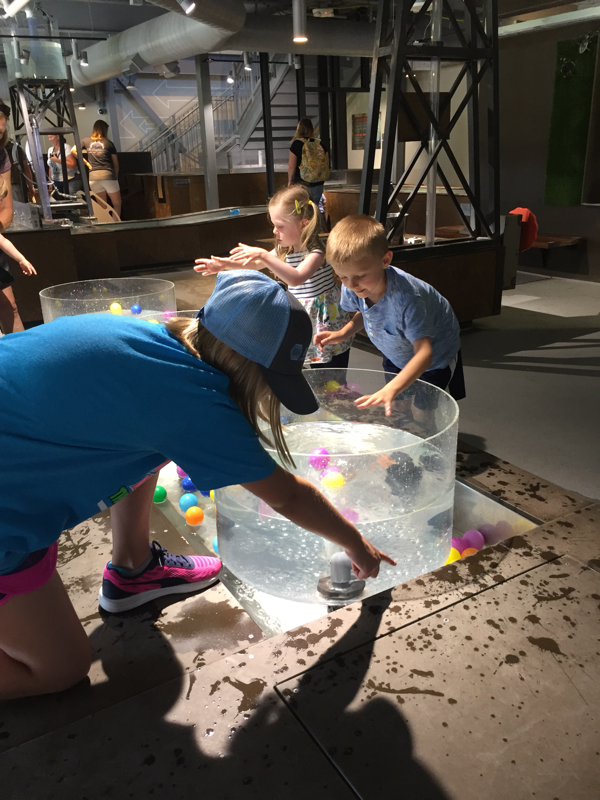
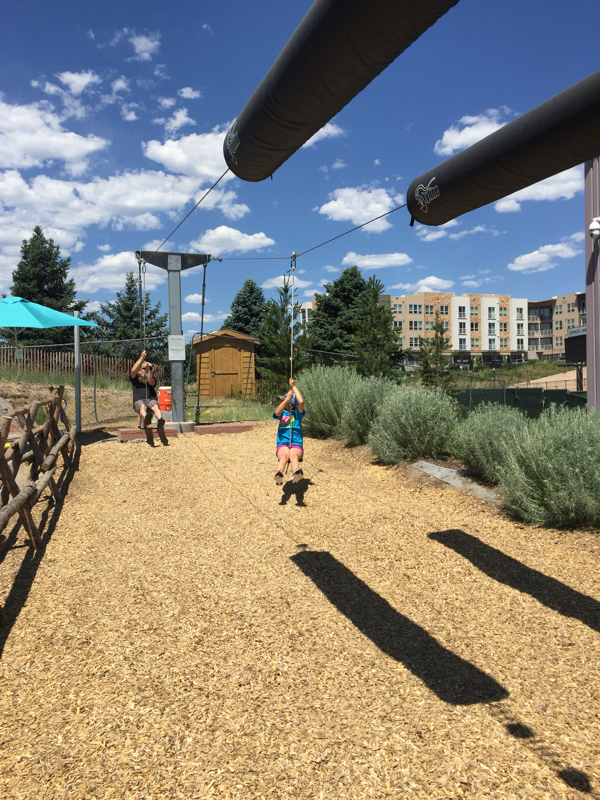
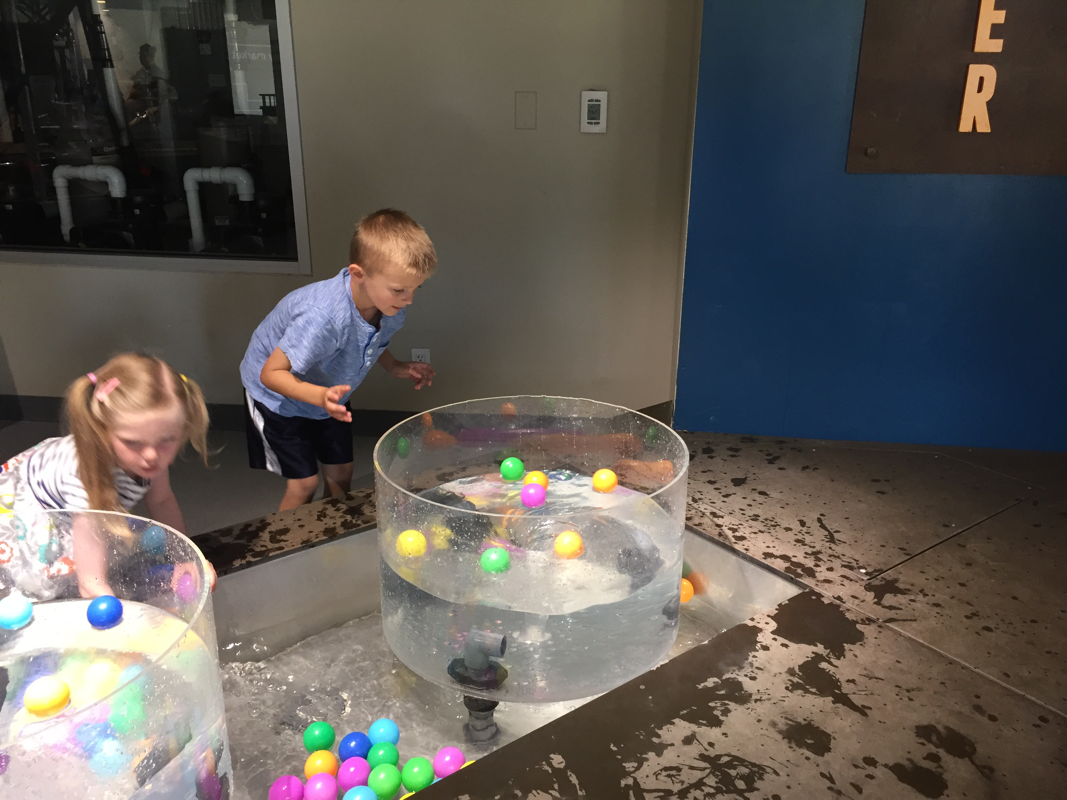
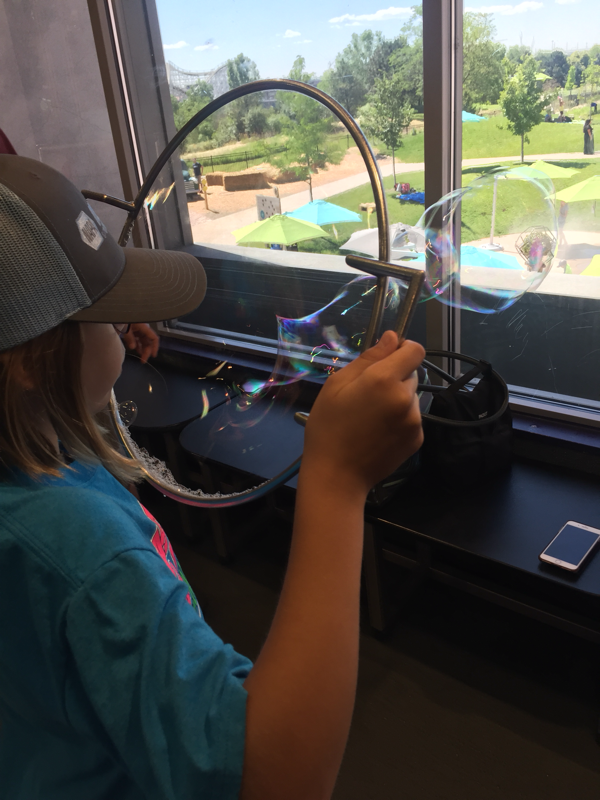
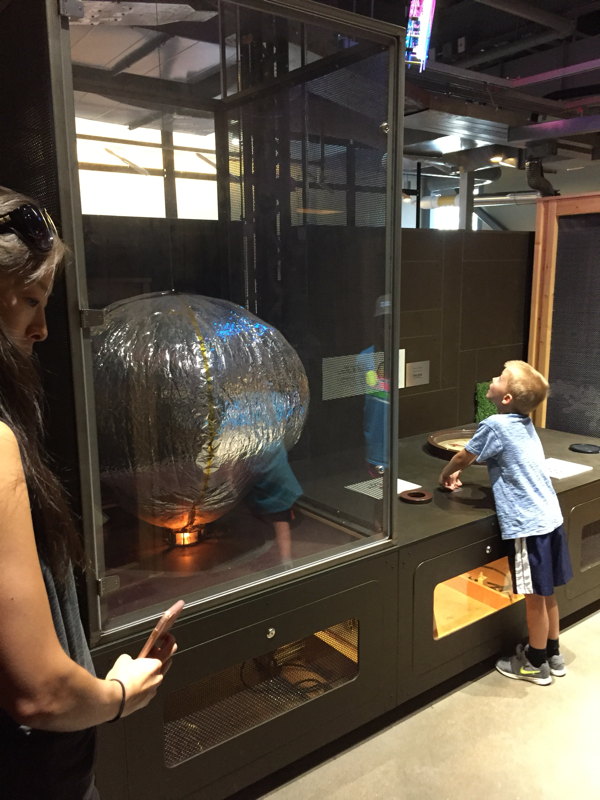
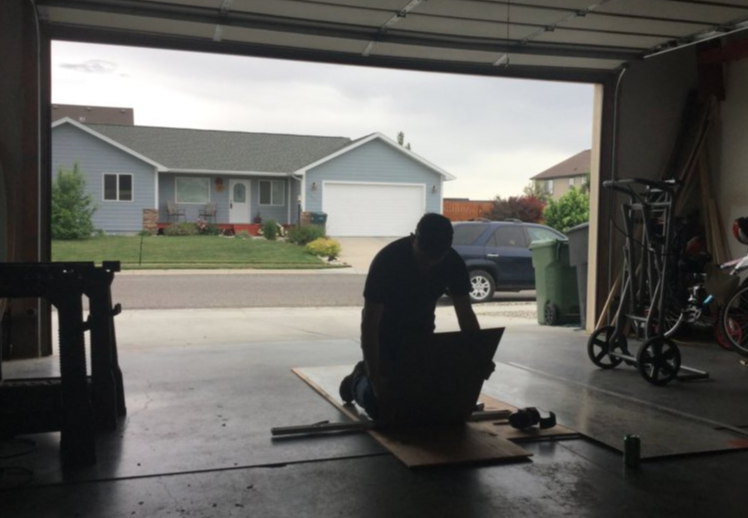
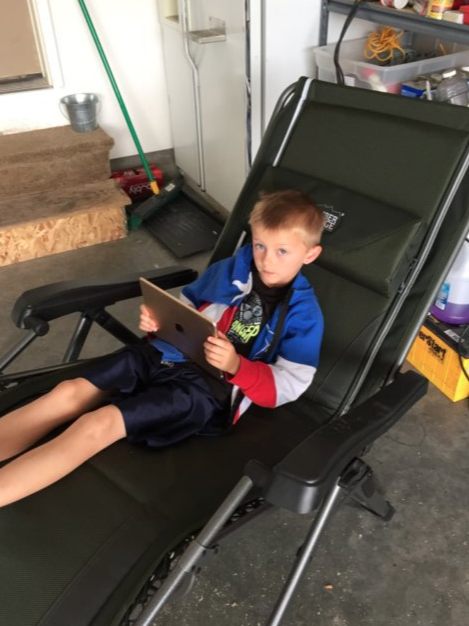
DrivingUgh. We’ve had a couple long driving days with plans for a couple more. Driving days are, by far, the worst part of the trip. However, I am super proud of my kids. They only argue a little and have been stalwart friends. My nephew, Jack, is learning to drive back in Montana. He’s a really good kid and will be a safe driver. But before we left, I took him for a drive and made him eat a soft serve ice cream cone while driving one handed. The goal wasn’t to be dangerous, teenagers eat and drive all the time. I wanted his first attempt to be with someone ready to grab the wheel. He was a little freaked out, but did a good job and only dripped a little ice cream on his crotch. 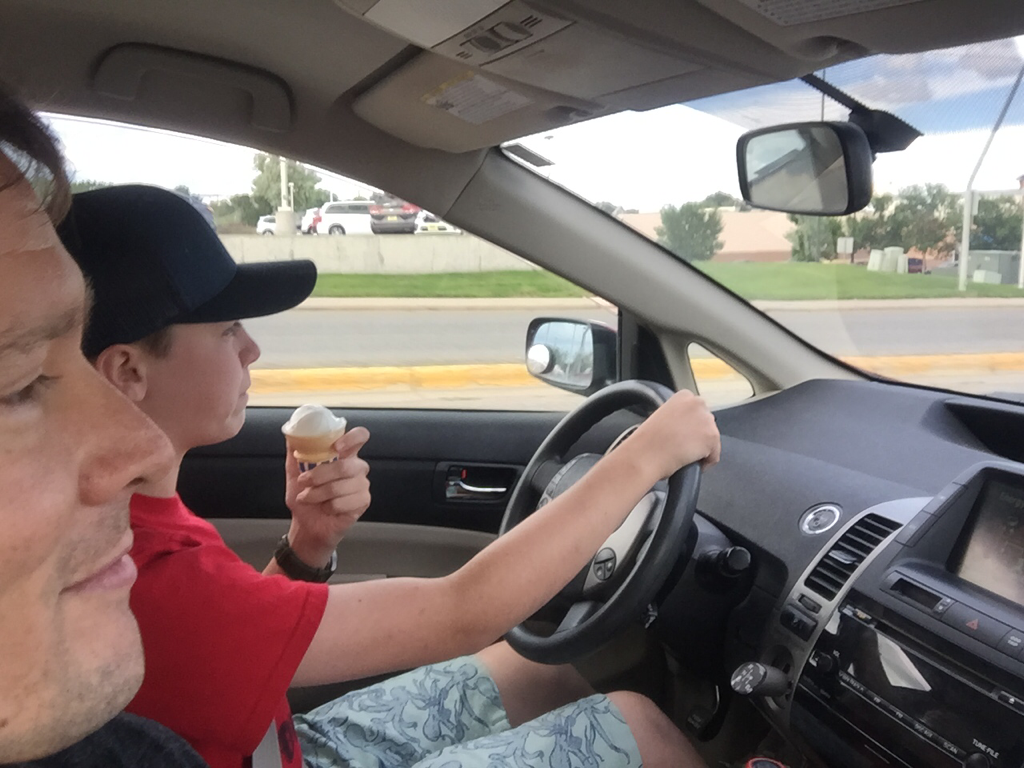 well, Jack, I told you it was real world. Here’s me, 8 hours driving, in big city traffic. I’m trying to eat a Chipotle burrito, pull an Airstream, and not spill rice and beans on my lap (I spilled). 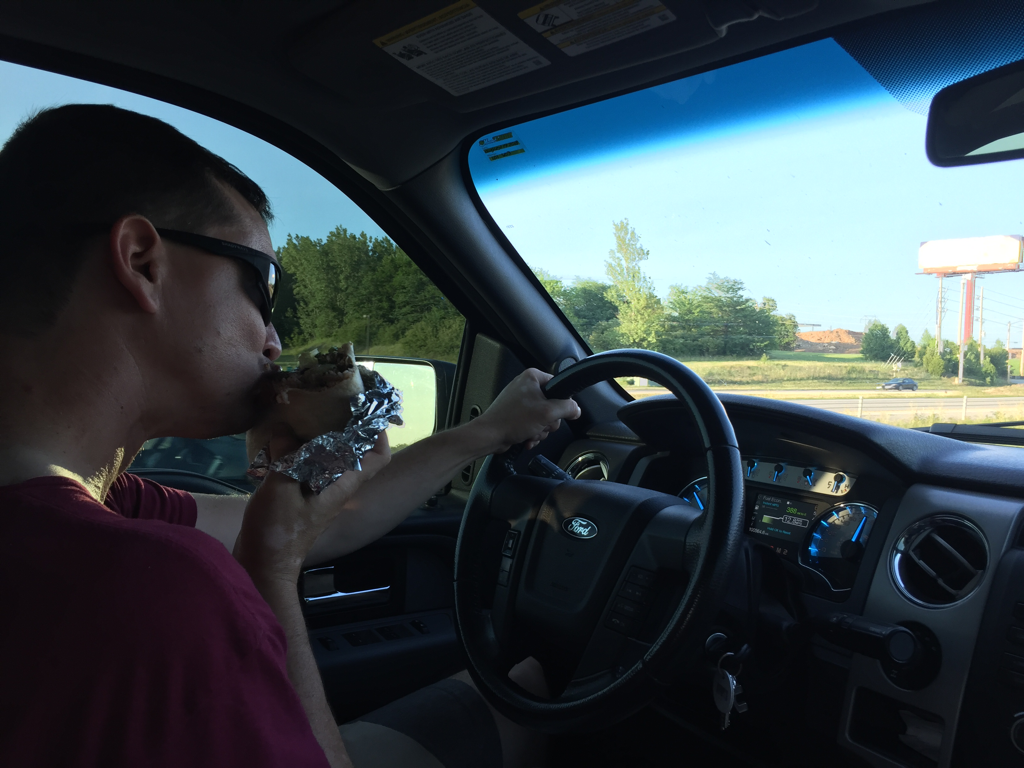 FunToday we went to a world-class zoo. All I can say is WOW! It was free and better than my expectations. We saw all sorts of animals. Maya’s big deal was seeing a cheetah and Ben’s favorite part was the discovery that elephant poo floats. He was grossed out and enthralled. We did the iconic tourist thing an went to the arch. We fully intended to go up, but it was a 4-hour wait. So we took pictures outside and found a fantastic local brewery to drown our sorrows about not going up. We finished our afternoon at the science center. We played with all sorts of science an engineering toys. I tried to feed Ben to the animatronic T-Rex, and we went to a planetarium show. World openingIt’s hard to take pics of the “moments” when they seem to be happening. That’s a quick way to kill them. But Ben asking, “ Why is the air sticky here?” And, “Are those (trees, shrubs, and crazy-thick forest) real?” felt like his world getting bigger. Maya is getting harder to read, but she loved the science center and the big city highways stacked on top of each other. Sara and I have quietly enjoyed seeing the kids realize that the world is bigger than they knew. Unfinished businessGood news, my fix stopped the leak in the shower from Denver. Better news is that we discovered the shower drains just fine when the dump valve is open. Today our campsite has full hookups, so everything works. Our non-driving evenings are starting to see a routine- kids shower, adults shower, every retreats to a quiet space. Right now the kids are reading in their bunks, Sara is reading in our bed, and I’m blogging by the fire. I think this is us finding that solo time we all need. i could live in St. Louis. I really like this city. Don’t worry friends, tomorrow we go on! 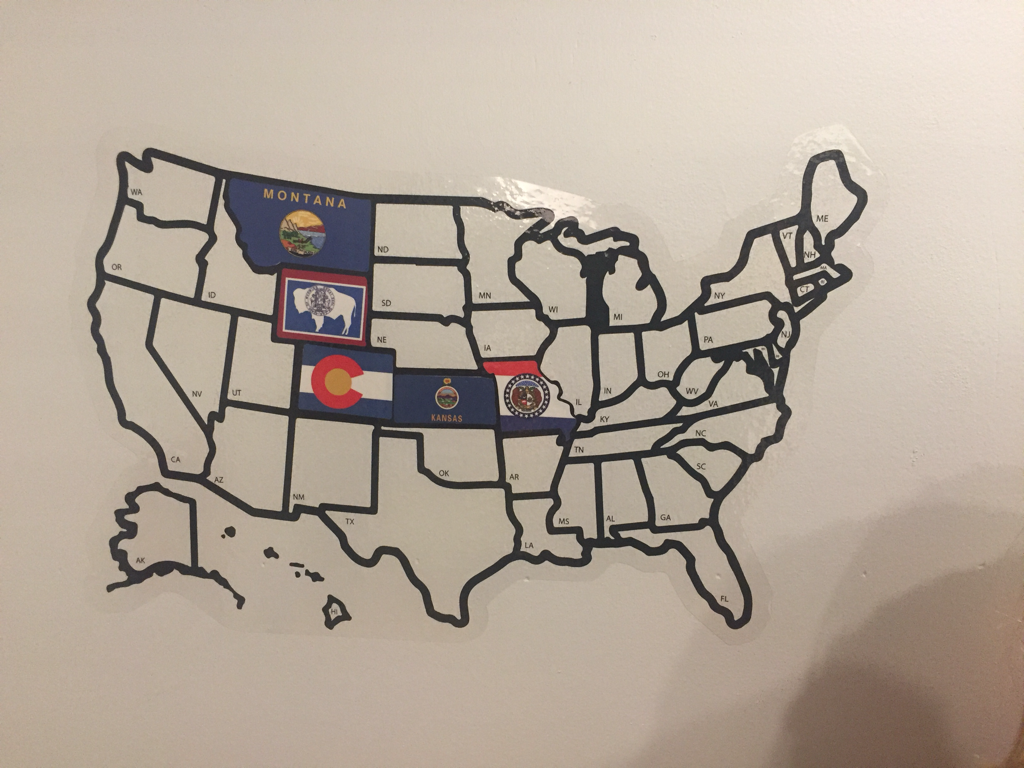
1 Comment
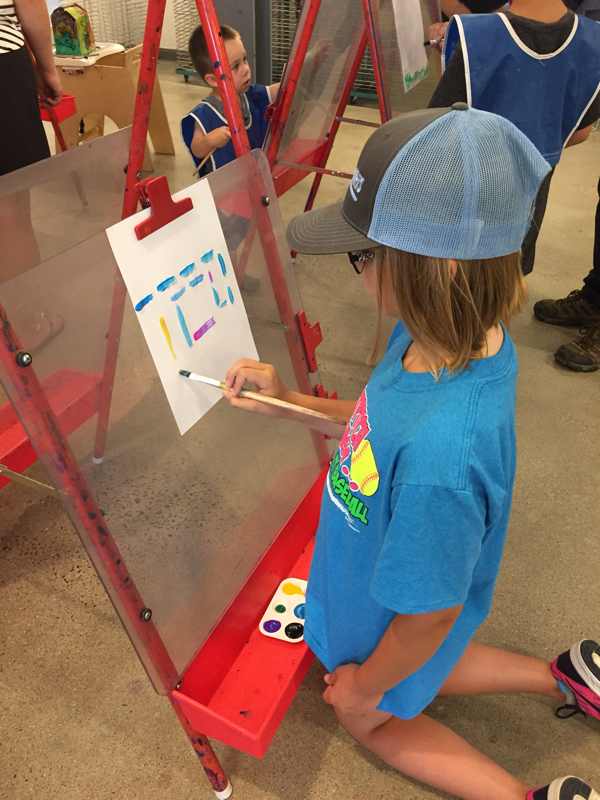
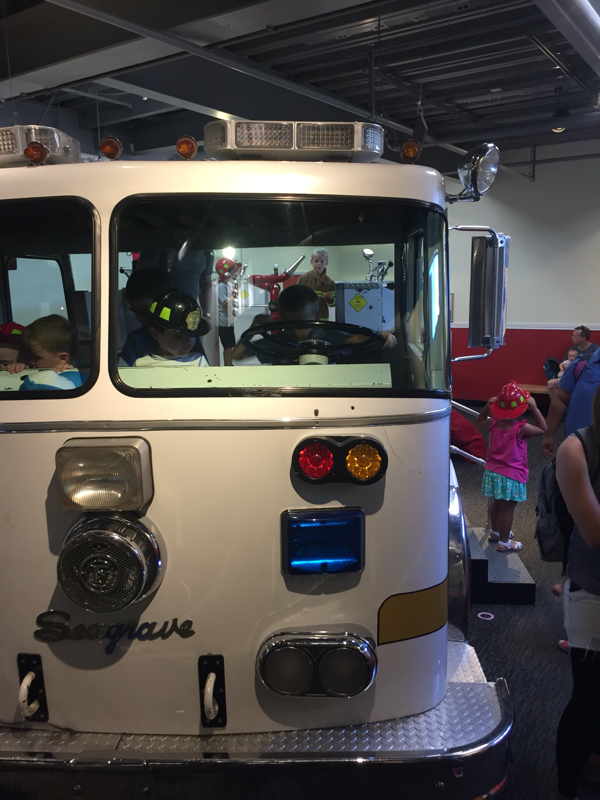
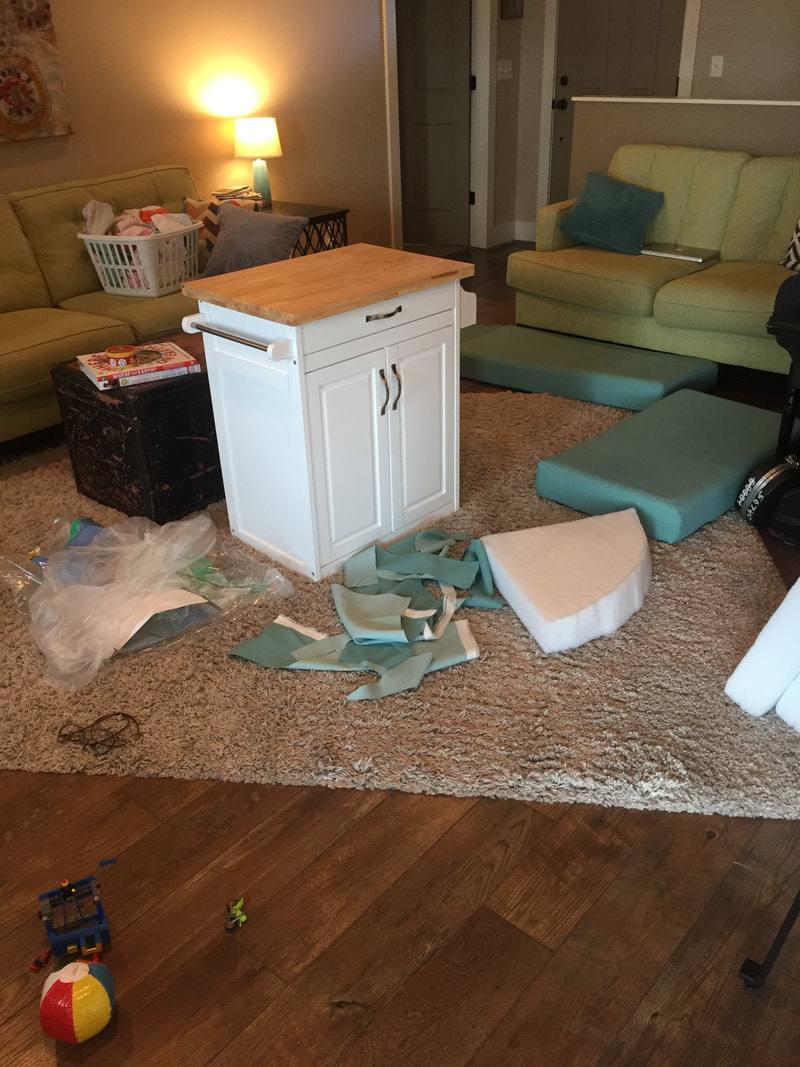
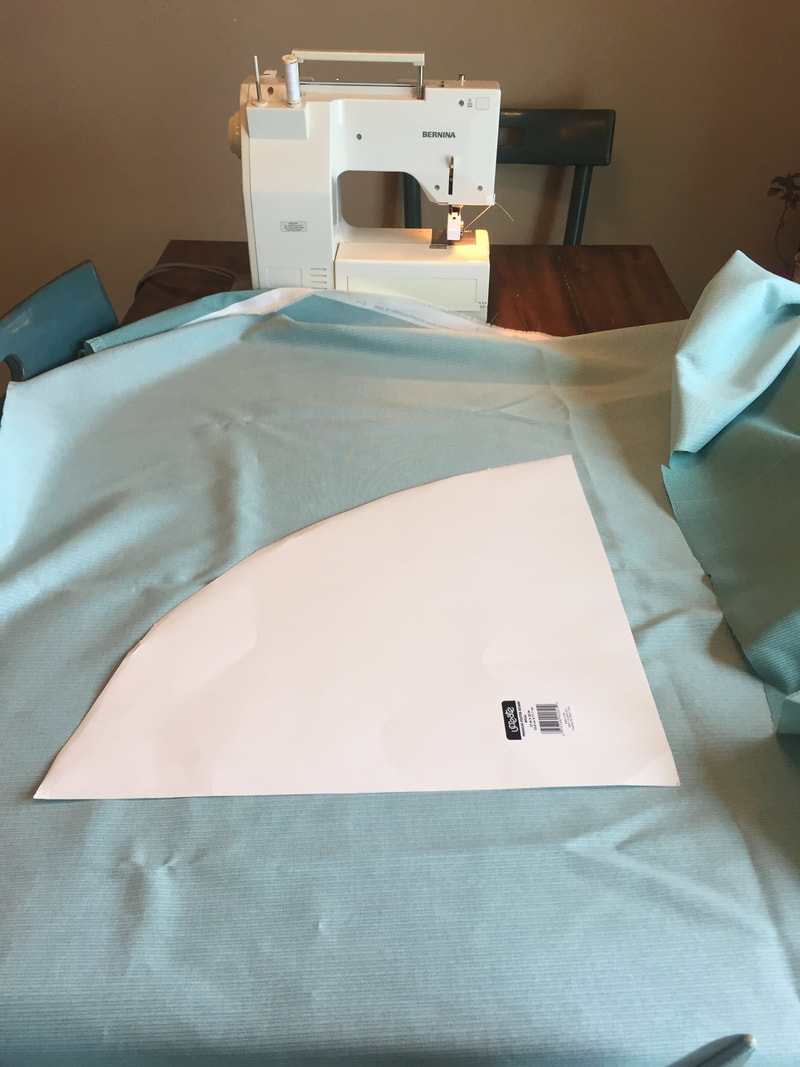
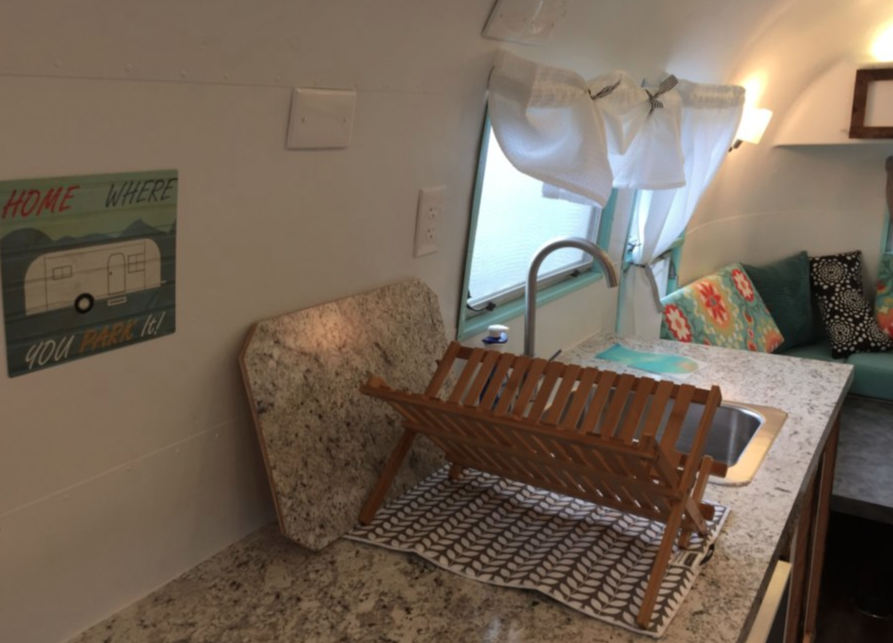
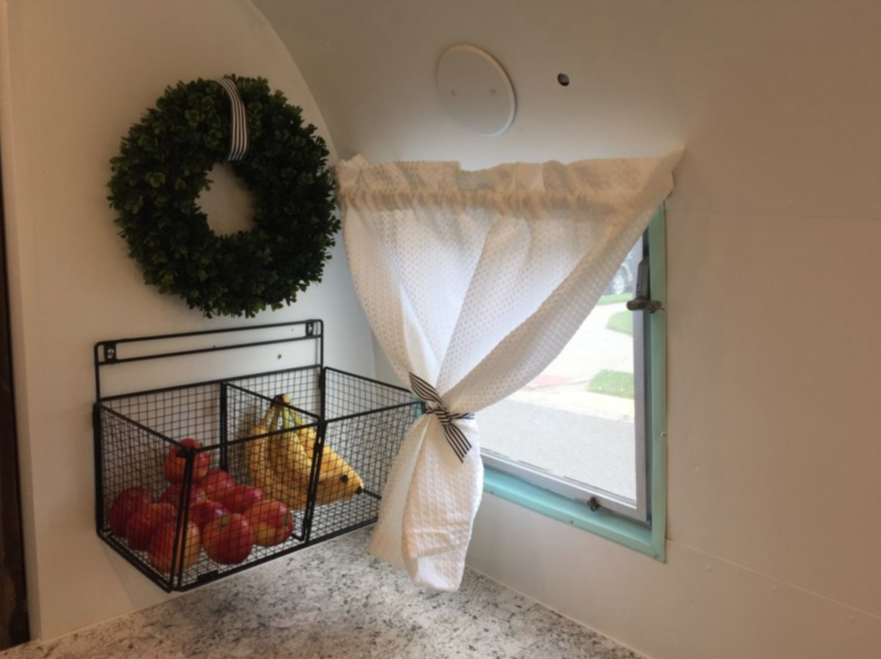
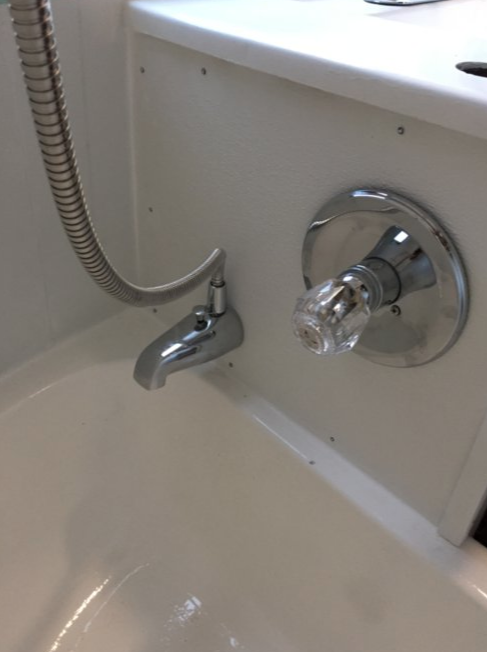
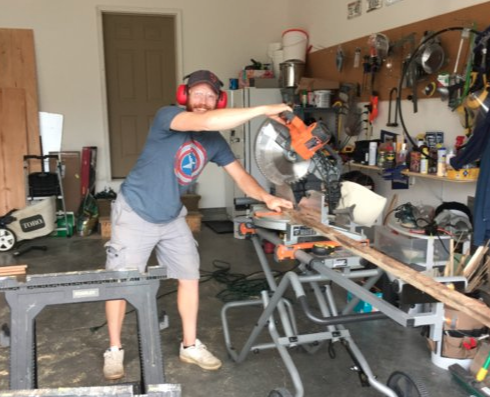
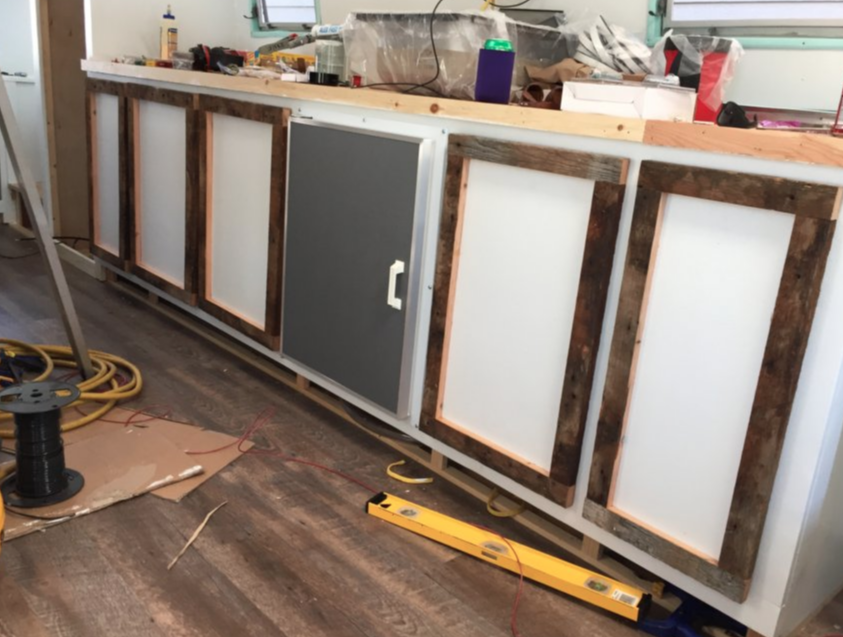
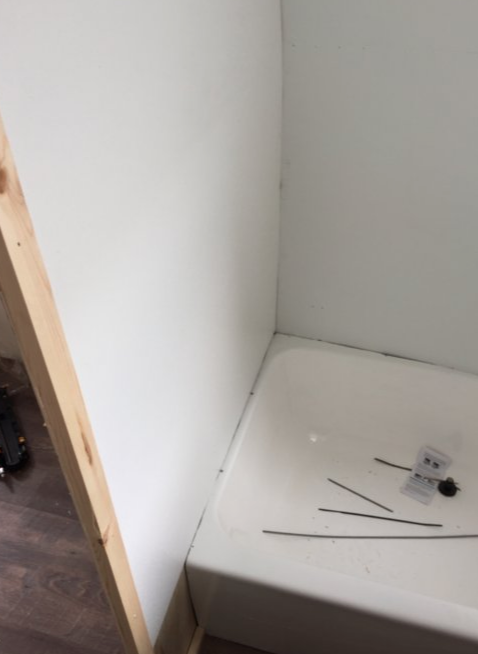
Well folks, city #1 was a mixed bag. There were excellent successes and some disappointing failures. The Kanes forge ahead tomorrow, St. Louis or bust. Here are our highs and lows: The Children’s Museum What an amazing place! There were so many exhibits to play with. Ben’s favorite was The Big Backyard. It was in the style of “Honey I shrunk the kids”, where everything was huge. I marveled at the team of engineers and artists they must have to make a place like that possible. I’m sure this was Ben’s high, maybe Maya’s too. She was feeling a little too old for some things (which was a new parenting experience, yay!), but kept a positive attitude for her brother. Damn PlumbingI usually can do plumbing ok, but it’s my own personal hell when it goes wrong. It turns out the guy who put in the tub did everything wrong. Sometimes, as a teacher, Monday Me hates Friday Me. Friday Me typically has a lazy attitude whereas Monday Me is meticulous. It was definitely that Friday guy who did the plumbing under the tub. Consequently, it both leaks AND fails to drain. I think I had a quick fix for the leak (won’t know until tomorrow), but the failure to drain the last 1” of standing water will take major work. 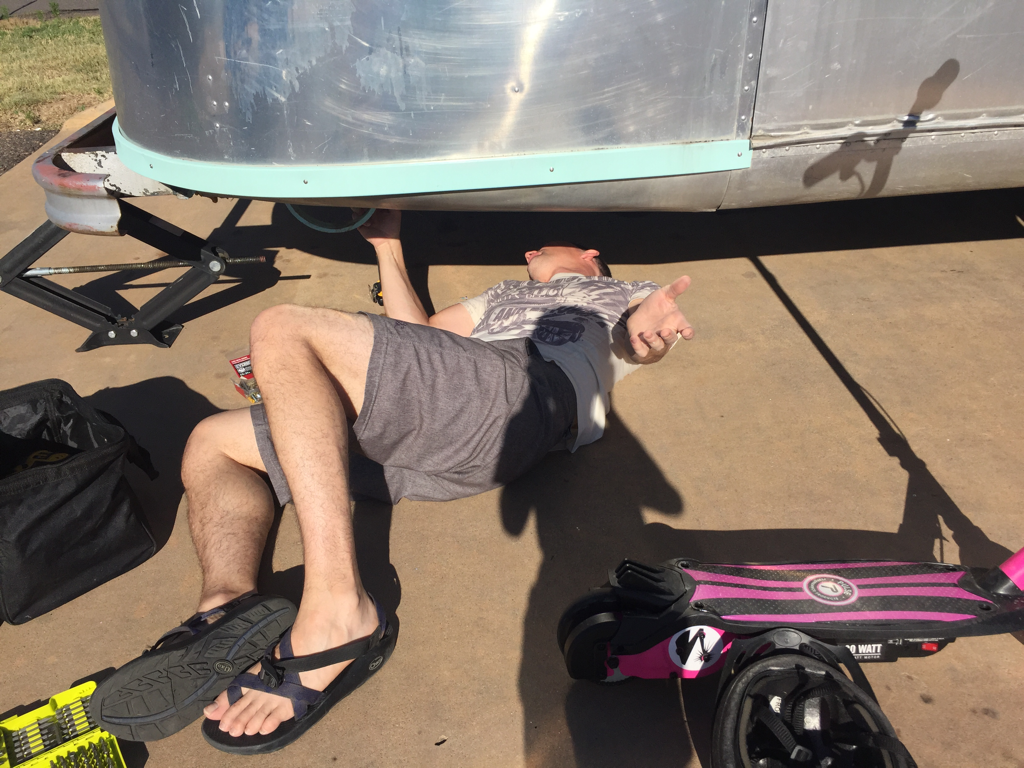 As a result, we needed to take showers at the coin-ops tonight. It feels like a major failure. I think I can fix it fully, but it’ll need to wait until I have time. We’ve got a few beach days planned around the 4th, maybe one of those will work. Fine artSara’s favorite place was the Denver Art Museum. It was an art museum. The hardest partThe hardest part is figuring out how this works. How do 4 people who usually lead separate, but intertwined, lives suddenly spend 24/7 with each other? We’re not arguing or fighting (we’ll the kids have a little), but we’re all exhausted. (The heat didn’t help. It was 102 today.) Sara and I are both big on personal space, so we’re trying to be graceful and articulate with each other. We’re about 50-50 on the day. The best partSara is a do-er. She did an amazing job creating a day that was an experience the kids will treasure. On vacation, I’m a sitter. Here’s my favorite moment of the day:  Tomorrow, St. Louis! 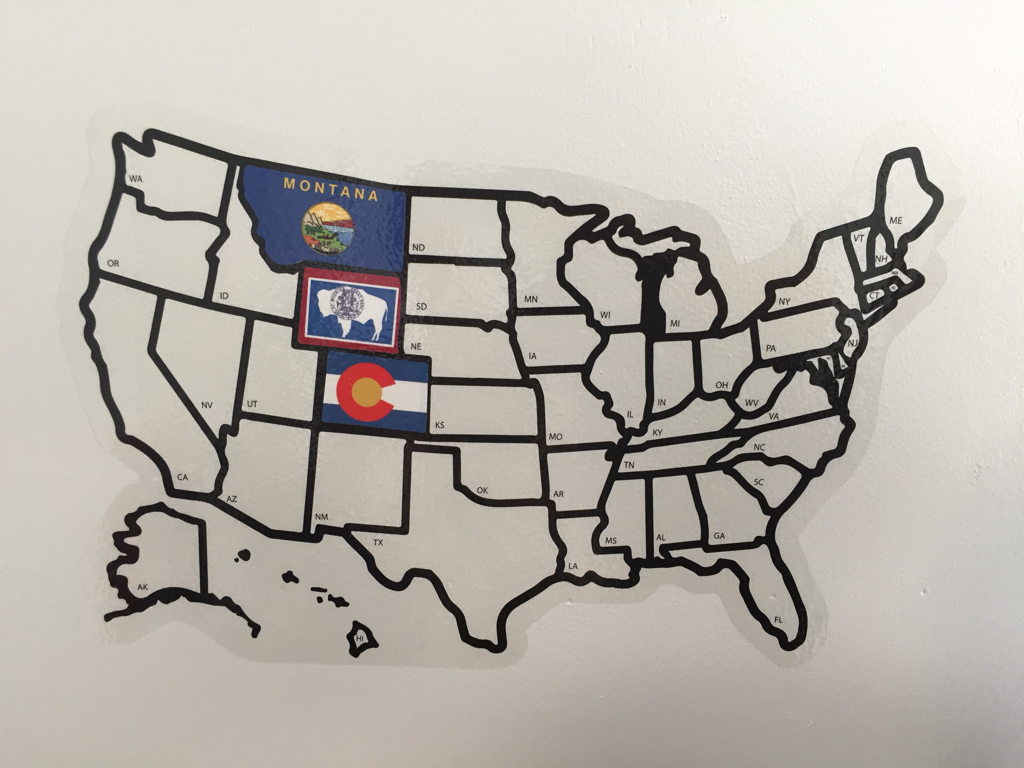 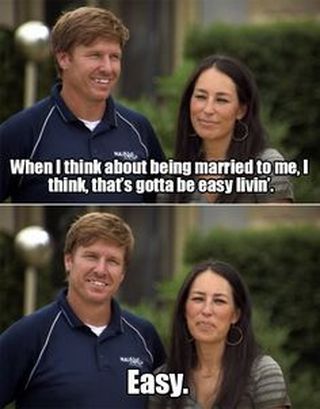 I can relate to Joanna Gaines here --->>> Chip and Mark share a few traits: -hard working -love demo day -a little bit of an ego -awkward dad jokes So for this blog entry, we'll pretend it's the last ten minutes of an episode of Fixer Upper. Chip (okay in this case Mark) has finished and it's time to get in there and make it cozy.  Mark has worked countless hours creating our little home away from home to help us better adventure as a family of four. My skills with power tools are lacking at best, so I have been on the sidelines for the most part until this week. My role has been design and decor. So, I bring you the final pieces. Much like Joanna plans, designs, consults, and then pops in at the end to add the finishing touches, I have worked the last few days to take Mark's hard work and make the Airstream a place we can feel comfortable in as we wander together exploring new cities and taking in new views. About a month ago I placed an Amazon order for plastic drawers, curtains, etc. I took measurements carefully and was thrilled as things trickled in that most of the items worked well. I have two small curtains to return when we get back from our trip. Otherwise, all of my measurements did the trick. We have plastic drawers under the kid's bunks for their clothes, two sections of drawers in the bathroom cabinet, bins for the cupboards to hold food and supplies, etc. Mark built a closet for us. It's a tight fit, but we were able to get enough in for about a week's worth of clothing. We'll do laundry here and there along the way. I really love sandal season, so I may have brought more than what some people (ahem, Mark) believe to be an appropriate amount of shoes for camping (How can you pick?!!). Nonetheless, it all fit! Last summer we had made the large rectangular cushions for the dinette, which folds out into a bed for Mark and I. This week I had to sew the curved corner cushions. They were a pain. The last time I was decent at sewing was high school Home Ec. Still, I made the corner cushions work. Absolutely any 4-H kid anywhere in America could've done a better job, but we've got cushions and they basically match the others. I ordered a stall size shower curtain that fit perfectly and some simple bedding for the kids. Mark and I will use extra bedding from home since it'll be stashed away during the day anyway. Mark didn't have time to build a pantry, so I found a small piece on Amazon to do the job (let's pretend it was custom made by Clint...) My friend Jill helped put it together because she is a much better direction-reader than I am and because we had wine. Now that everything is loaded up, I feel like we have exactly the right amount of space. No inch is spared, yet it doesn't feel crowded or chaotic. I suppose when four humans are inside that might change. Still, it feels really good. Take a peek: We'll have to add pictures of the dinette set up and in use when we have dinner one of these nights soon. Right now, it's down and ready for travel. We start our journey tomorrow.  Past ExhaustionMy back aches. My hands are scratched up. But Eisley is beautiful. It will be the nicest "hive of scum and villainy" (that's a Star Wars reference, for you non-geeks) in this sector of the galaxy. Tonight, I stopped work at 9pm, and am treating myself to a beer and a rest. Eisley is ready for packing full of gear and hitting the road. Where are the final pictures? Ahh, for those you'll need to tune in on Wednesday for a special guest blogger. But before I go, here are some pics of the final work. I ran all the water lines, traced several leaks, connected the brake lines, installed the waste valves, ran the gas line, and did a ton of little projects along the way. There's been some dispute about my carpentry skills (looking at you Aunt Kathy!). I want to put a rest to this question. I've really only showed you the cuts that work. But there are sooo many more pieces that were an 1/8" too short and had to be tossed (or used elsewhere) and parts that needed to be cut 5 times to get down to the right size. What I lack in talent I make up for in persistence. Exhibit A: 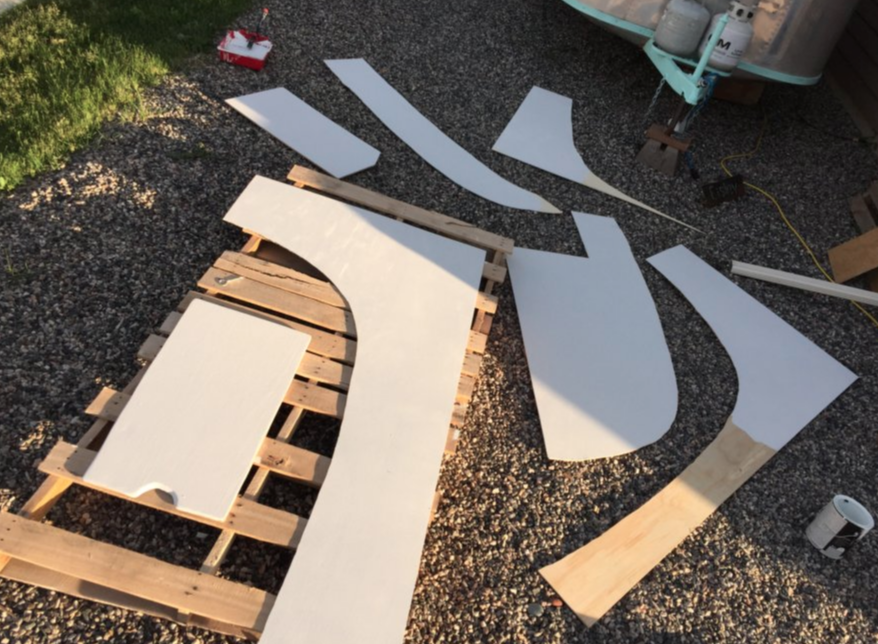 These are about 1/3 of the wrong cuts I made making bulkead or the dinette. I saved them to use for cabinet doors. Cabinet Doors
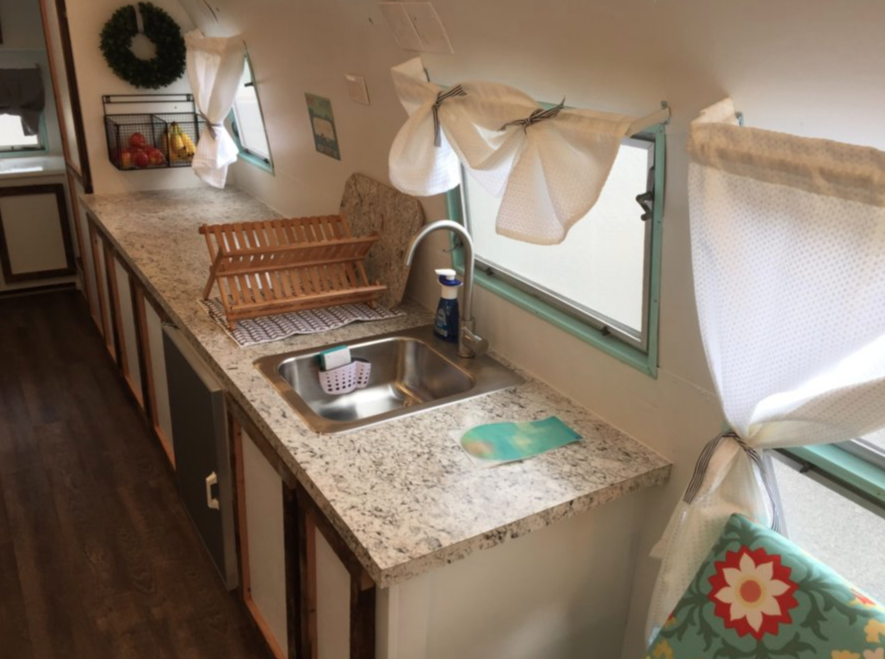
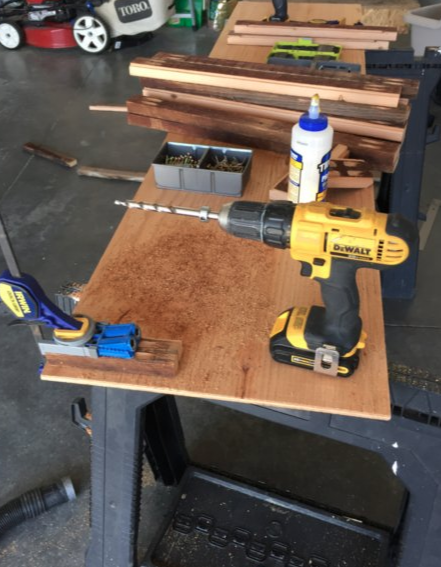
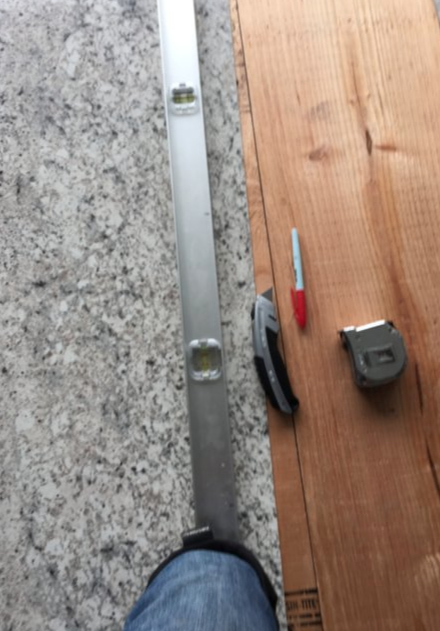
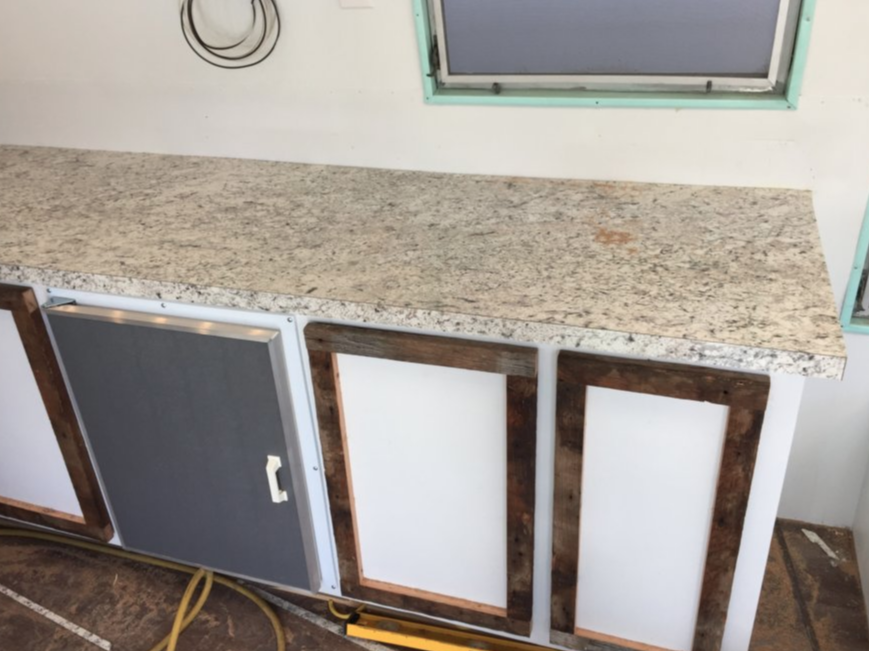
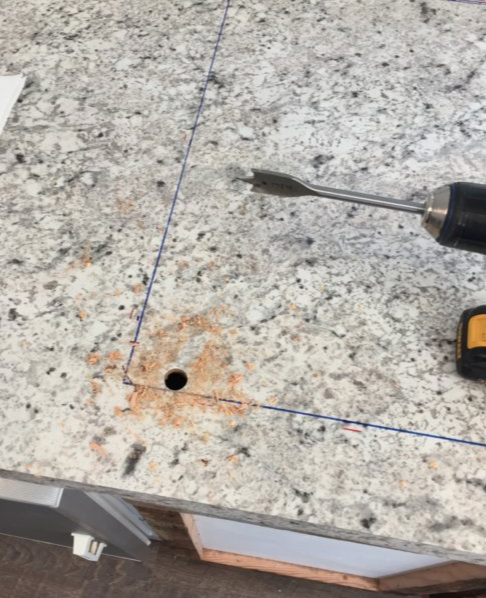
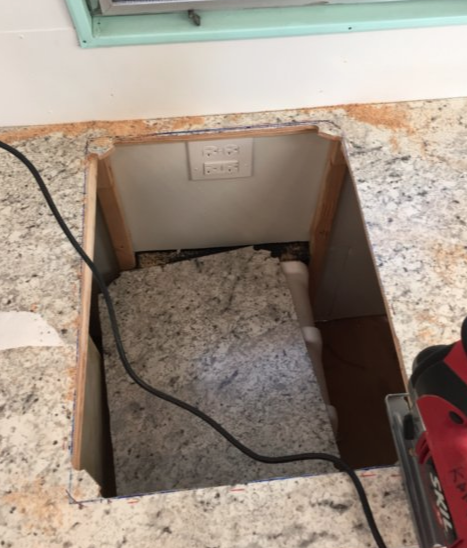
Scott helped me get all of the cuts right the first time and then lent me use of his router table to make the panels flush. The finished product surpassed my hopes. I also installed the icebox at the same time as the doors. (We decided to go low-tech and use an honest-to-goodness icebox. An RV fridge costs about $1,100 and Icebox costs about $100. You can buy a lot of ice for $1K. And ice is for sale at every gas station in America.) CountertopLike many items in Eisley, the countertop was a happy accident. We went to the box stores to get black countertops, but really didn't like the laminate. There happened to be a faux-marble piece that Sara liked, but it was the last one and broken on one side. The manager offered about 40% off and I accepted. Because I'm making my own countertop, I figured there would be a good chance I could avoid the broken edges. Cutting laminate sheet is really easy. All you need to have is a straight edge and lots of razor blades. I probably went through 15 blades because the laminate dulls the blade so fast. Once you have a deep enough score, it just snaps along the line. It also helps to have a good helper, who, when done building bunkers to shoot at cars, knows when to relax. I had one seam in the length (the countertop is so long). There were some helpful youtube videos on how to keep the seams tight. The secret is lots of tape. The final countertop looked pretty good. The worst part of having something looking pretty good is needing to put holes in it for the next step. But the final result was worth it. Click on any image to make it bigger. 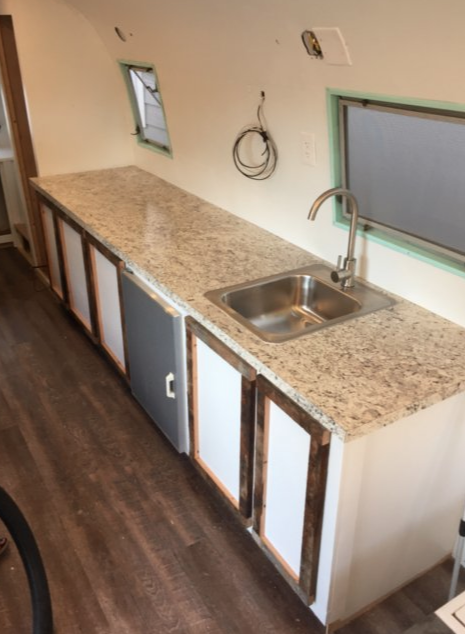 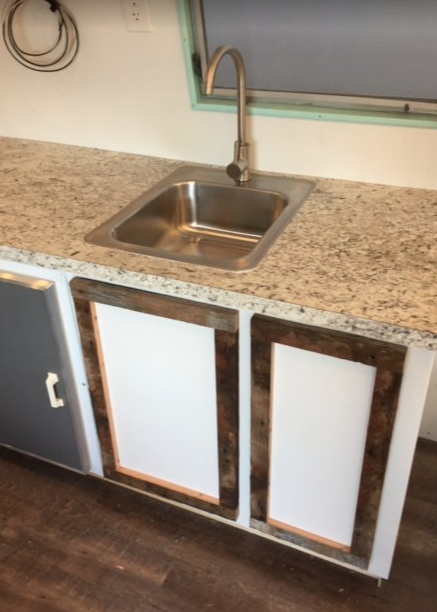 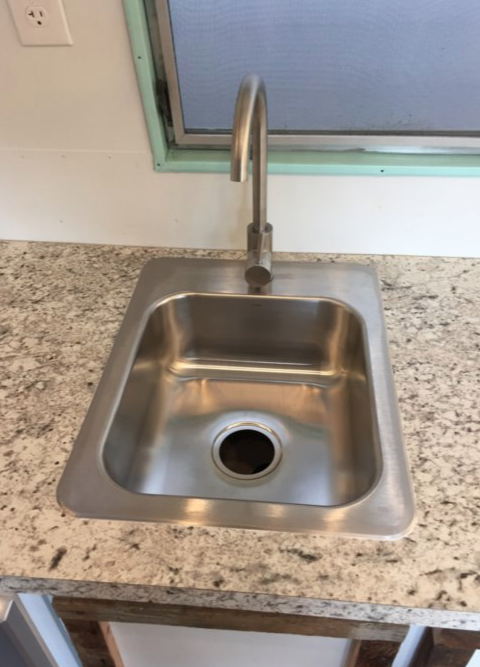  ExhaustionI'm exhausted. It is halfway through June and our giant trip is looming. Despite school being out for the summer, I'm currently working full days teaching summer camps at our local college. I've really enjoyed the camps this year - great kids - and the money is paying for our trip. So no regrets, but after work I come home and work on Eisley most nights until about 10 pm. I'm exhausted, but seeing progress. I hope I'm finished soon! PaintPaint does wonders. In order to get the doors on the cabinets, I needed to paint the cabinets first. It's easier in that order. So I painted almost everything that will eventually need paint. I will still need final touch-ups and molding around the floor. Molding may not happen this summer. The kids' bunks are painted on surfaces that will eventually be seen, but not where the mattress will cover it. I need to put some sort of sticky vinyl tiles around the toilet and there's a few cracks to cault on the dinette. There also a few spots to touch up, but that will be a quick job. Electricity
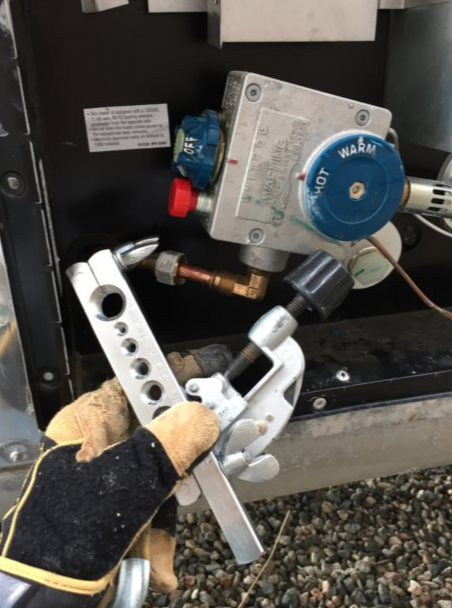
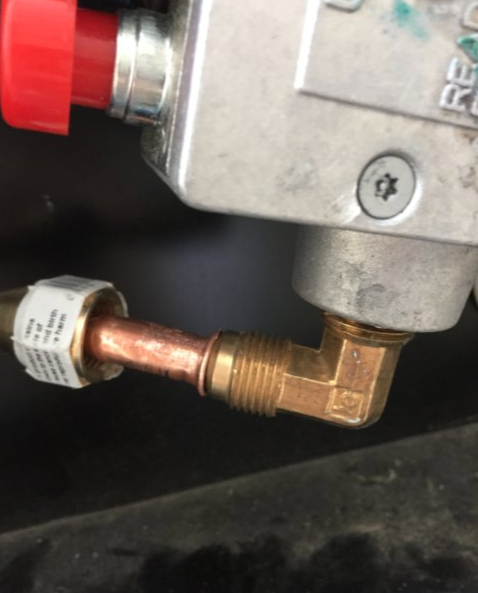
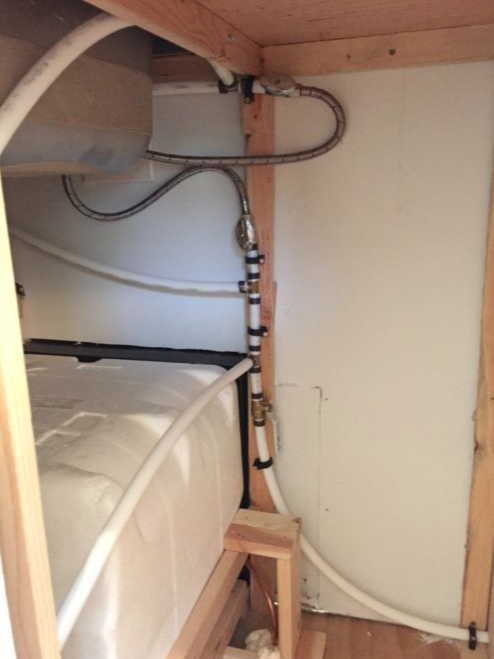
My next post should catch you all the way, or nearly all the way, up to today. I had a friend help with the cupboard doors and I installed the countertops. I'm currently working on propane lines and septic valves. After that, fresh water, cleaning and decorations.
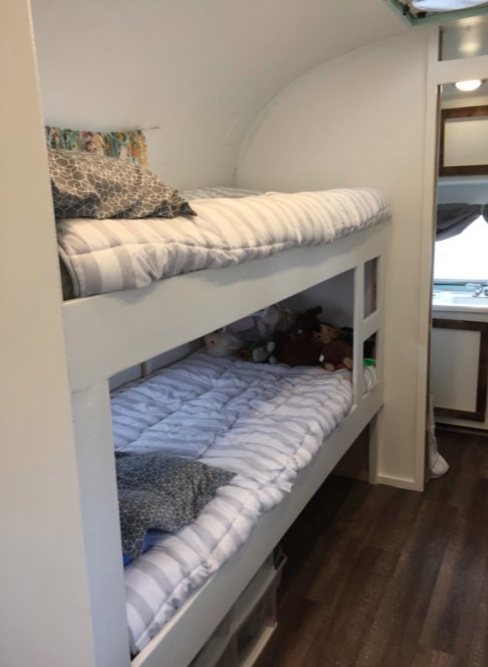
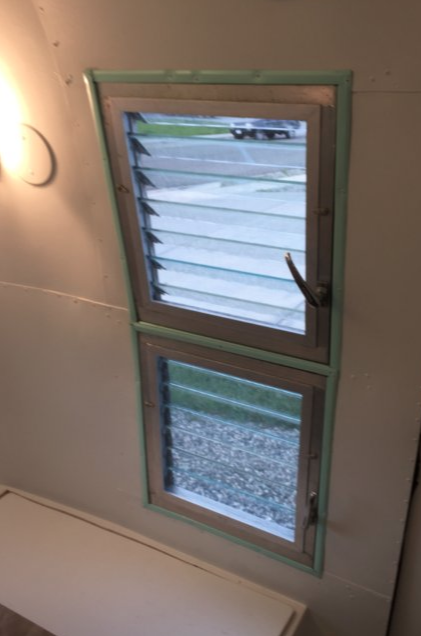
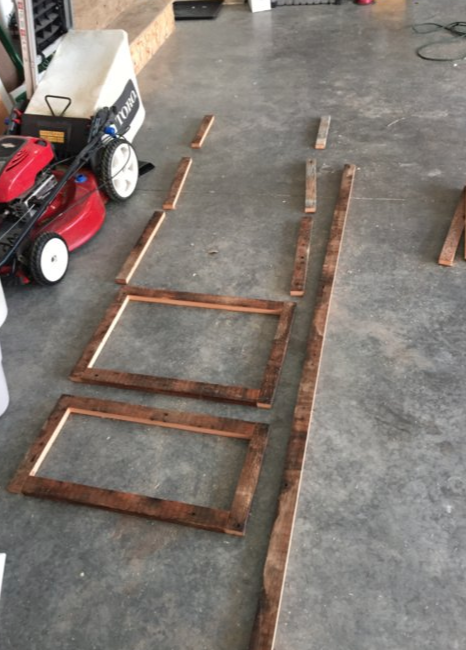
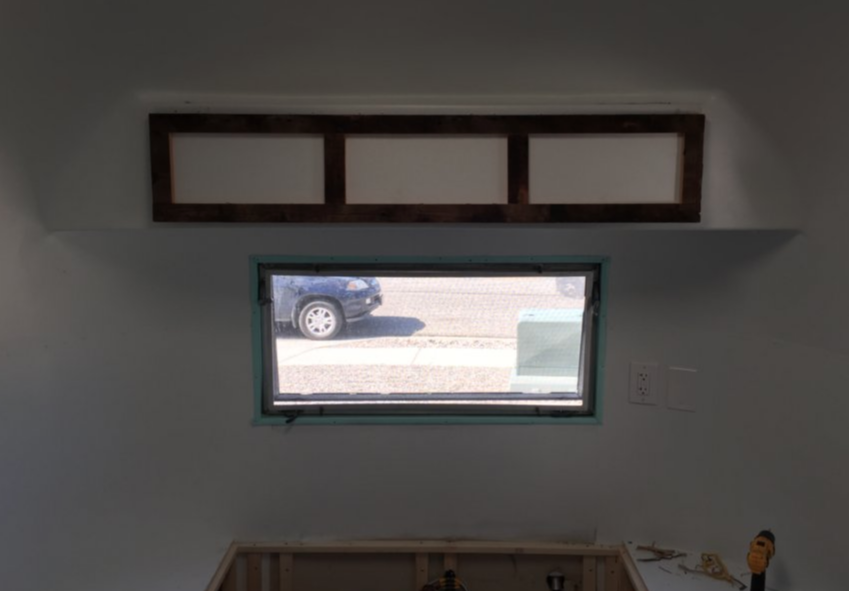
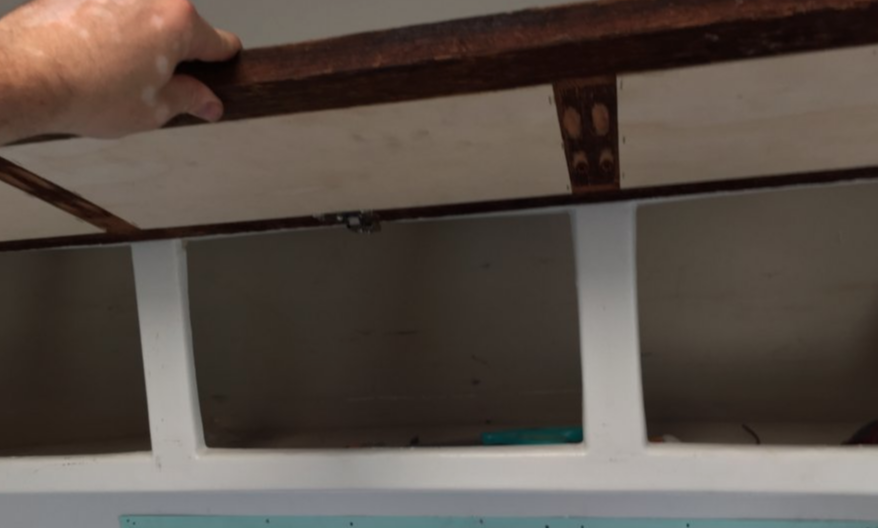
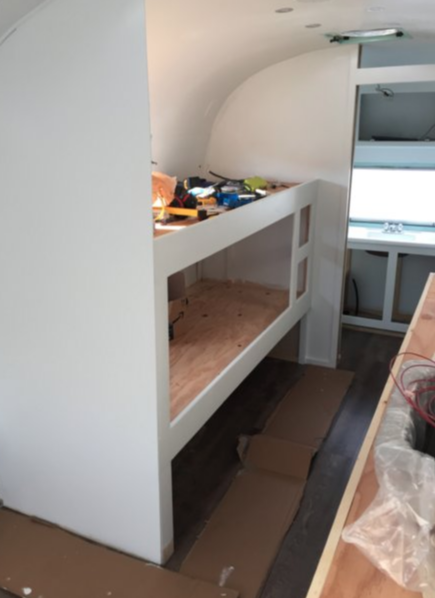
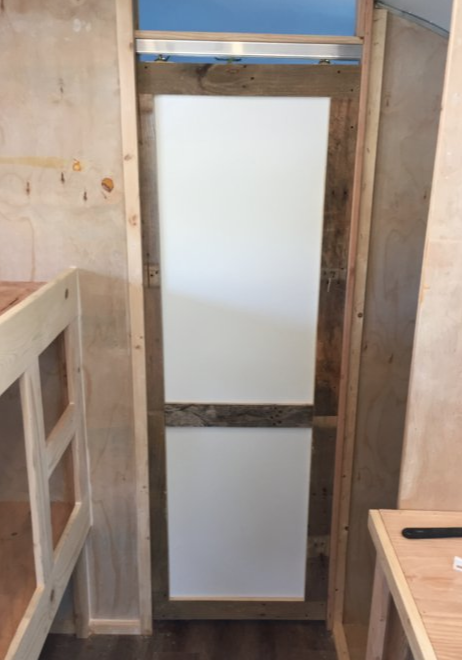
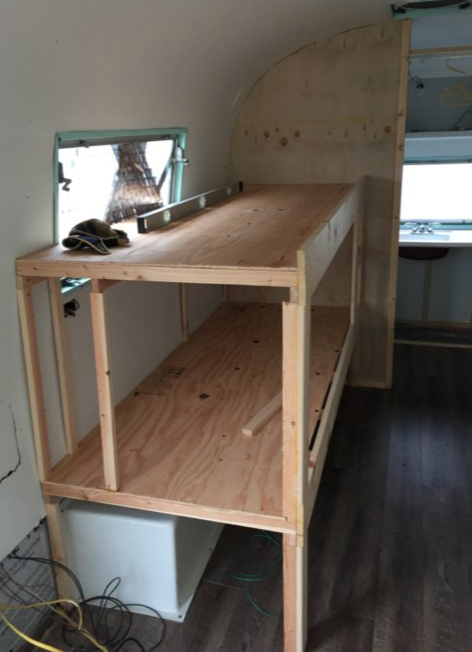
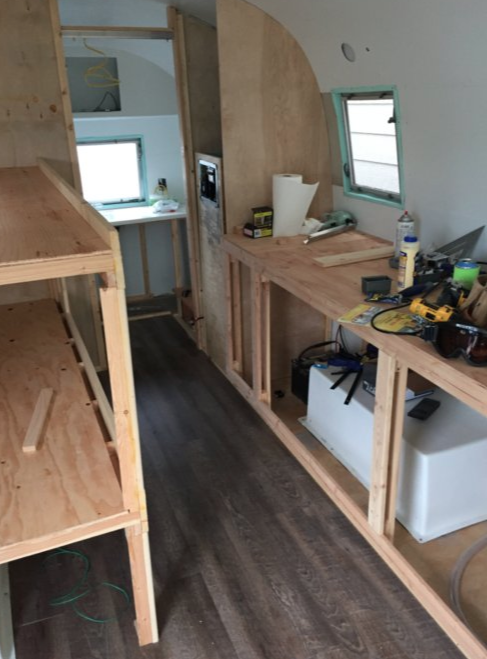
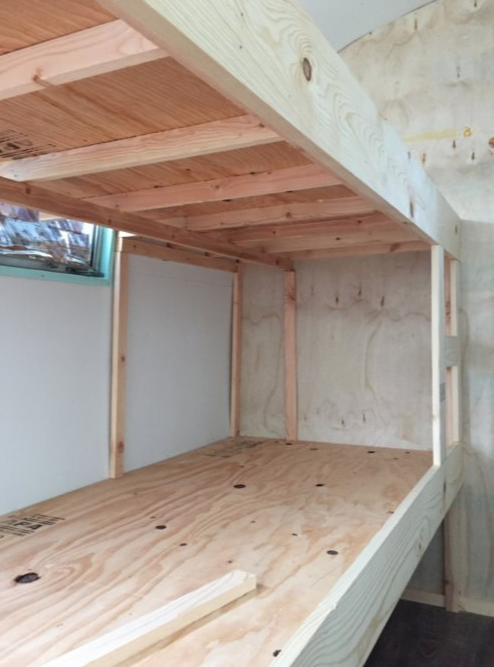
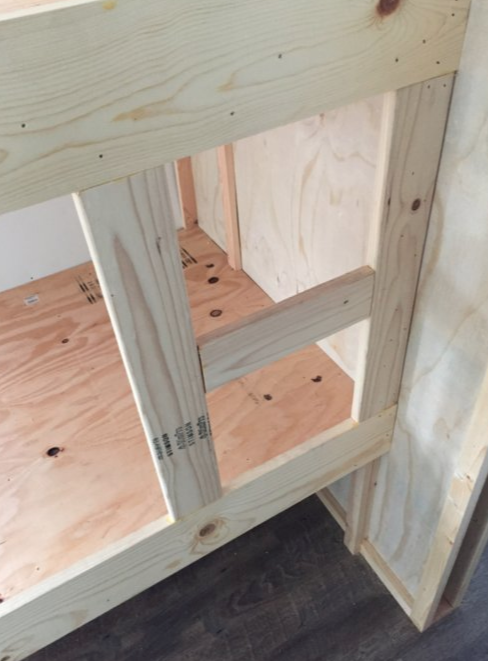
More CarpentryLast month, I began work again in earnest. Winter was over, the temperature was warm and my deadline was looming. First, I finished framing the kitchen and bath cupboards. I must not have stopped to take many pictures. Next, I put in the bulkhead walls for the bathroom. One side of the bath has a tub and will eventually have a shower. I took extra effort to caulk every inch of this side with bathtub caulk. I also used a shower board on the backside of the wall. Hopefully, this will keep water where it is supposed to be. For privacy, I installed a pocket door. I think most Airstreams of this era just had a curtain, but if I have to have a toilet, I want a door. It slides well and fits nicely, but not perfectly. I'll tweak it next summer - it needs a stop behind it so that it does not go so far into the pocket. But that is minor. Also, I painted the door before installing to make it easier on me. You can see the beginnings of the style we chose. Rough wood and clean white. Along the way, I started the bunk beds. I messed around with the height of the beds some. My main problem is that if the top bunk is above the window, there is too little headroom. If it is below the window, the bottom bunk is squished. I decided to cut the window in half, though I don't love the result. But both kids will get some view, which is a plus. (If you click on any of the pictures, they will pop up bigger to see details.)  Another challenge was how to brace the bed across the window. I put a brace running the length of the top bunk about 2/3 deep. My hope was to not need a vertical brace in the window. It still was not enough and I ended up with one brace in the window. Other than that, I am happy with the result.
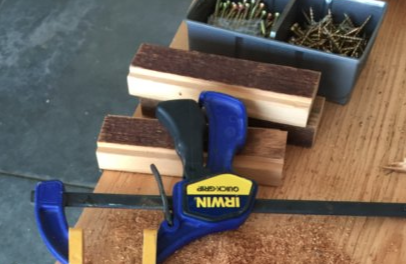
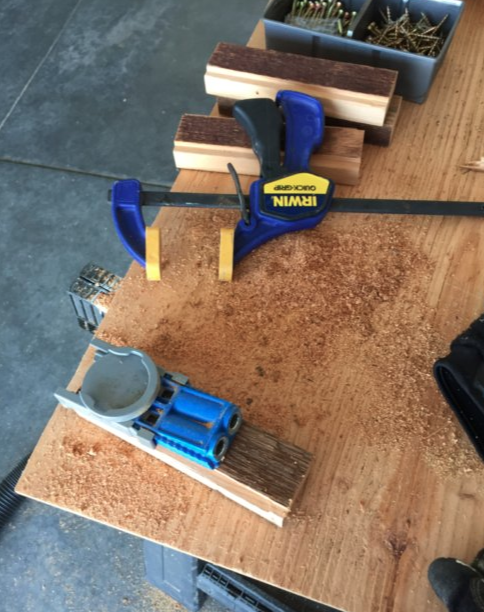
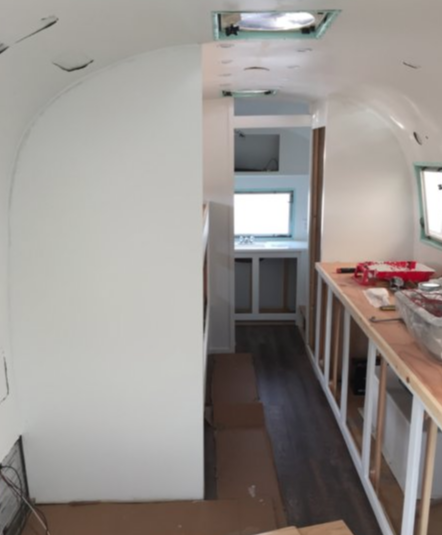
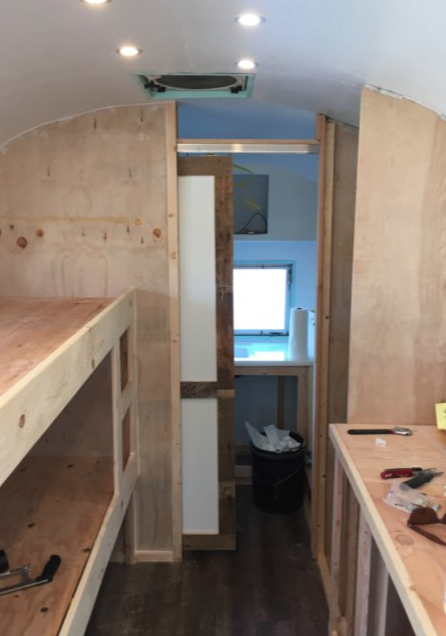
One other thing that I did at this time, but for which I don't have good pictures, is caulking small rivet holes all over the interior skins. It was a small task, but it had a huge result. The interior walls look much cleaner. May ended with bulkhead walls mostly installed (the last one was still somewhat loose) and a real sense of what the interior would end up looking like. I can't wait to show you the paint, cupboard doors, and countertop! June has been a transformation. It better be because we're leaving soon! The Beginning of CarpentryFor my wedding, my groomsmen gave me 10 bottles of wine. Each bottle was intentionally chosen to age and be ready to be opened on each of our first 10 anniversaries. It was a magnificent, extravagant gift. Sara and I were poor. She worked at Starbucks, I worked nights at a boys' treatment center. We didn't have a wine rack and didn't think we had the money to buy one. However, there was a local lumber mill that had a scrap pile. So one day I scavenged scrap wood from the pile and cobbled together a wine rack. It was the ugliest thing. This winter, I began the process of building the kitchen cabinets, the bathroom cabinets, the interior walls, and all things made of wood. I am still a terrible, terrible carpenter. I really cannot emphasize this enough. I can do plumbing; I'm pretty good with electricity; I've hung and finished drywall; and, I can paint expertly. Carpentry and I do not go well together. I did not let that stop me. I could have used pre-made cabinets, but they are heavy and expensive. So I built them out of 1x2s and 1x3s. Basically, I measured up our kitchen countertops and tried to get the dimensions as close to normal as I could, with as little lumber as I could.
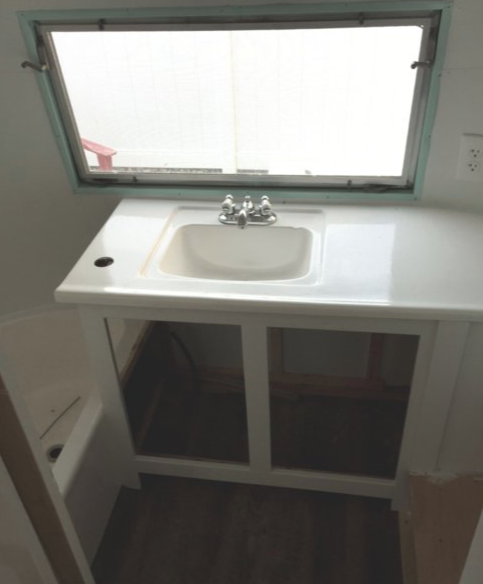
The doors are all unique sizes, based on the area underneath. Two were based on the wheel well, one based on the size of the water heater, and the three others just fit in the area between. Also, the wall of the Airstream is not perfectly straight, so it was hard to make the front square. I had to cut just about every piece in the cabinet more than once. Mostly, I'm not good at precision, but also its just hard for me to visualize each piece until the others get there too. In the end, I was able to get its depth within 1/2" of square over the 117" length of cabinets. For most of the winter, I was certain that the cabinets would turn out like the infamous wine rack. Today I finished them. I'm dying to post pics, but I have more steps to write about before I can do that. A Sink and a HoleIt's hard to make a sink funny or interesting. My students know that's how you start any piece of writing. This is about a sink. It's not interesting. If you saw a picture and only read these words, you get it. I put in a sink. See, no sink:  There is no sink in this photo. Don't spend too much time looking. It's not there. Then, sink:  There is a sink in the photo now. Look closely. You will find it. This is not a hidden picture puzzle. If you look closely, you are sure to spot the difference. Astute observers will note that the sink is not floating. I used small pieces of wood to hold the sink up. Each piece was too small by itself, but together they did the job. On to the next amazing topic: A hole. There was a hold in the side of the Airstream. I made the hole actually. 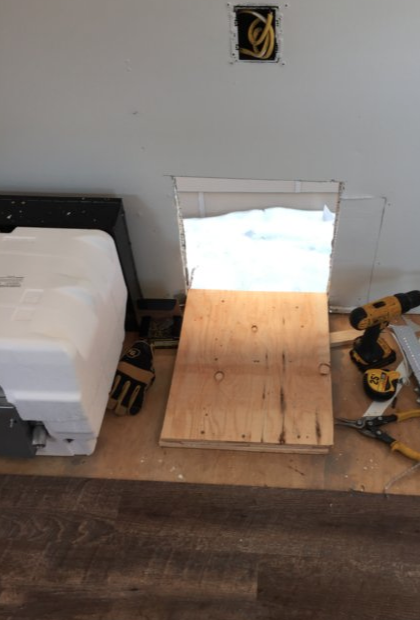 Then, I plugged the hole using a hot water heater I had lying around.  So far, the hot water heater is doing a fine job plugging the hole. This is its only function. I'm hoping that some day soon it will also heat water. But, there is no propane line to fuel it. Nor is it hooked up to AC power. In fact, there is no water line at all to bring water for it to heat. So it is a great hole plug.
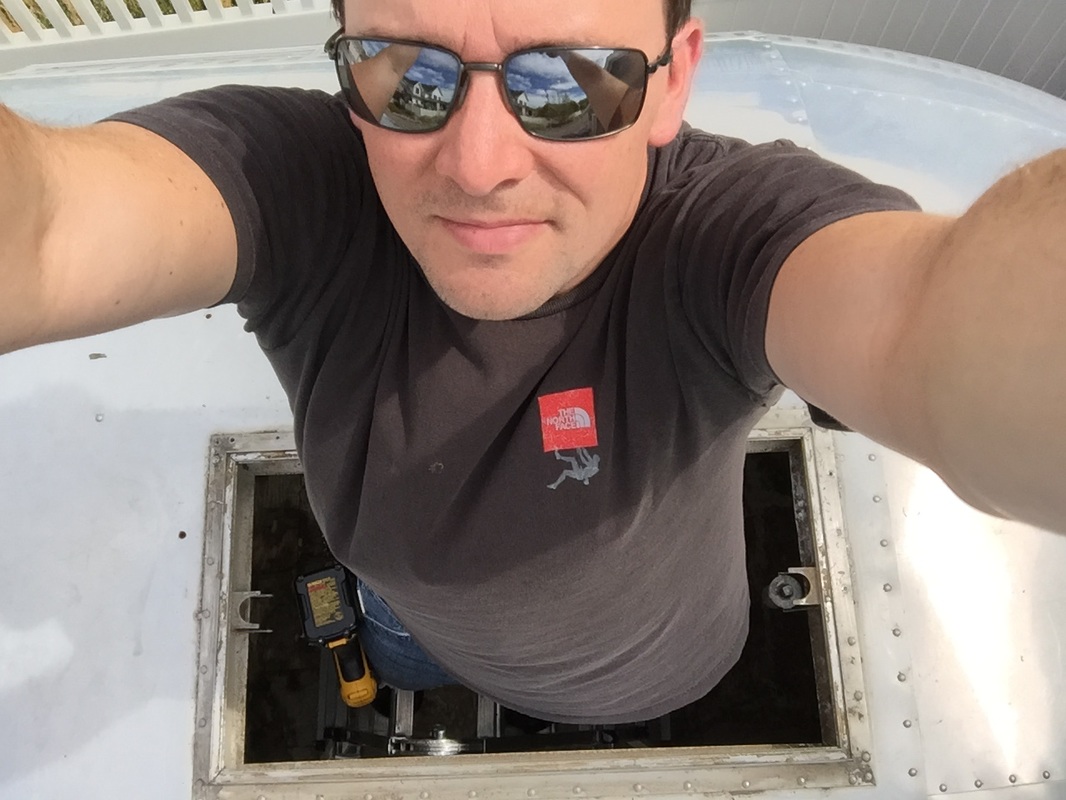
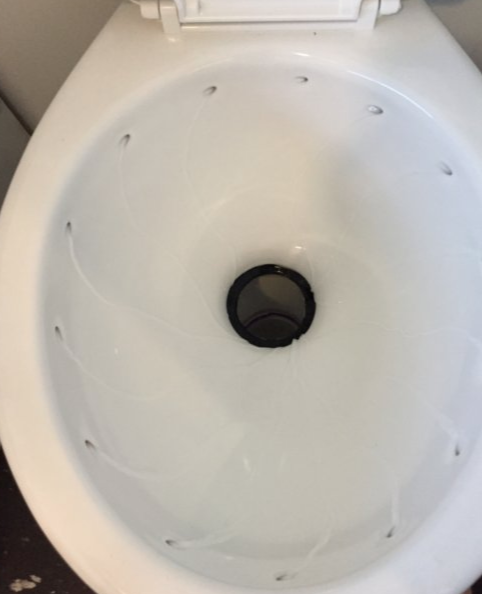
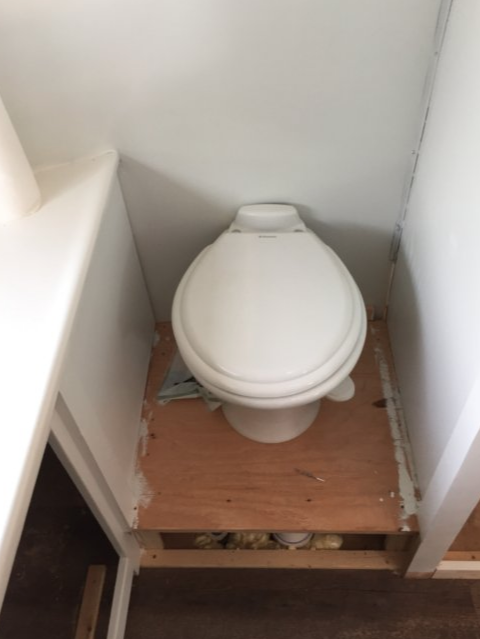
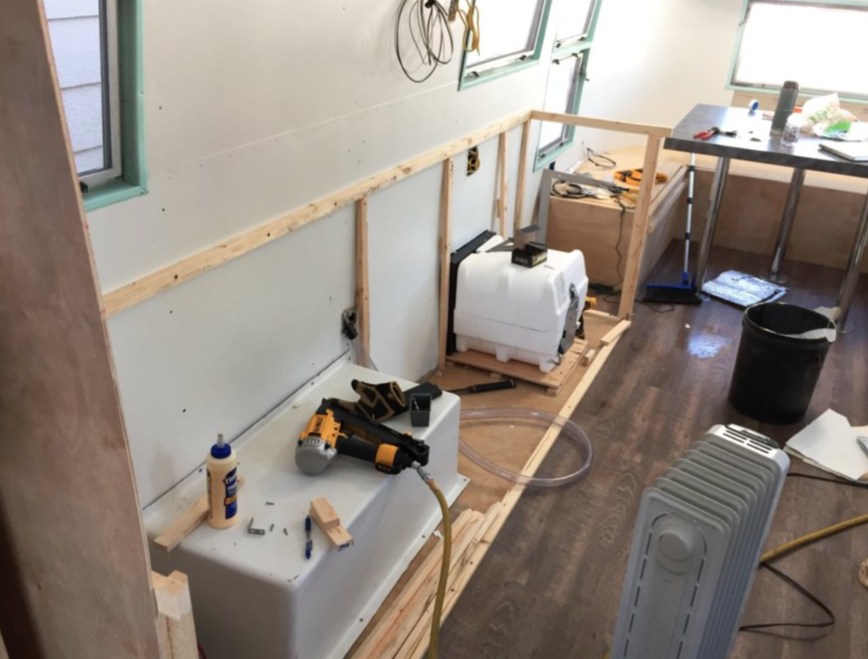
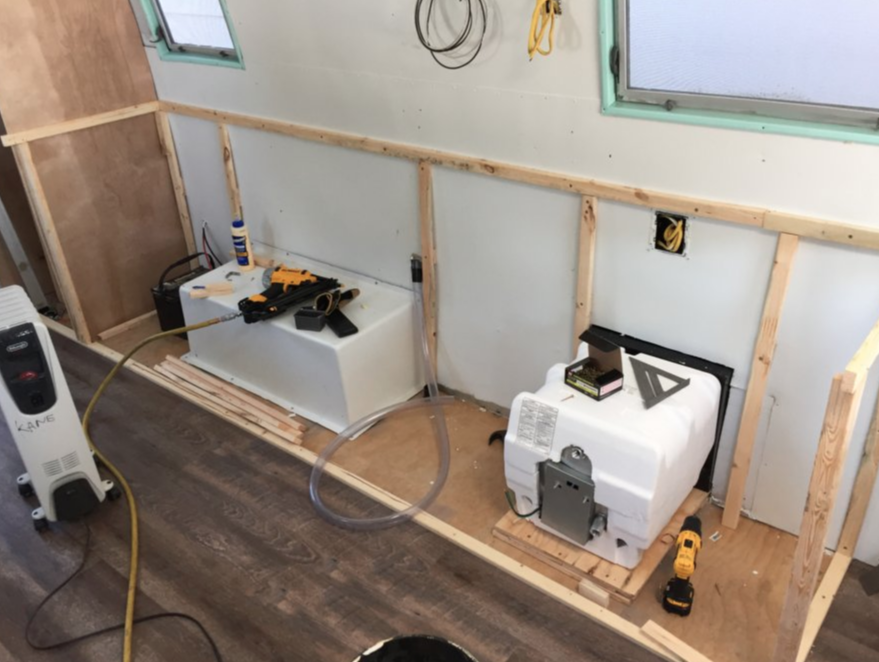
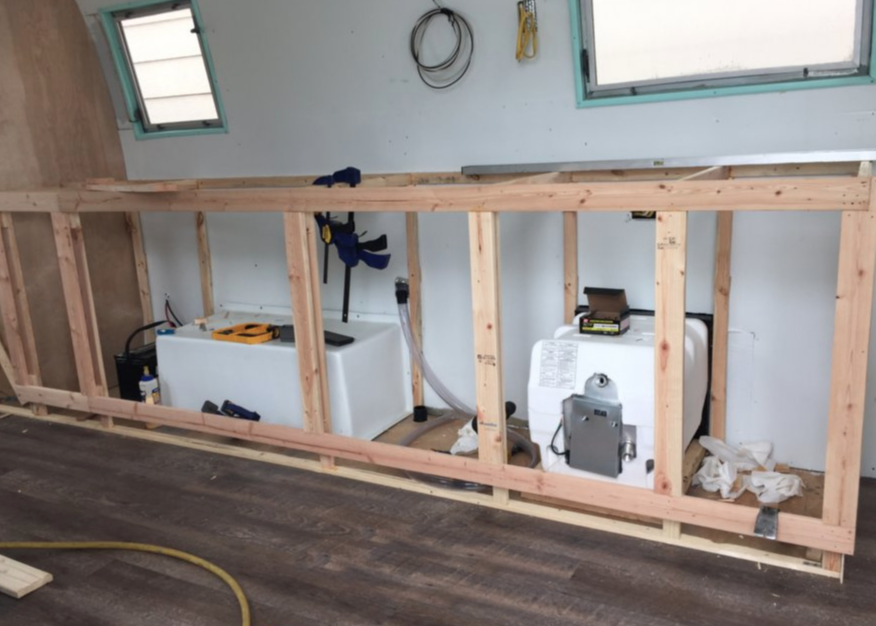
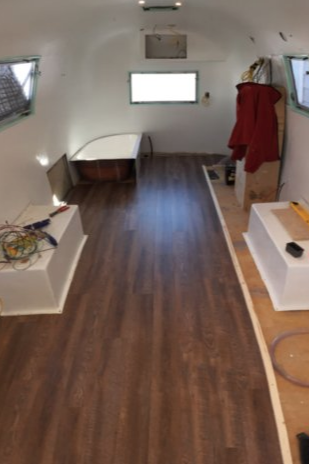
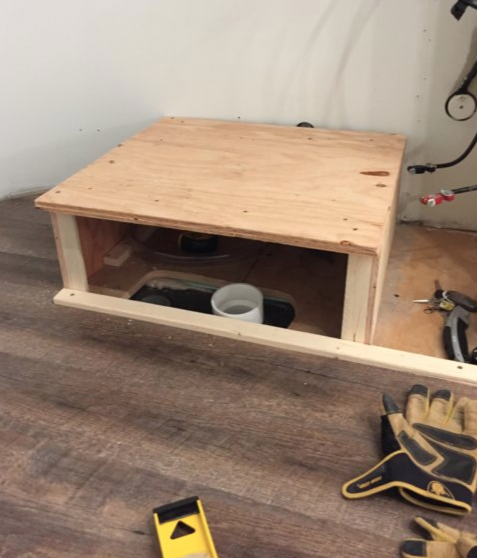
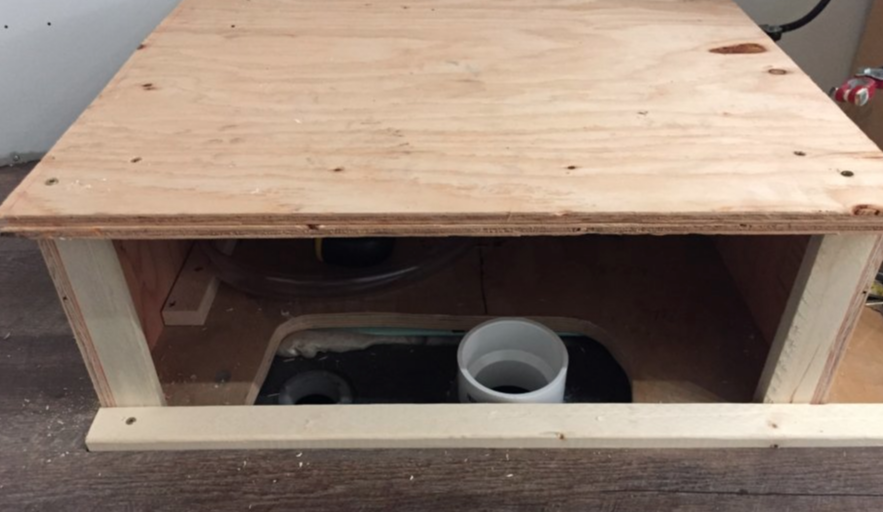
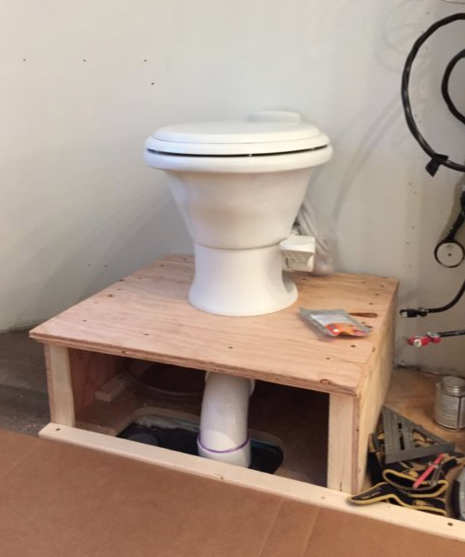
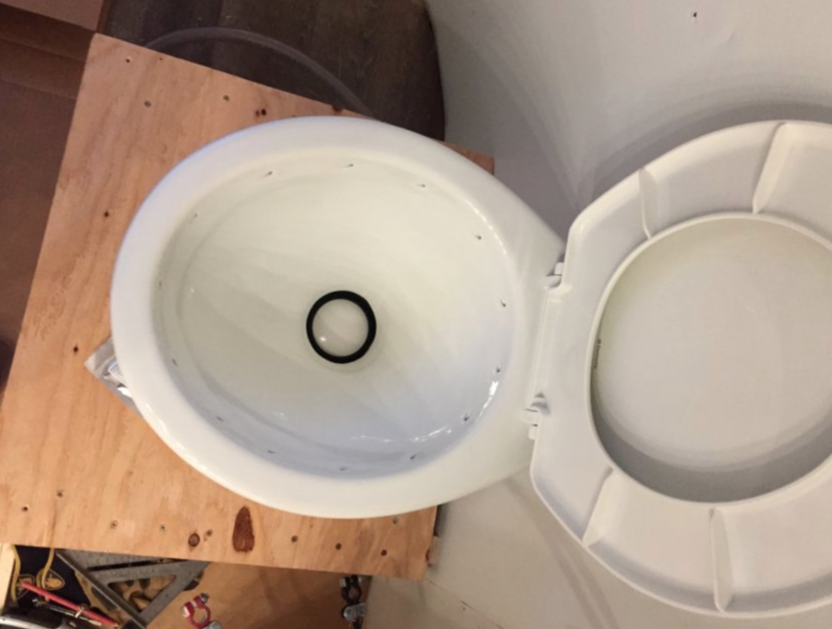
No one would fault you if you stopped reading these posts. The Most Essential ItemLast fall, we ended the summer with something slightly more than a metal tent. If I recall right, we had several lights working on battery power, our dinette installed but not finished, and the vinyl planks installed on the floor. Something like this: I began the next phase on that most essential, most required, most valuable of all RV equipment: the toilet. Ok, I'm being cheeky. I wouldn't have put a toilet in at all, except for the fact that it wasn't my decision. I hate outhouses, but I also am not looking forward to using a septic hose. There's no-win here, but like I said, it wasn't my decision. Way back, years ago, when I installed the tanks, I made a mistake. Check that post out in the archives, especially if you are reading this as a how-to. I bought the wrong holding tanks and couldn't stomach the idea of wasting $500 to re-buy the right ones (did you catch the puns?). So while this is what I did, it's not what I'd recommend. (Leave a comment with an email address if you want the advice I'd go back and give myself.) I started with the 3" plumbing I'd need to get from the tanks to the toilet flange and build a box. From there, it was a matter of measuring, cutting a hole, and installing the flange. Unfortunately, none of that is pictured here. But, hopefully, everything works as well as I designed. I installed the toilet. It ended up being a nice little elevated throne. My big fear with that run of pipe is that I have a child who loves toilet paper. I'll need a short snake, just in case. I think one use of a toilet snake and he'll be cured of using too much paper.
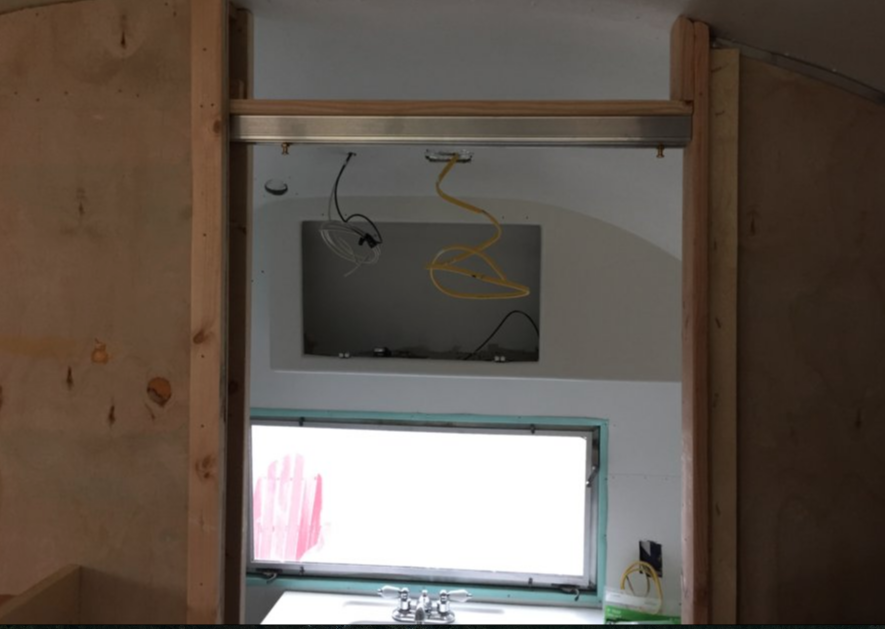
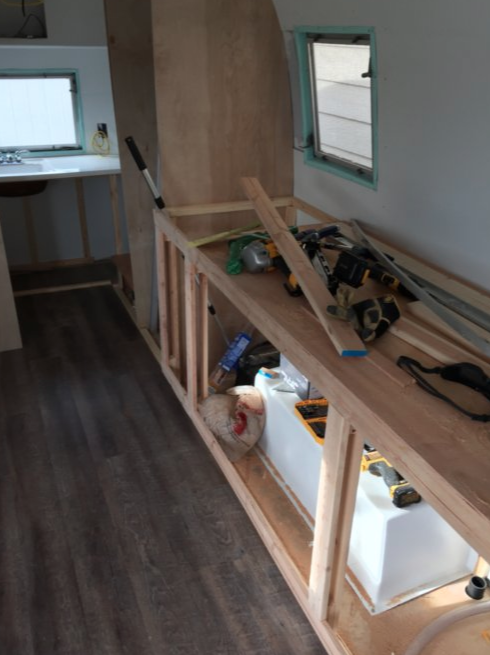
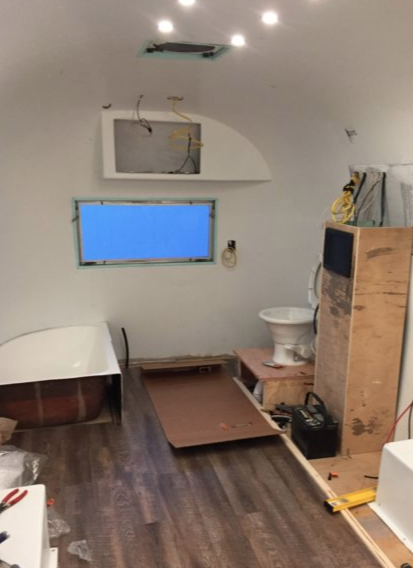
We're a close family, but our bathroom did need walls. More on that effort tomorrow. Plus a sink. |
AuthorI'm not an Airstream Jedi, yet. Airstream Jedi would have sounded presumptuous, like I know what I'm doing. That couldn't be further from the truth. Padawan is a title I can hope to live up to. Favorite Links:Knots Per Hour
My friend Mike is building an airplane. Check it out. Archives
August 2018
Categories |


 RSS Feed
