|
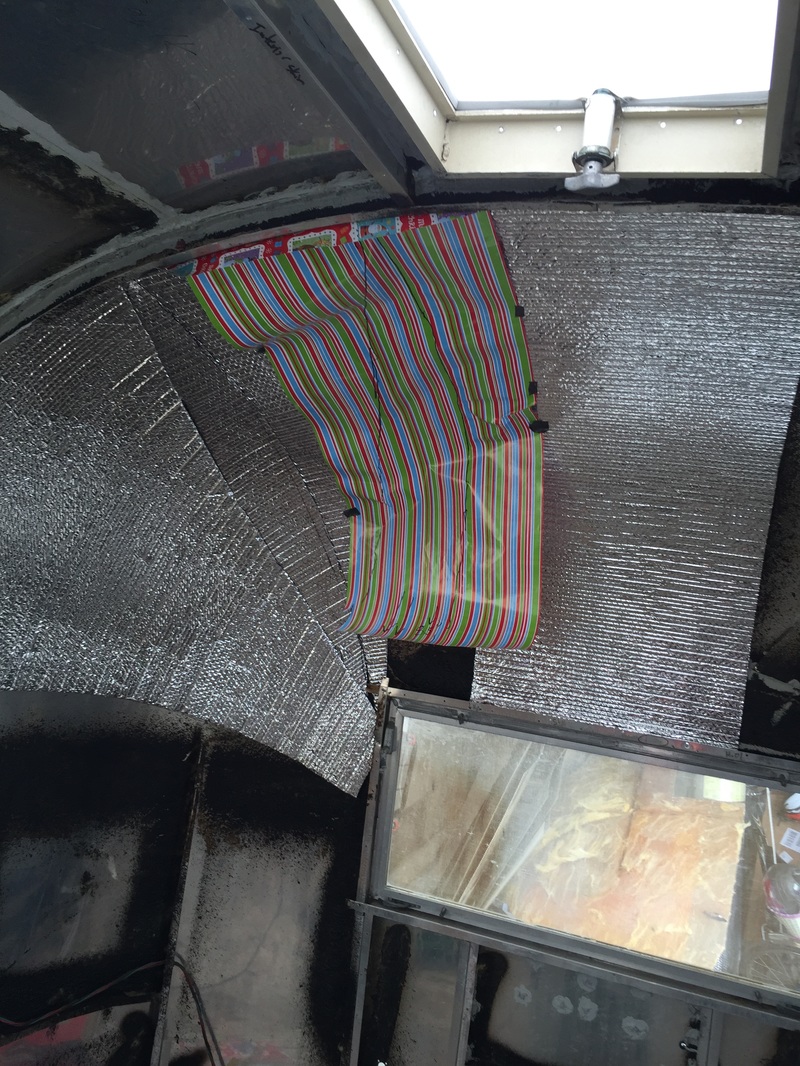
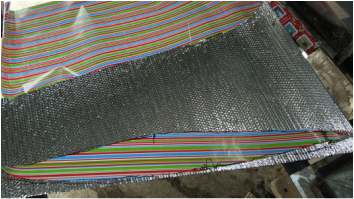
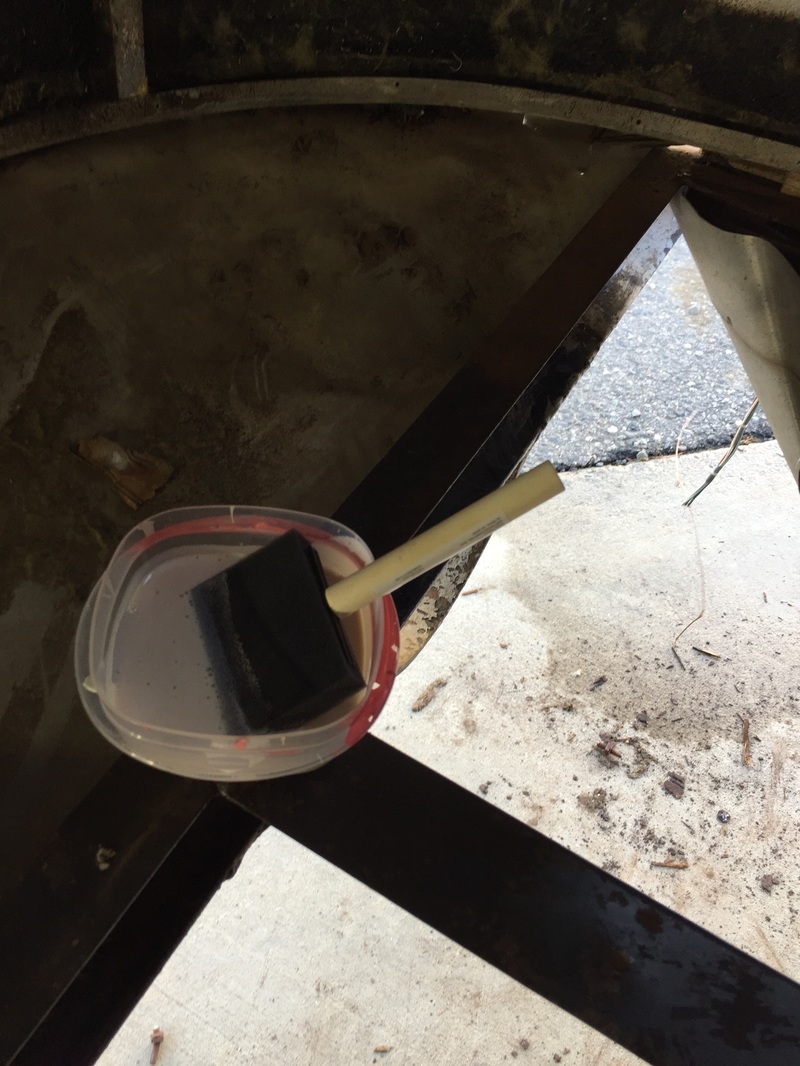
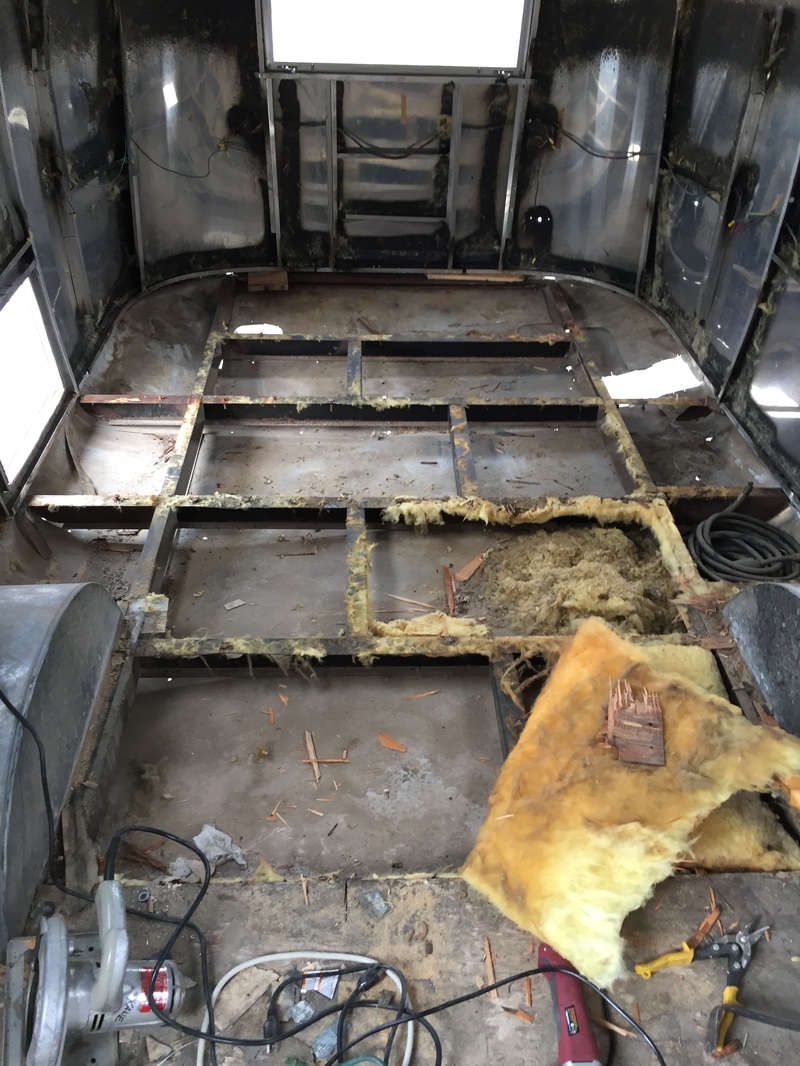
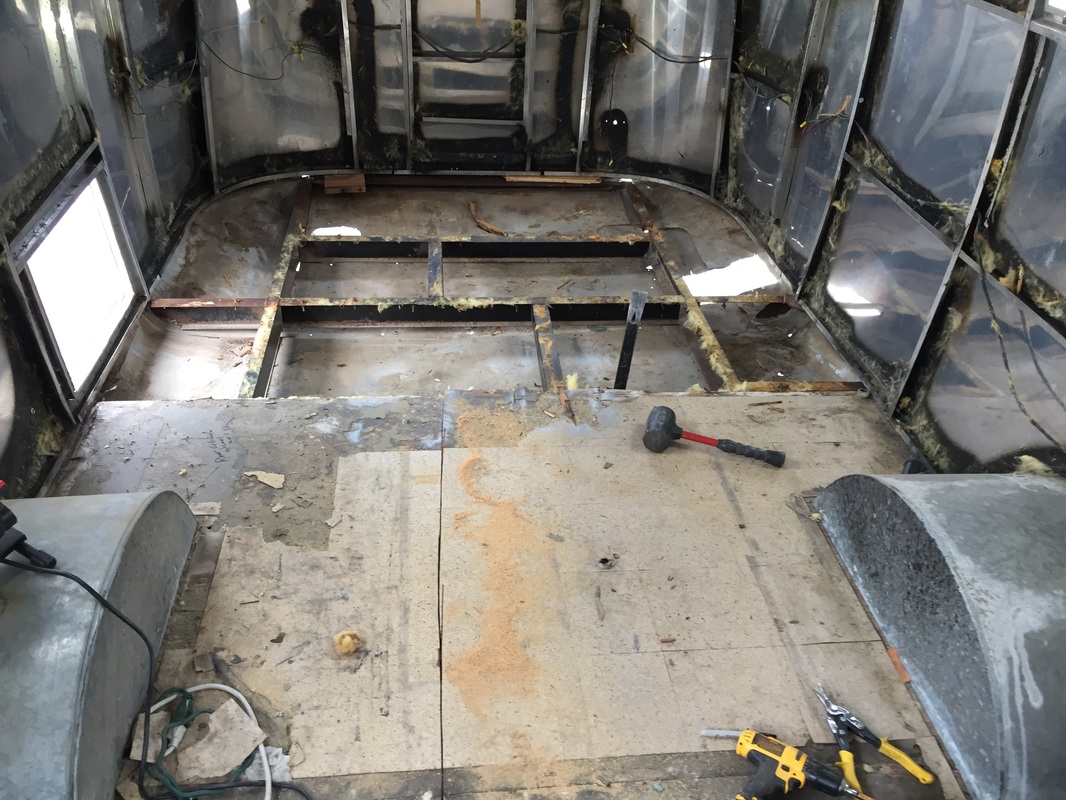
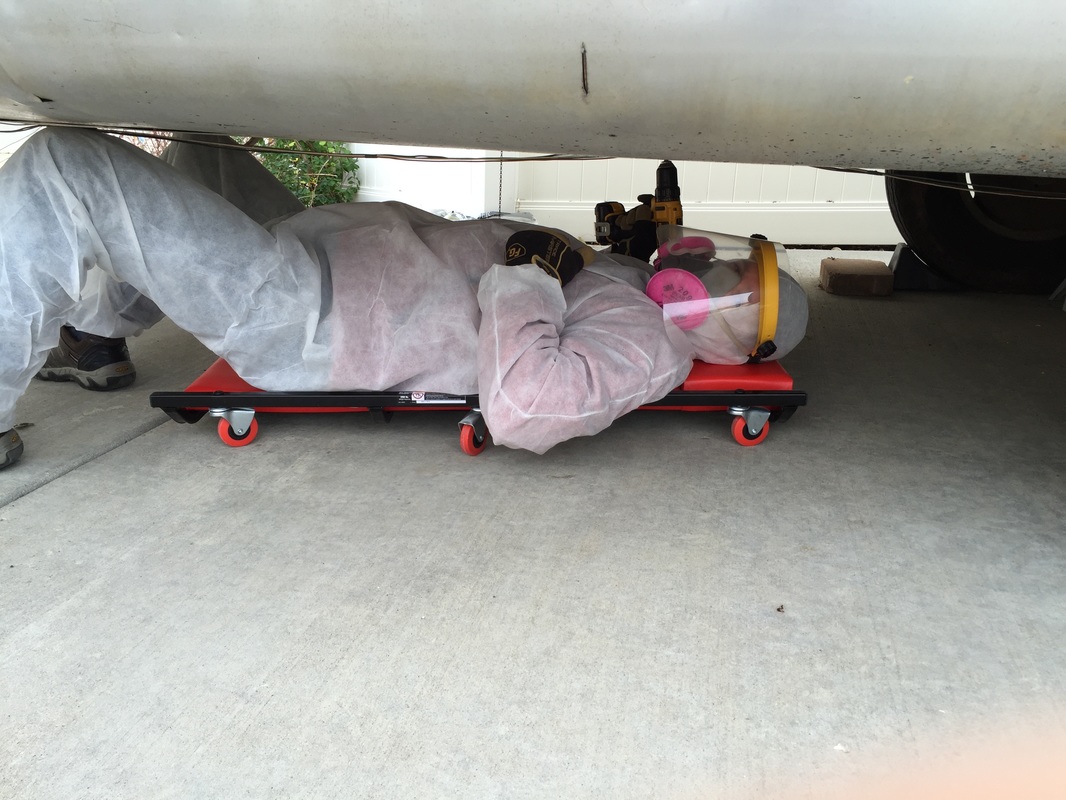
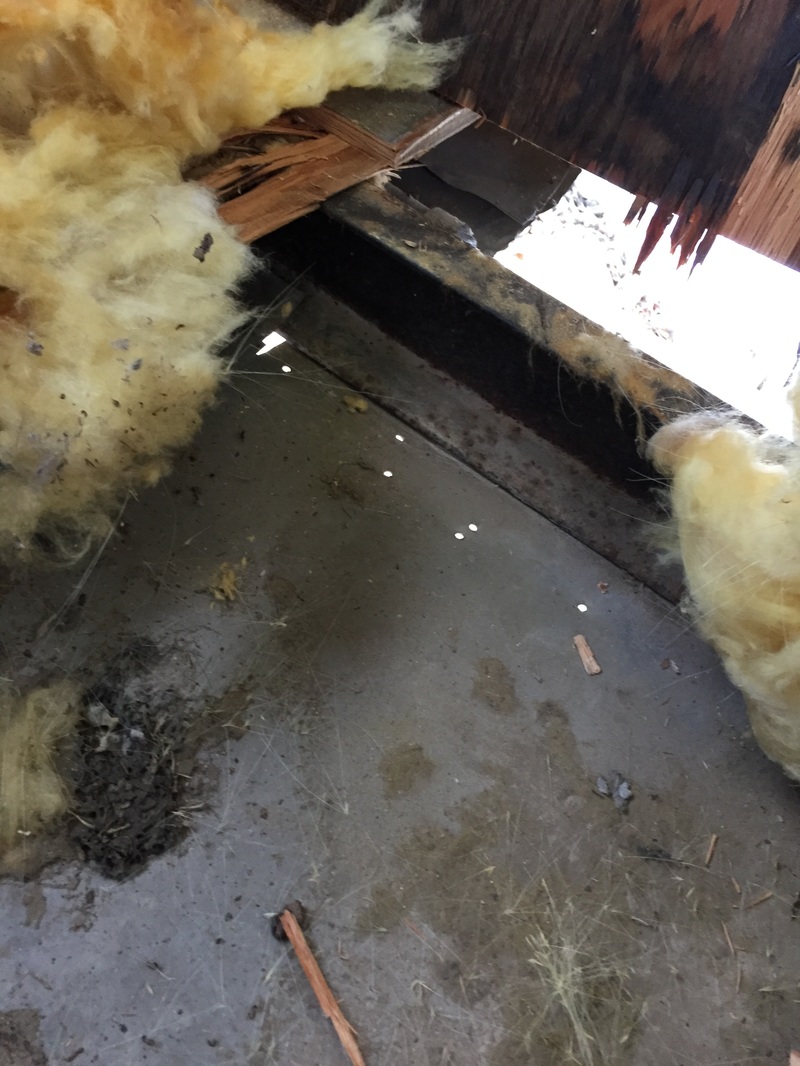
It turns out that I'm terrible at geometry. 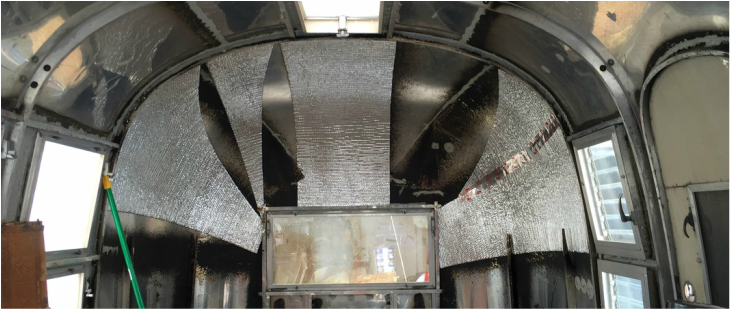 None of those spaces are intentional. But first, thank you to Jim, Cheryl & Katie for the kind blog comments. They've been pending for quite a while -- I forget to check for them to approve them! The encouragement really does lift my spirits. My frame and tank work is on hold for a few weeks. My neighbor Cory is a welding engineer and has generously offered to lend me his expertise. We (mostly meaning Cory) will make short work of the holes cut by the previous owner. We're planning that work for mid-late January. I've decided the waste tank debacle is behind me (again, I'm not so upset to skip a pun). My solution isn't as elegant or functional as the pro's, but I think it will work. If it craps out, I'll fix it later. So, on we go to insulation! There are so many different opinions on the best way to insulate an Airstream. I've spent hours reading airforms and each restorer seems to have a slightly different take. One person had even gone Mythbusters style and set up trials in his garage. The puzzle comes from the fact that the maximum depth between the two skins is about 1.8". It is hard to get much insulation value in just under 2".  The ribs are about 2" deep. The electrical wiring, insulation, and even some plumbing need to be between the inner and outer skins. Way back in 1962 (yep, it's a '62, not a '63), Airstream just used fiberglass for insulation. The problem with fiberglass is that is makes great nests for all sorts of pests and holds water. It also really isn't that great at insulating such a small gap - 2" of it has an R-value of about 3. (With R-values higher is better.) That value only comes with a perfect install. The positive is that fiberglass is cheap and easy to install. While numerous people choose to put it back in, I just can't bring myself to do it. Some restorers, even a few pros, use only a foil-faced bubble/foam. It is supposed to be a miracle insulation, though I have my doubts. There are two different versions. One is called Reflectix, which is essentially foil-faced 1/4" double-bubble wrap. 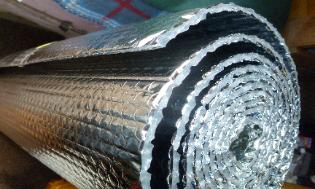 A roll of Reflectix. The other is called Prodex which is foil faced 5mm foam. Some people have very strong opinions as to which is better, but both seemed very similar to me. It turns out that Reflectix is carried at my local orange box store. Prodex is only online and shipping isn't cheap. I have my suspicions that both are overrated. Both say they carried R-values from 3-31, depending on installation. (If it is installed with R-30 fiberglass it makes the system R-31, right?) Much of that R-value demands an air gap for the thermal reflection. Lastly, there are many different types of solid foam board. One particular type of foam, polyisocyanurate foam, has the highest R-value of any insulation I could find. Its value of R-6 per inch is not part of a system, but inherent in the board. It is sold under the trade name "Rmax" 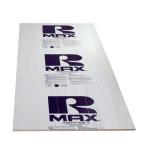 I was almost going to just install 1" Rmax and be done with it, but at the last moment I read a few posts by professionals on the airforums who use Reflectix. So I decided to use the Reflectix and 1/2" Rmax foam with an air gap between the two. This will give me a space to run the electricity also. By my rough estimate, the Reflectix will give me about R-2, the Rmax will lend R-3.2 and the approx 3/4" sealed air gap will add about R-2. So that gives me an R-value of R-7 in two inches. Here's hoping! I began my work today with the Reflectix.
It turns out that I'm really bad at making flat objects round: 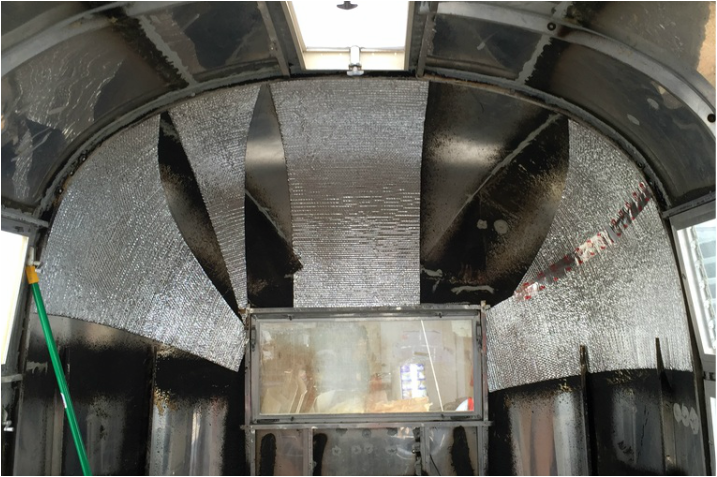 But no worries. I used a little left over Christmas wrap and it did the trick:
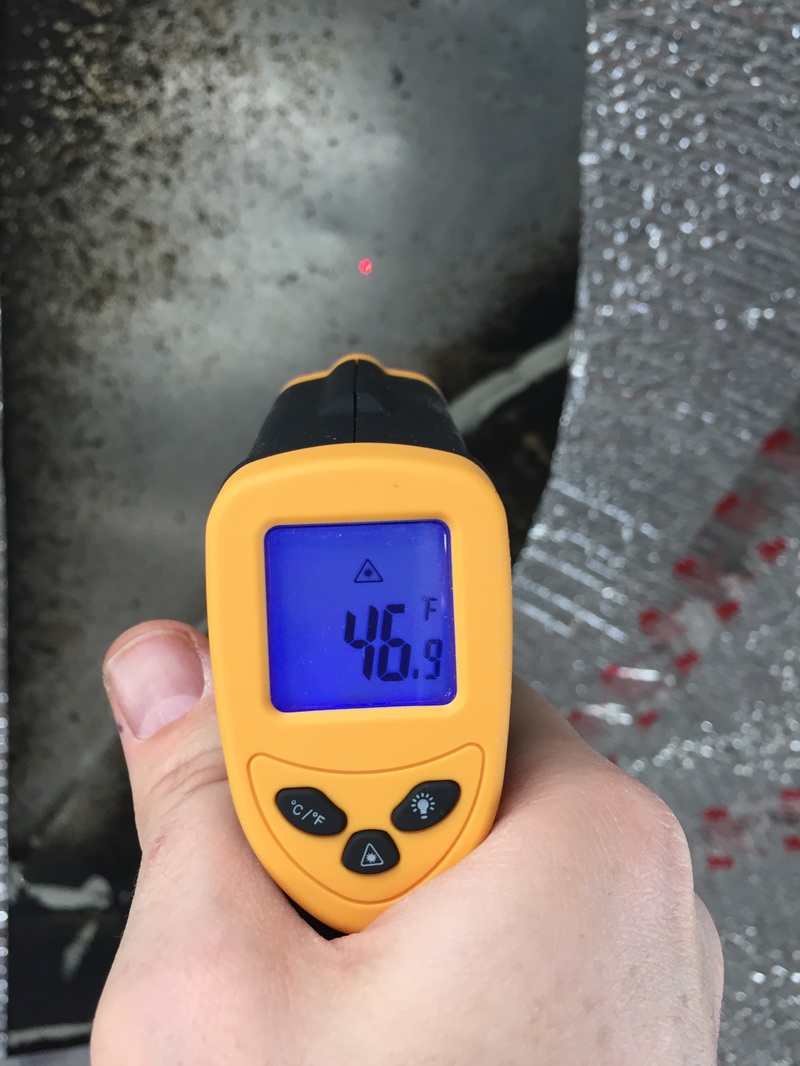
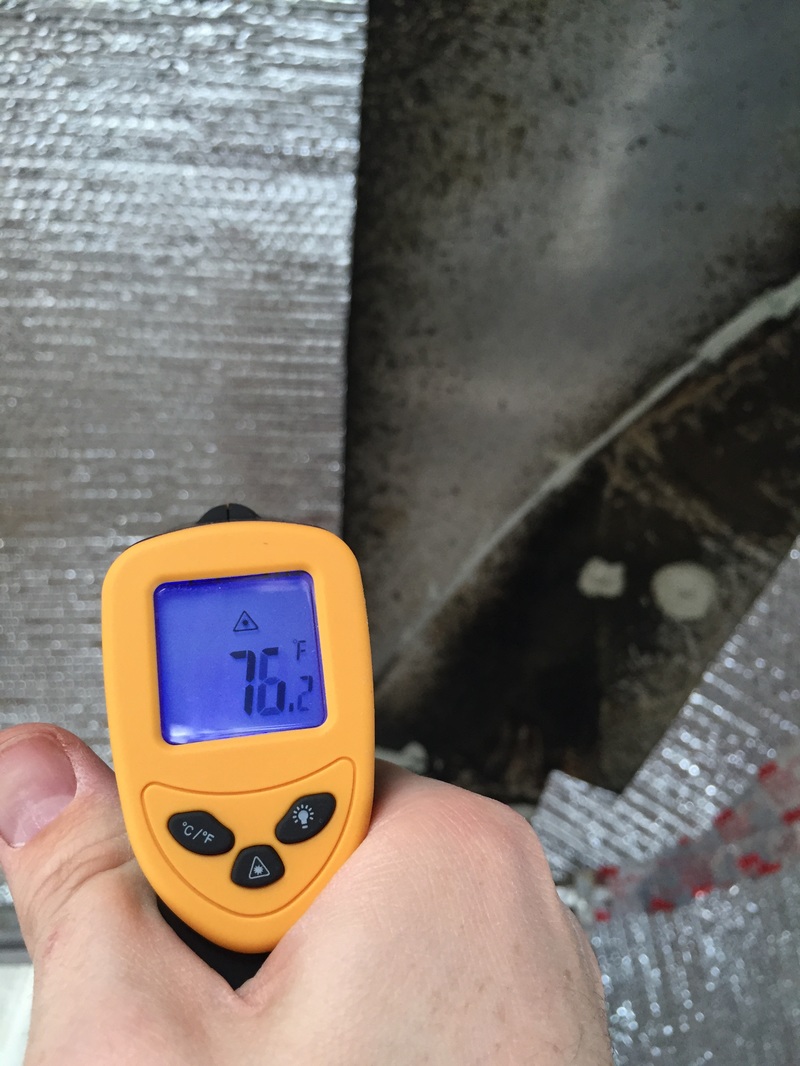
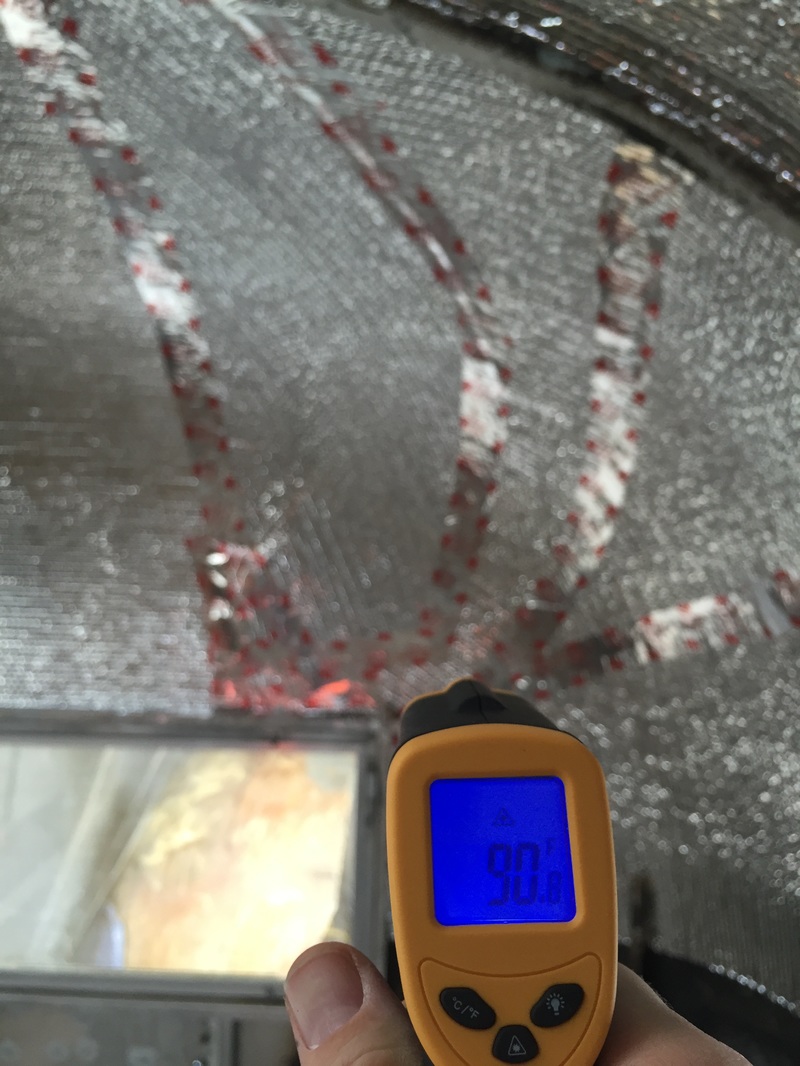
If you've read all the way to here, this is the coolest (or hottest) part of the whole post. Below are a few images of my laser thermometer. Now, it just registers the surface temp, not the amount of heat transferred, but this is just the Reflectix layer alone.
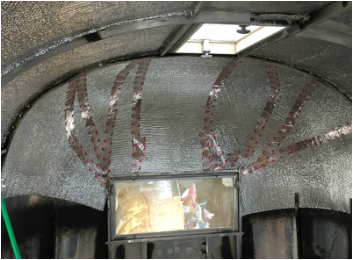
But here's the outside!! 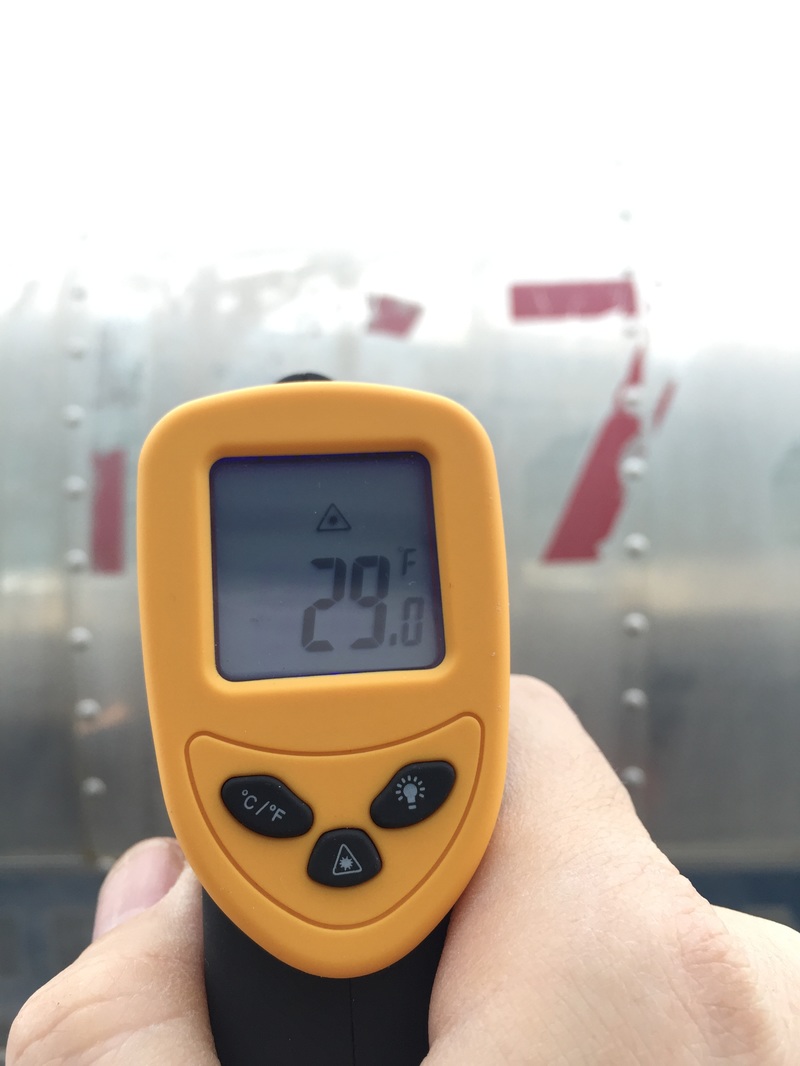 So far so good! And that's with only the 1/4" bubble insulation...
5 Comments
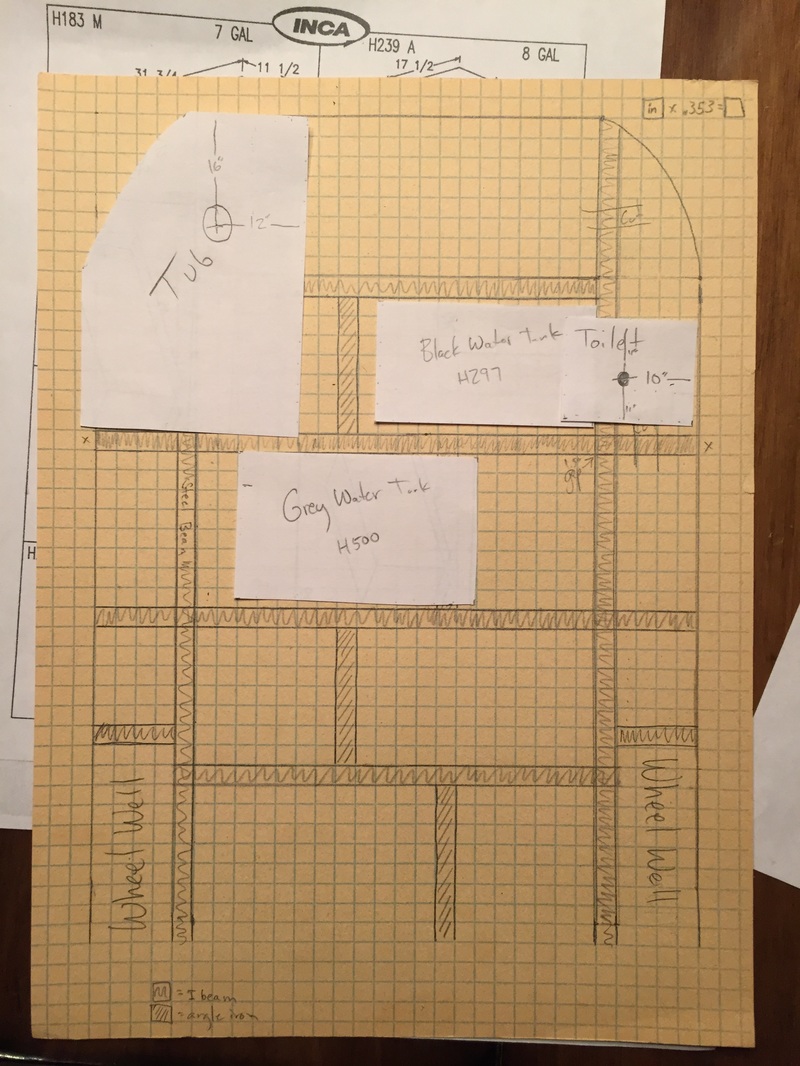
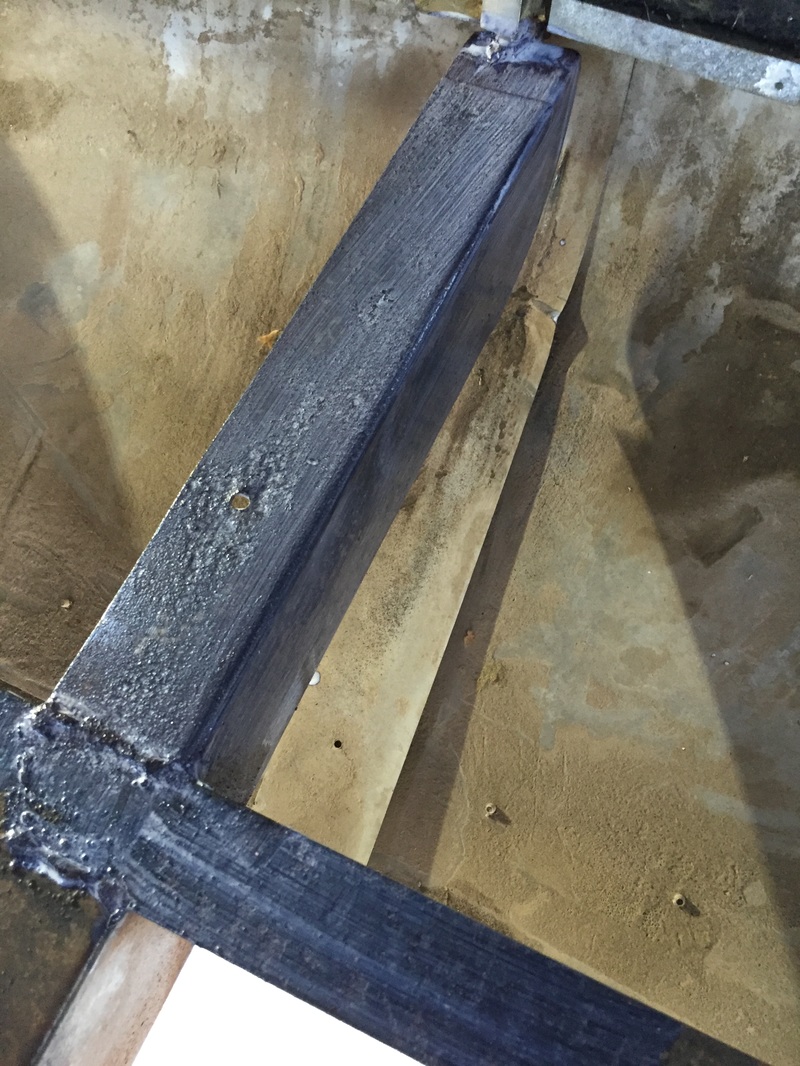
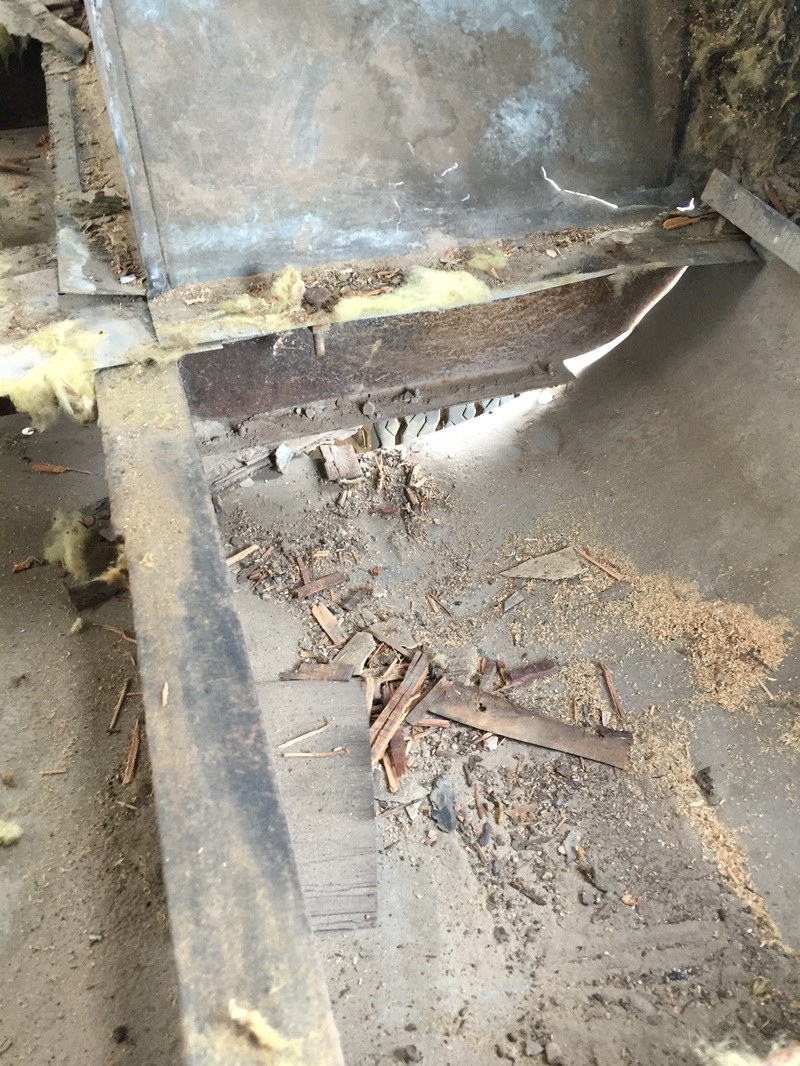
"This is for posterity, so be honest. How do you feel?" (Count Rugen to Wesley) A little like swearing, actually. It turns out all of my planning and time figuring out tank configurations was wasted (I'm not too upset for a pun). All because I didn't know one small, yet game-changing piece of information. The "stringers" or small supports running lengthwise are unnecessary for the structure. The years prior to and after do not have them. Colin Hyde said that they routinely cut them out and use flat-iron. 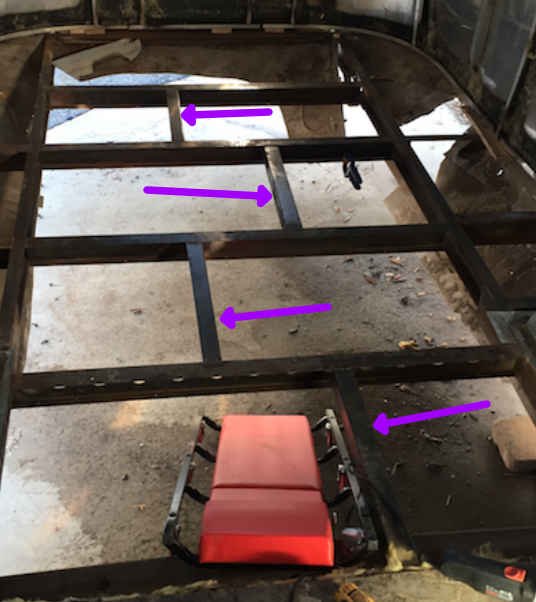 Stringers This means I could have cut them out and put wider tanks in the whole lateral space. Using the whole space means that I could have made the depth much smaller and fit the tanks inside the belly pan itself. My plan exposes the narrower, deeper tanks under the belly pan. This makes them exposed to road debris and camping/parking objects, like stumps. Of course, I didn't learn that the stringers could be cut out until after the non-returnable tanks have shipped. "Fezzik, do you hear that? That is the sound of ultimate suffering." (Inigo to Fezzik)
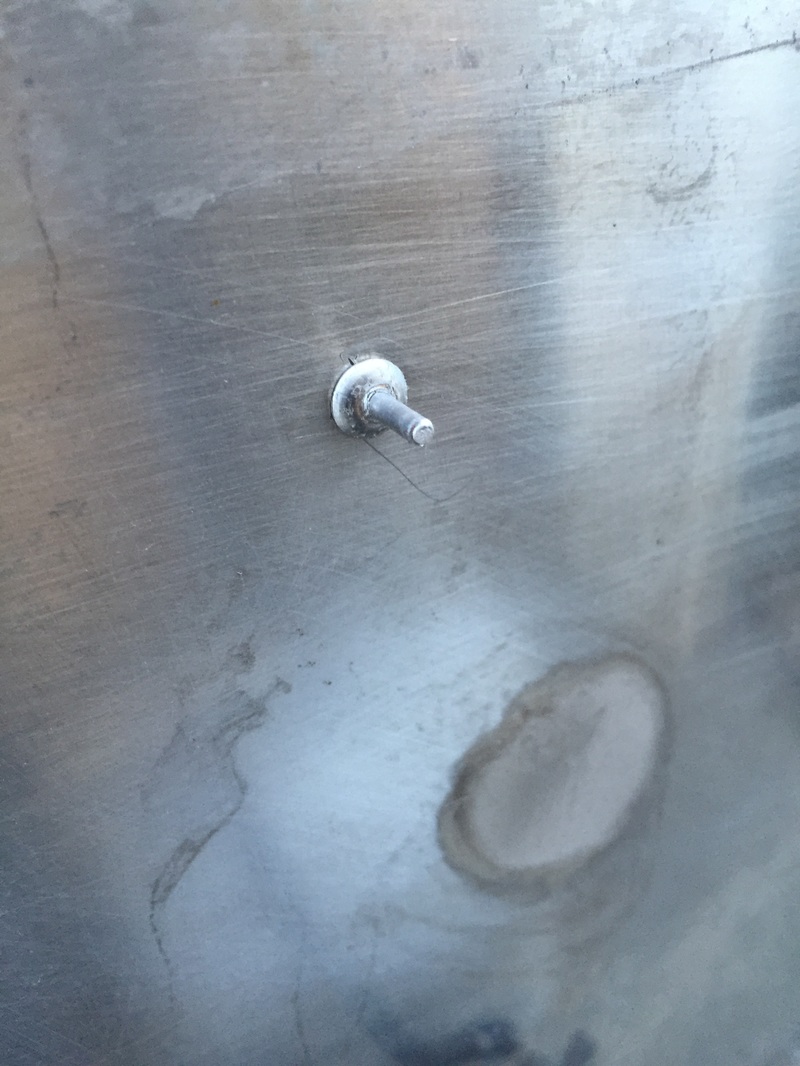
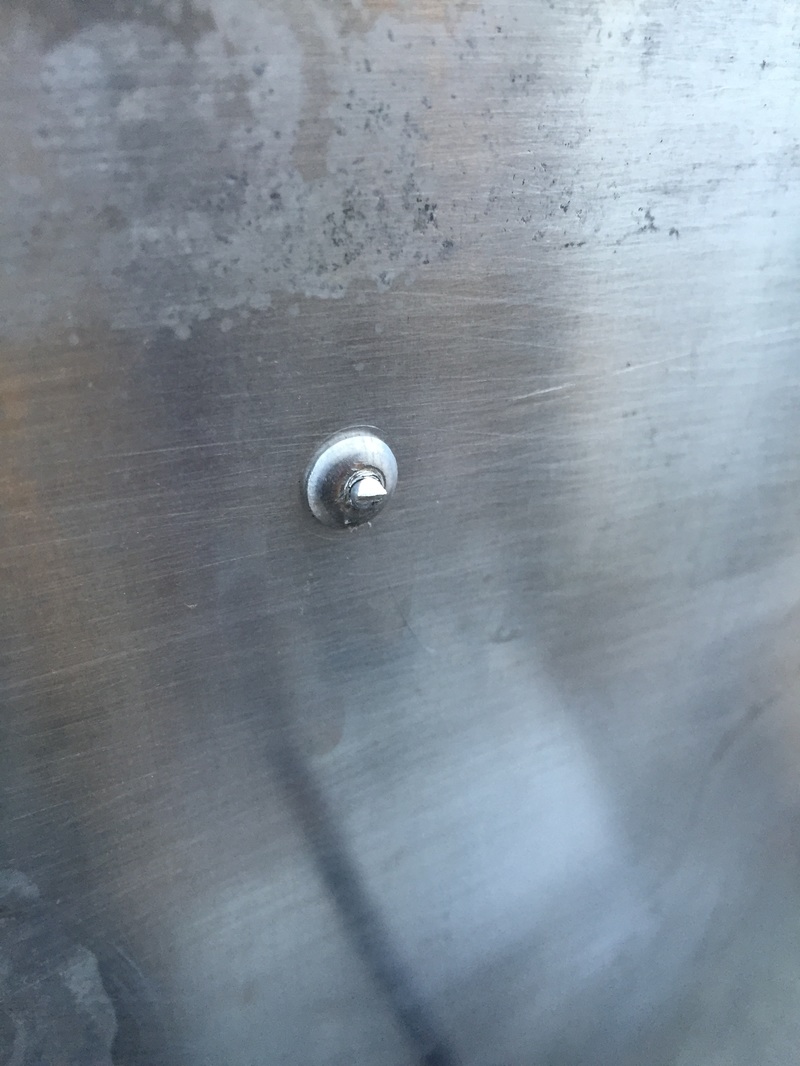
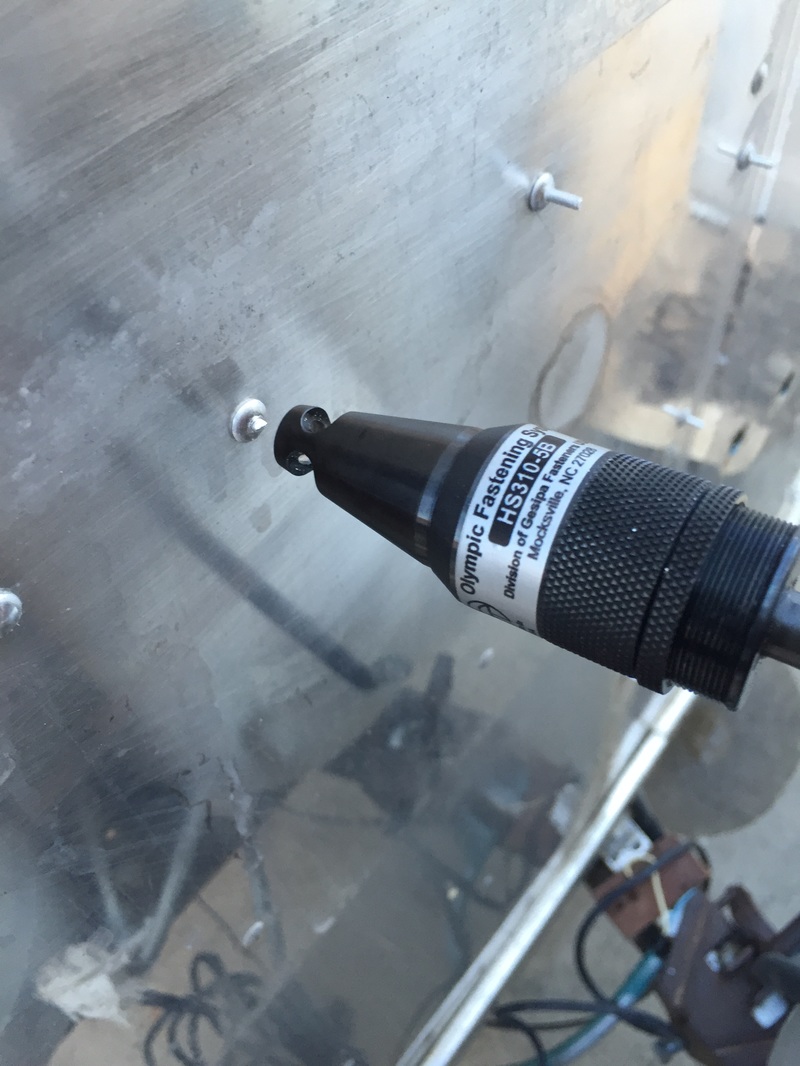
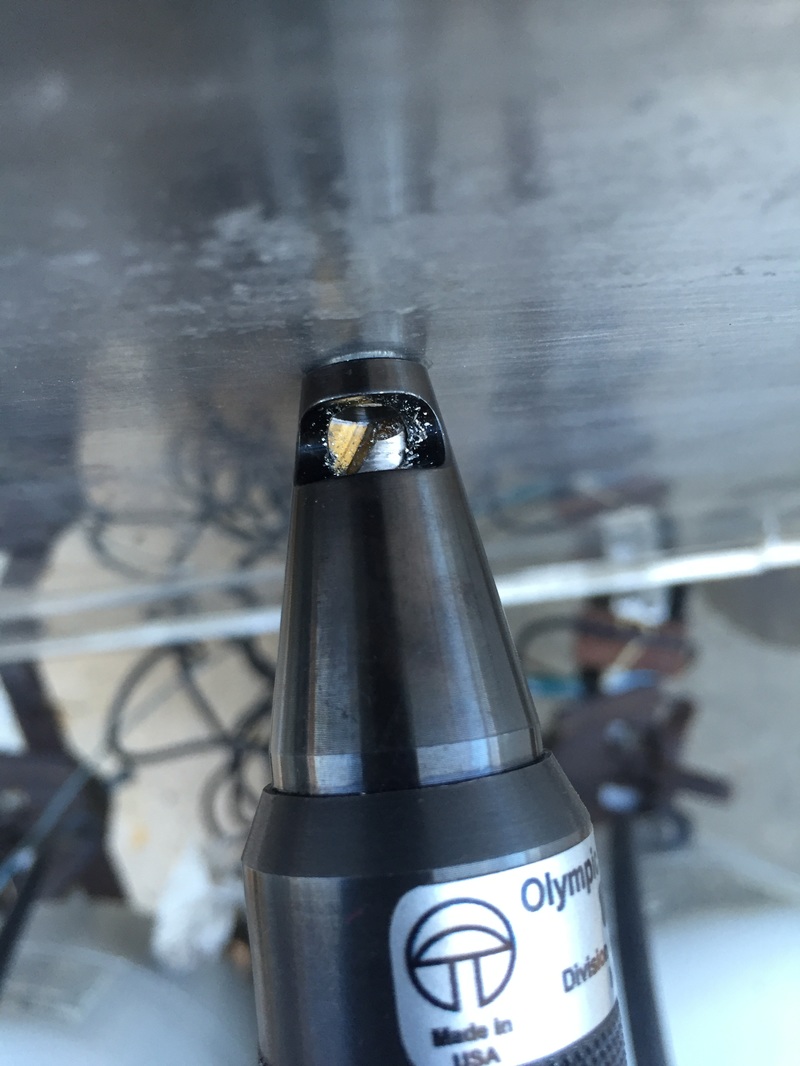
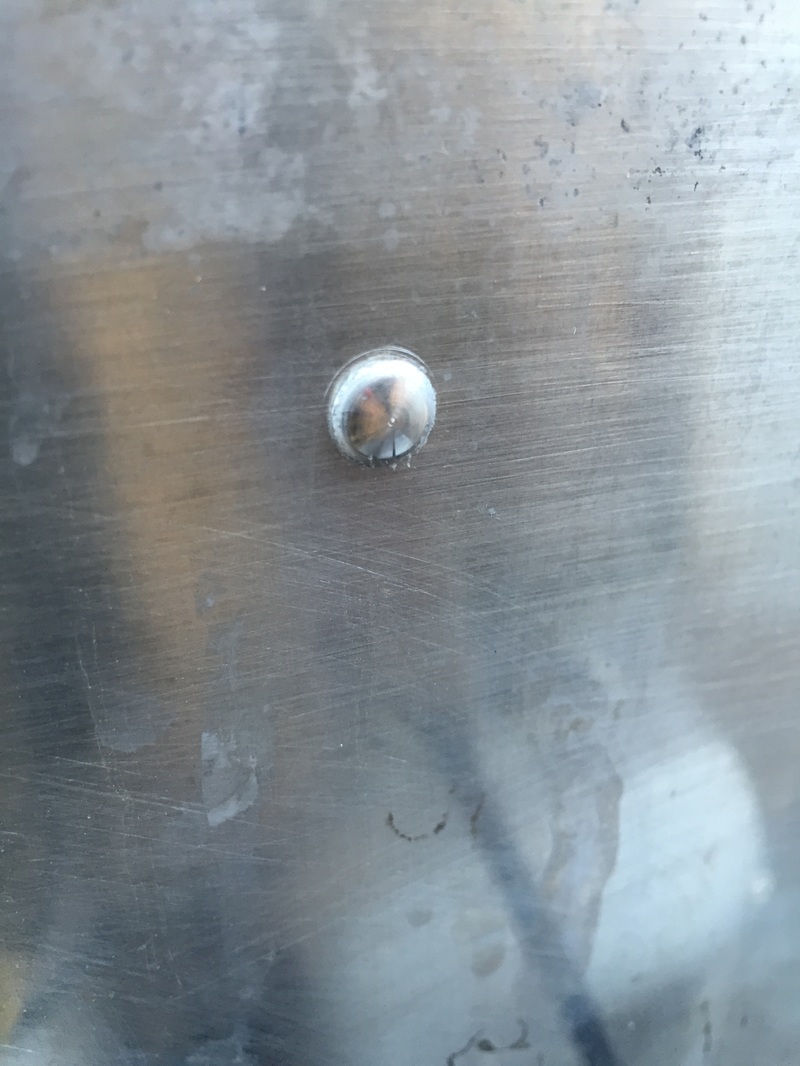
I may be mixing up my theme... This tool is the most expensive drill bit I've ever heard of. Any guesses? Here is what this expensive bit does: First, the olympic rivet shaft snaps off above the top of the rivet head on install with a rivet gun.
Second, the majority of the shaft needs to be snipped off. Third, the rivet shaver goes to work. It needs to be spinning full speed before touching the rivet. Fourth, the spring-loaded bit touches down on the head and shaves the excess aluminum. Last, the rivet head matches a bucked-style rivet.  The "other" names include: Road Kane, Padawan, Braveheart, Hotspur, and Argyrus Zephyr (I had to look that one up). I guess the best offering right now is the Aluminum Falcon but until it feels right, we're holding off on a name.
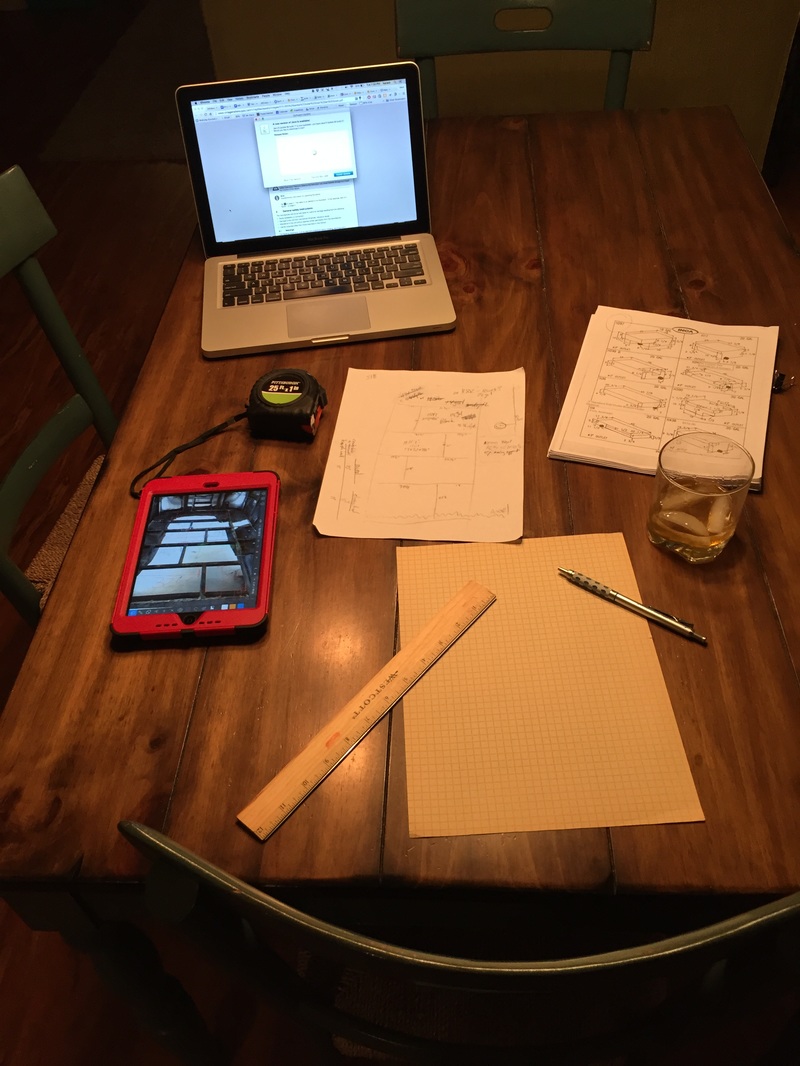
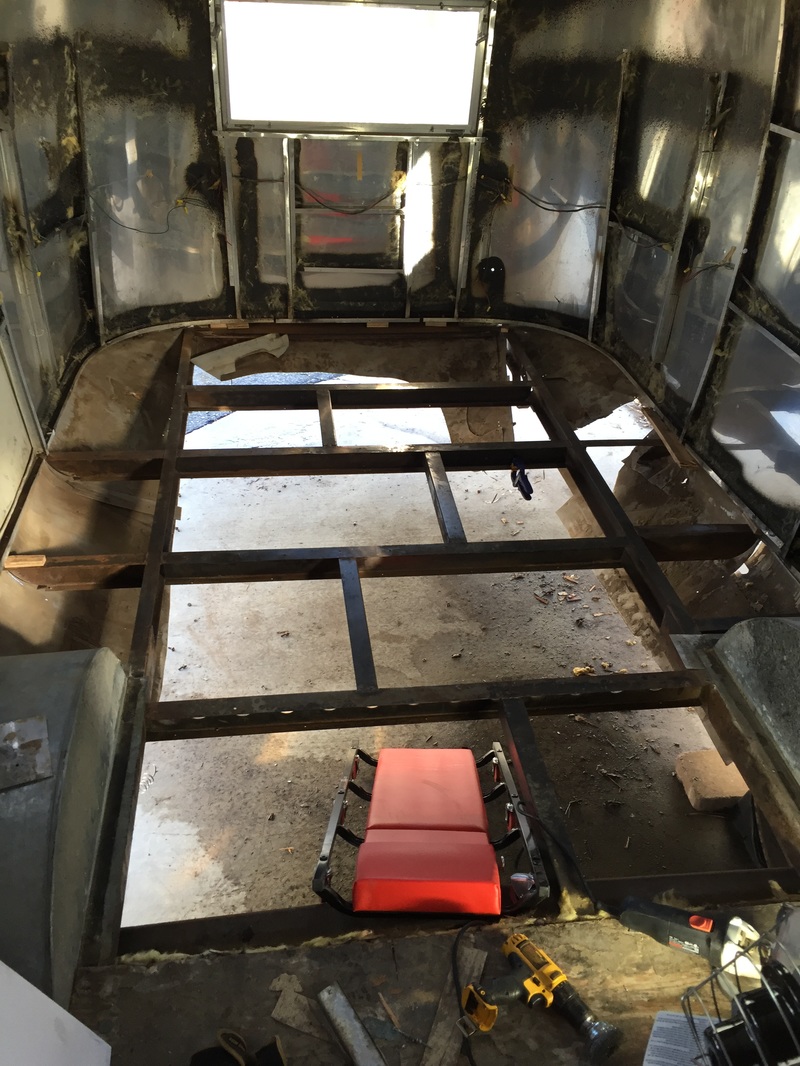
My progress is in somewhat of a holding pattern until the tanks that I've ordered come in. I do need to spend more time caulking, though. There are still many rivets that are unsealed on the inside. Ugh... More to come.  I went to order a new axle for the Airstream. After emailing and sending a photo or two to the Airstream Jedi Master, Colin Hyde, it seems unlikely that I have a 1963. Axles were not welded on in 1963, but mine is. It is most likely a 1962 or earlier, since that was the last year axles were welded. I've sent the Jedi Master a pic of my Airstream's serial number and we'll see. He is going to drop-ship an axle to Ratco Trailers here in Billings (sometime after the new year when I'm ready) and they will do the welding and install the axle. In the meantime, my restoration work has taken a new twist. I've had to measure and plan for the plumbing system that needs to go in before the floor goes back down. Since these decisions are north of $500, and are not returnable, I've been doing a lot of math and graphing. Irish whiskey does help make the process easier to bear
As a final note, I'm getting tired of referring to it as "the Airstream" or "my Airstream". Airstreams need to have a name. We've struggled to find a name. What do you think? -voting closed-
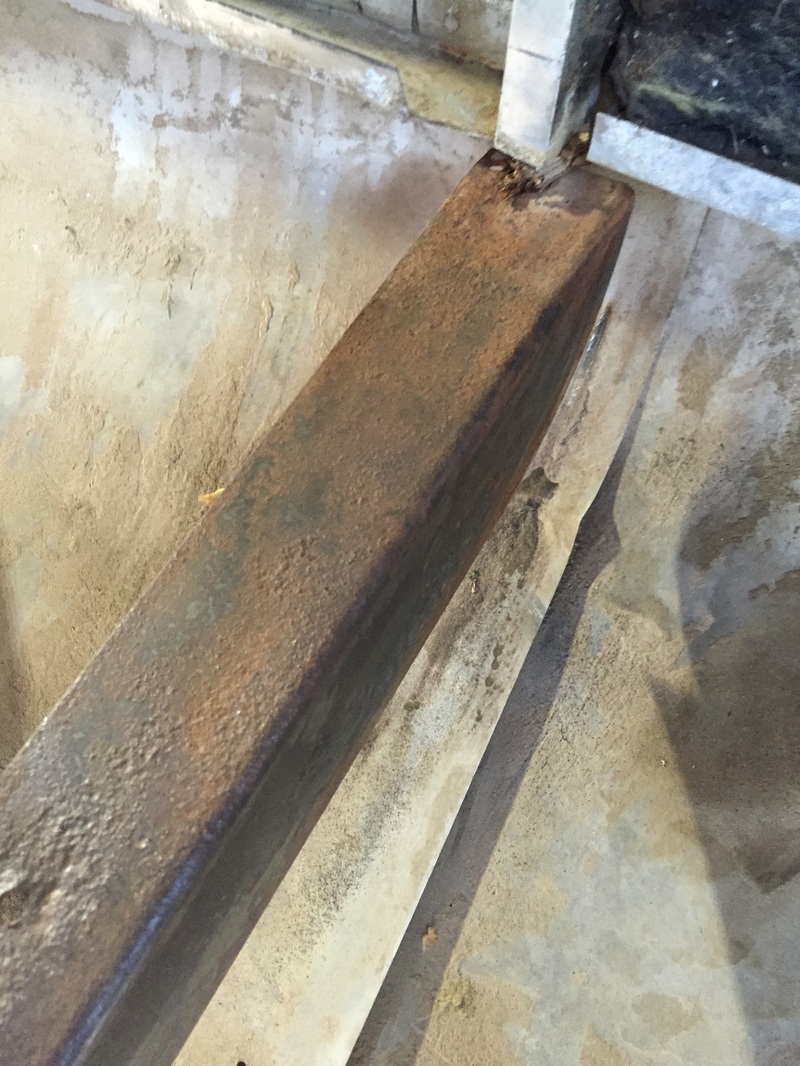
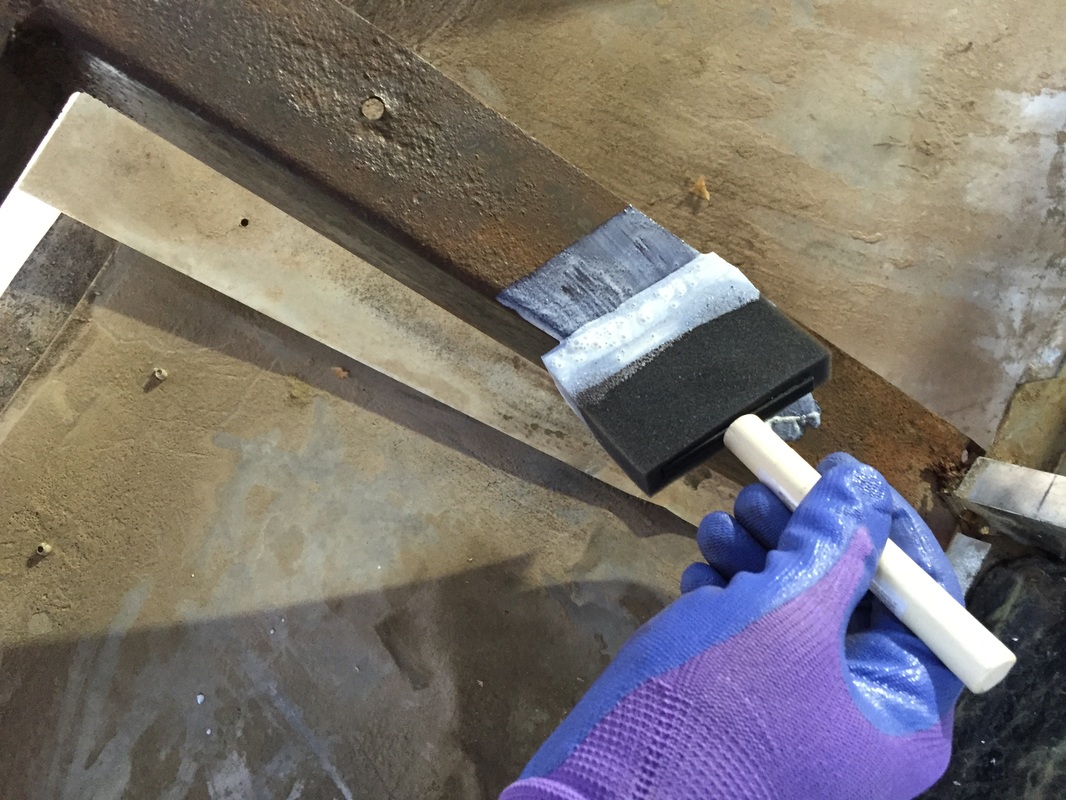
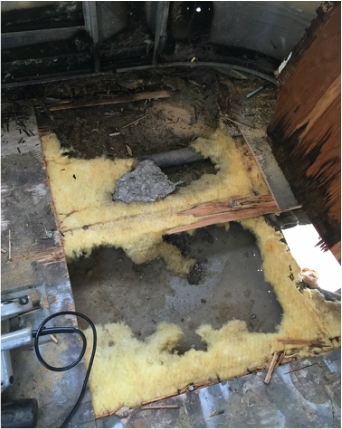
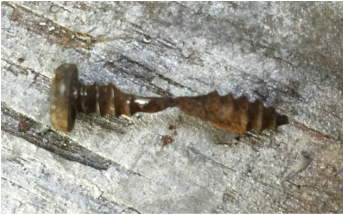
The rear frame had so very little rust that a wire brush attachment to my drill was all that I needed to remove the rust from the frame. There were a few places, mostly on the underside of the beams and outriggers, that had rusted a bit more deeply. Still, the worst of my frame (so far) has been nothing like the stories on the airforums. The top-left photo above was the worst outrigger of the rear end. No holes and still very solid metal, but it was uniformly rusty and slightly pitted. I know all the literature (or nearly all of it) says to use POR-15 to encapsulate the rust. POR-15 is the automotive standard for restoration buffs. I've got nothing against that product, but I wasn't willing to pay the premium - in dollars or in skin. POR-15 is expensive in both, or so everyone says. I used a product that is virtually unmentioned in the airstream world - Corroseal. It is an acid-based rust converter (similar to Ospho) that seals itself into a latex metal primer. It chemically changes the rust into not-rust. I don't think that's the technical term, but you get the idea. The first picture above is bare metal, the second is moments after application, and the third is after curing for a few hours. Sure this product isn't hard-as-nails like POR-15. In theory the paint/primer could come off and rust could come back someday. But it took 52 years to get to this point; I'm pretty sure this buys me another 50, maybe more. Ben can restore it again when I'm 86. My next step is ordering black and grey holding tanks. The grey, if not the black too, will need to be mounted under the floor. Then I'll replace the floor and move to the front. I hope the rust isn't too bad up there! Here are a few more photos from today: After the slow success of yesterday, I decided to try to remove half the belly pan today. Like yesterday, it was slow, dirty work. It felt successful because of the dramatic change, though. Opening the belly of the trailer to the ground felt huge. It went from totally closed (ok mostly closed):  To open to the ground:  Here is the obligatory, standing-on-the-ground-inside-your-airstream photo. I guess this photo is required to prove you've done the "fully monty" in the airstream restoration world. <You can insert your own joke here.>  Last, I used a grinder and ground off the elevator bolts that gave me so much trouble when removing the plywood sheets. I'll need to put new ones back in, but Airstream bent all of the bolts to prevent the nuts from backing out. So these had to be cut out. I feel like such a badass when using an angle grinder. 
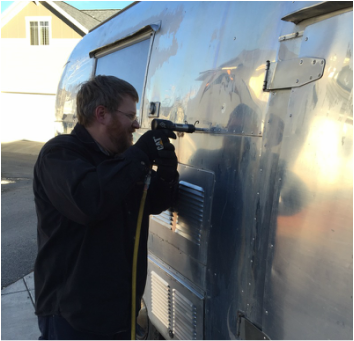
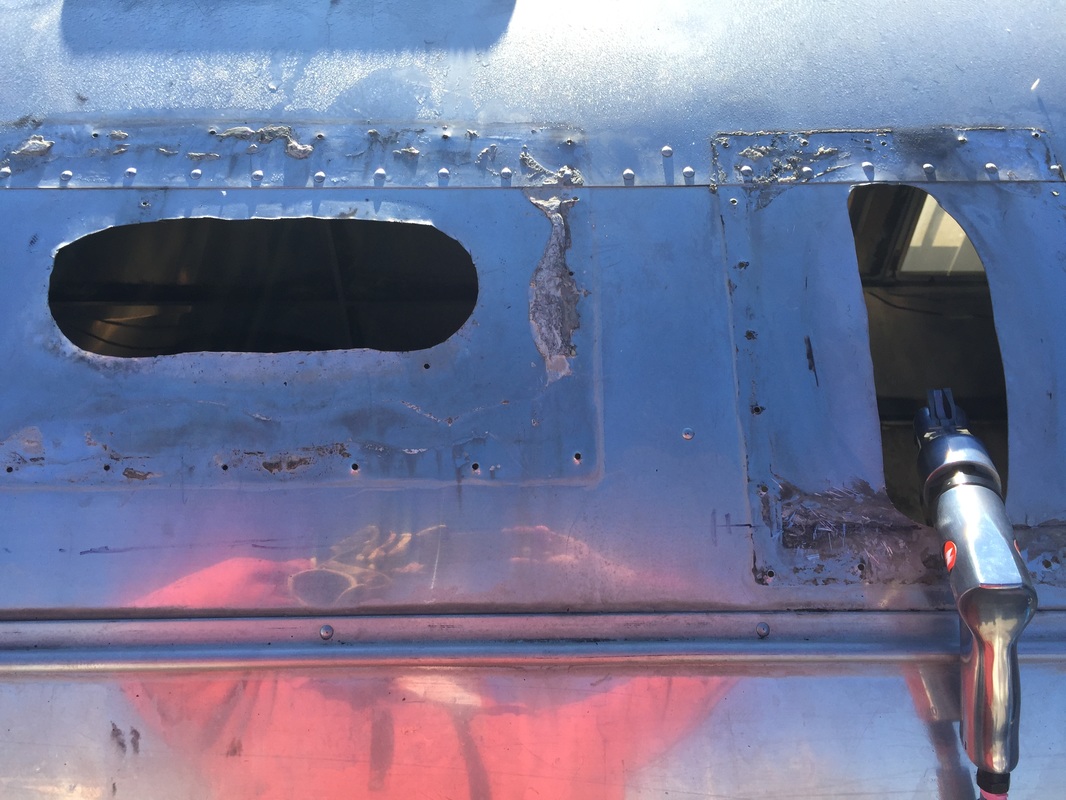
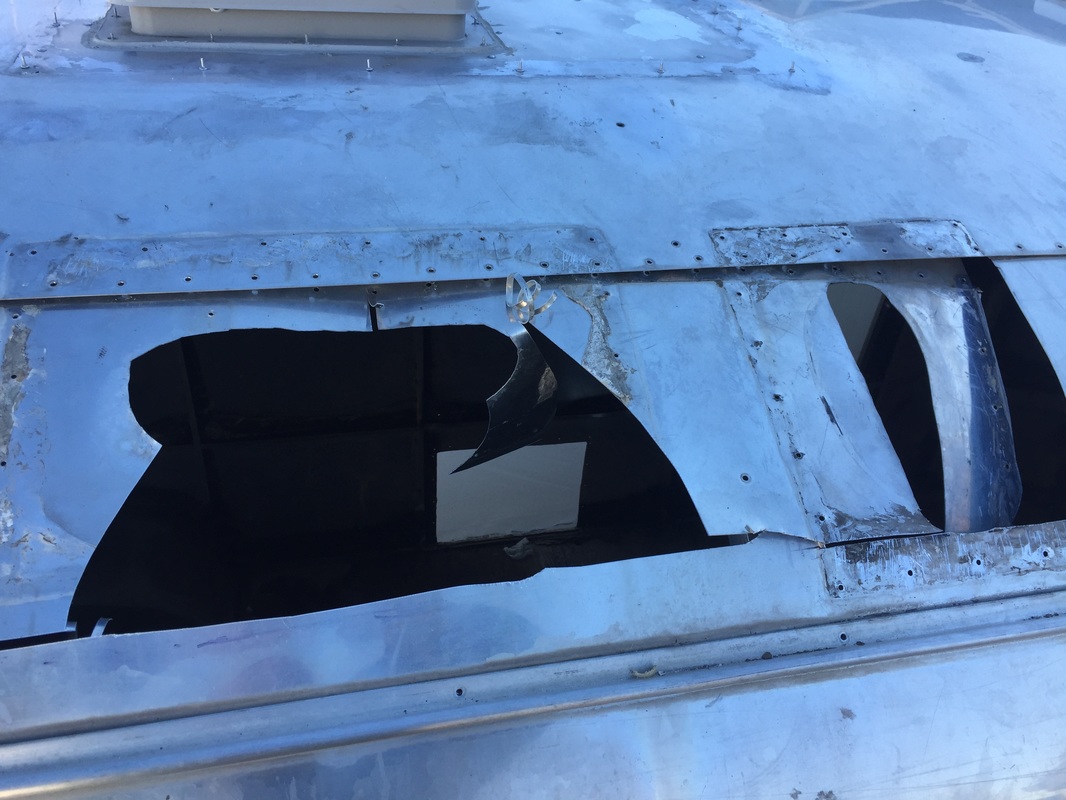
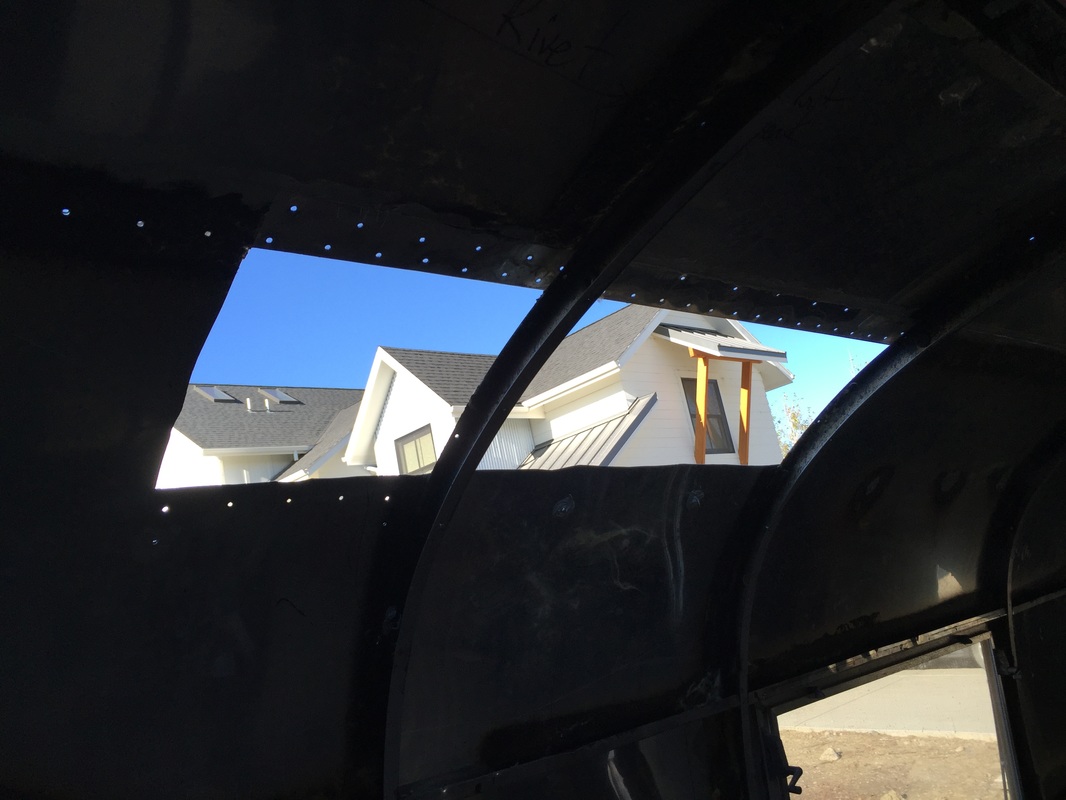
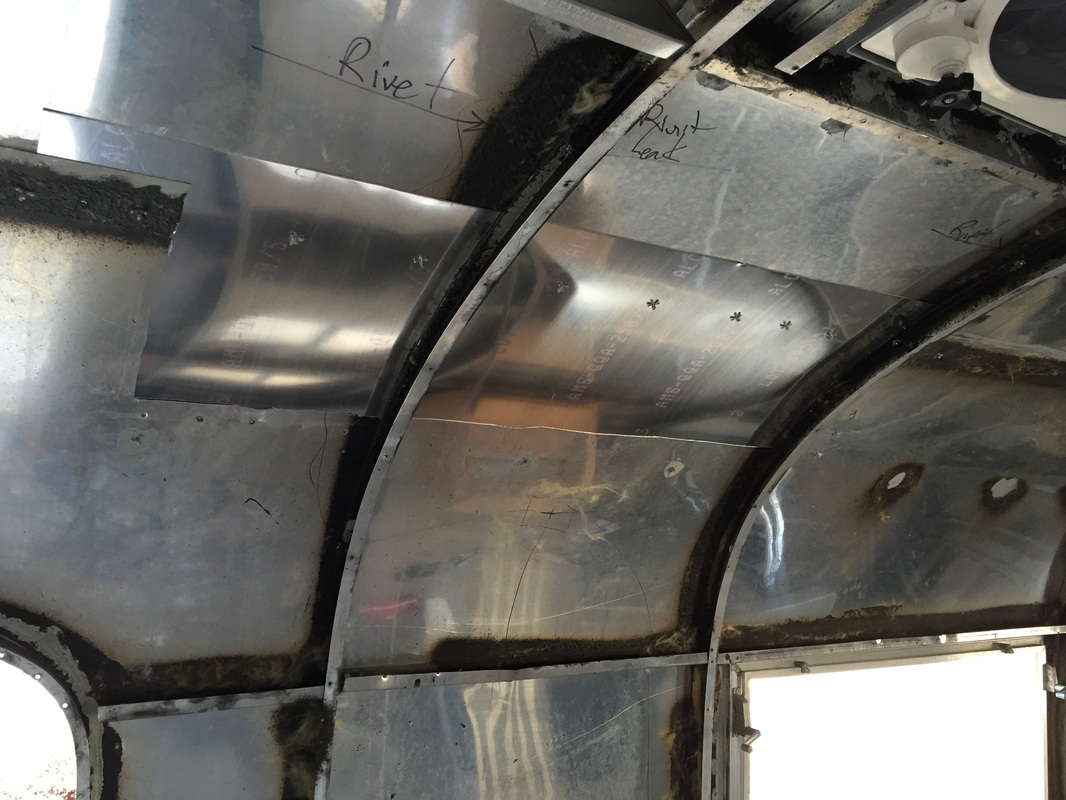
If beer can't help your your DIY project, it's not worth doing. In two different ways, my Airstream's watertightness comes thanks to Guinness.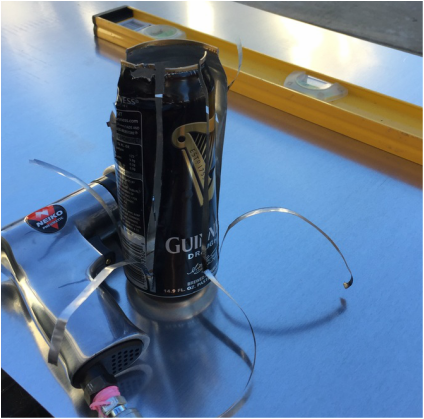 First, I had to scrap my plans for a skylight up front. I called every glass manufacturer in Billings and described my project. Every last one turned me down after they heard the install. After the first few rejections, I started to realize my idea might not be so sound. I still called every glass maker Google found in Billings. Sometimes it's best to listen when no one else thinks my ideas are good. 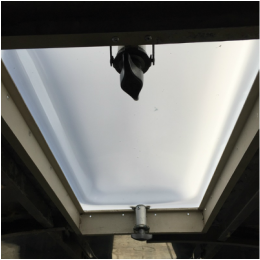 Plan B has been to install the new-vintage lexan vent cover called an "astradome". (Ugh! Expensive plastic!) In order to do this I had to cannibalize the vent operators (the knobby things on the right) from the original vent in the back. New operators cost nearly the same as a state-of-the-art, rain-sensing, thermostatically-controlled Fantastic Fan. So, yeah, I bought a second Fantastic Fan for the back and used the vintage parts for the front. 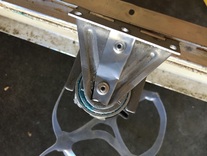 The old parts, though, had one problem. One operator had a tendency to spin rather than lift. A strip of a Guinness can, folded on itself and riveted into place, made the whole thing work. 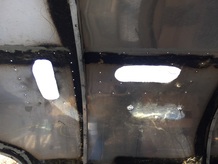 Next, I had two major holes from old appliance vents. Each vent was surrounded by a couple dozen rivet holes. These holes have been a source of anxiety for me because I could never figure out what to do with them. Eventually I'll need to put in a fridge vent, but the modern cover only needs four rivets, not over 20. The second hole was from an old (and dangerous) water heater and was totally useless. I bought a sheet of aircraft-grade alclad aluminum (alclad means that the aluminum alloy has pure aluminum coating the exterior - which makes it polishable) just like the original stuff. For most of the day, I had this vomity feeling as I cut a BIGGER hole in the skin of the Airstream. A Guinness can helped me practice cutting aluminum. The first cut on the Airstream was the worst! I must have measured a dozen times in different ways. In the end, I planned on having extra overlap on the inside top of the patch (which you can see in the last pic above) so that I knew I would not have too little overlap. I'm not quite finished riveting, but I've done several happy-dances. The entire patch went exactly according to plan. When does that EVER HAPPEN?!?! 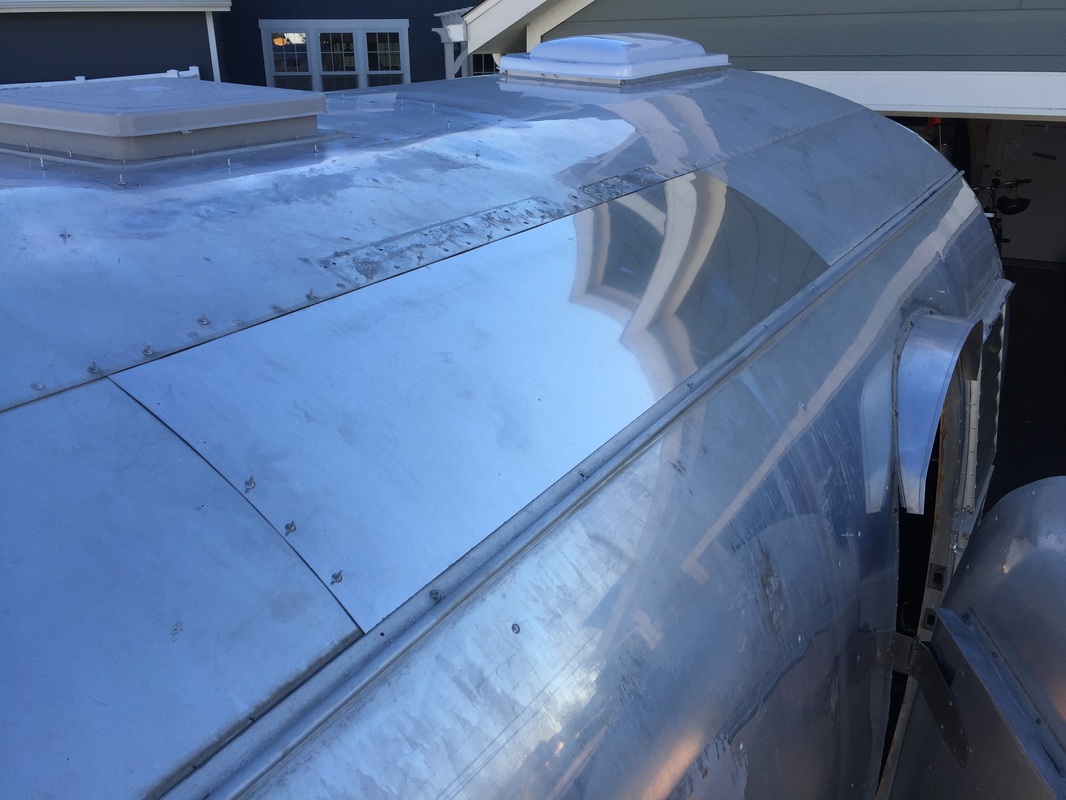 The new aluminum is shinier than the rest, but less shiny than the whole thing will be when polished. I guess it will even out over time. The new astradome is visible up front. |
AuthorI'm not an Airstream Jedi, yet. Airstream Jedi would have sounded presumptuous, like I know what I'm doing. That couldn't be further from the truth. Padawan is a title I can hope to live up to. Favorite Links:Knots Per Hour
My friend Mike is building an airplane. Check it out. Archives
August 2018
Categories |


 RSS Feed
