|
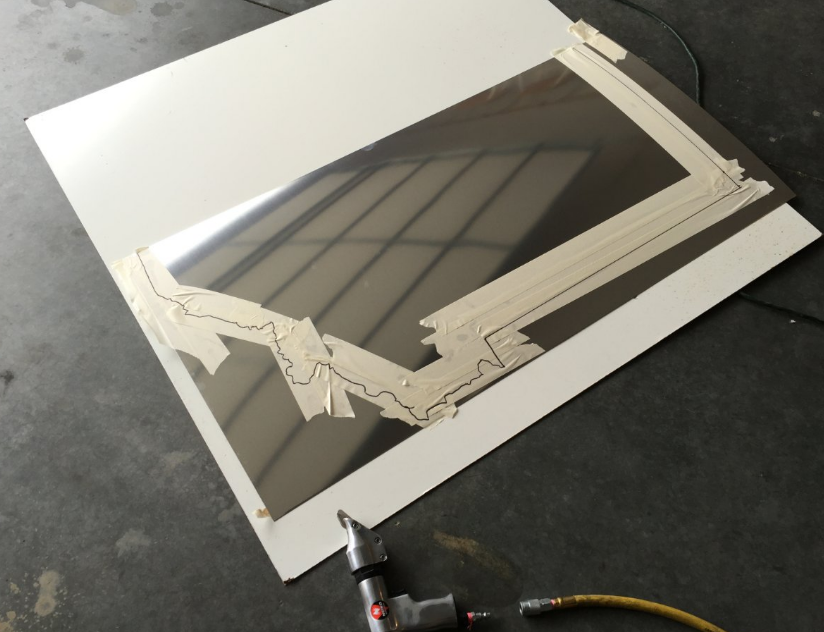
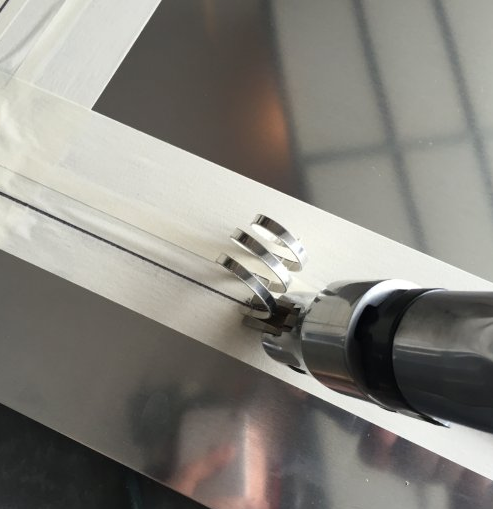
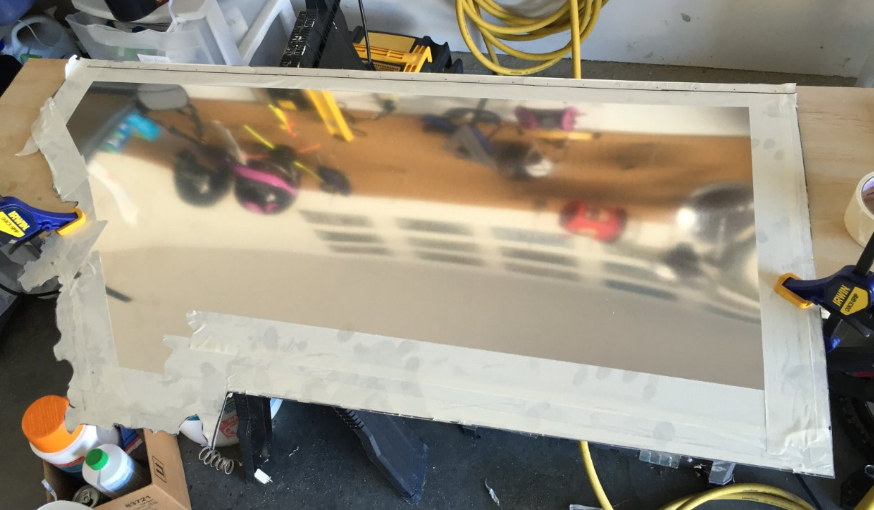
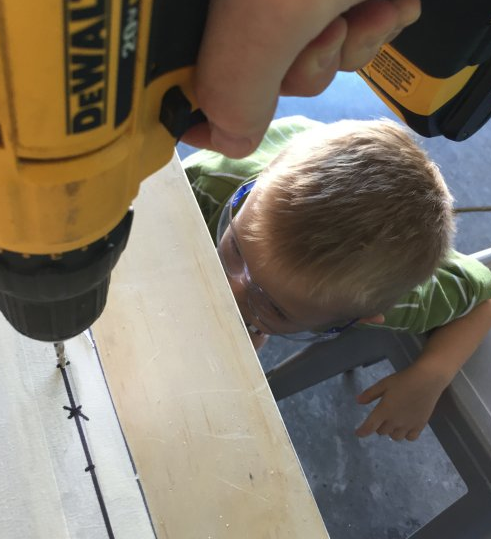
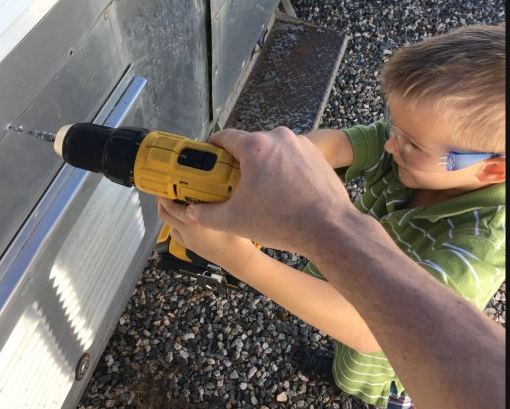
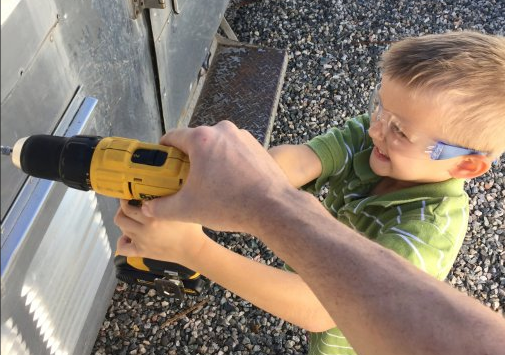
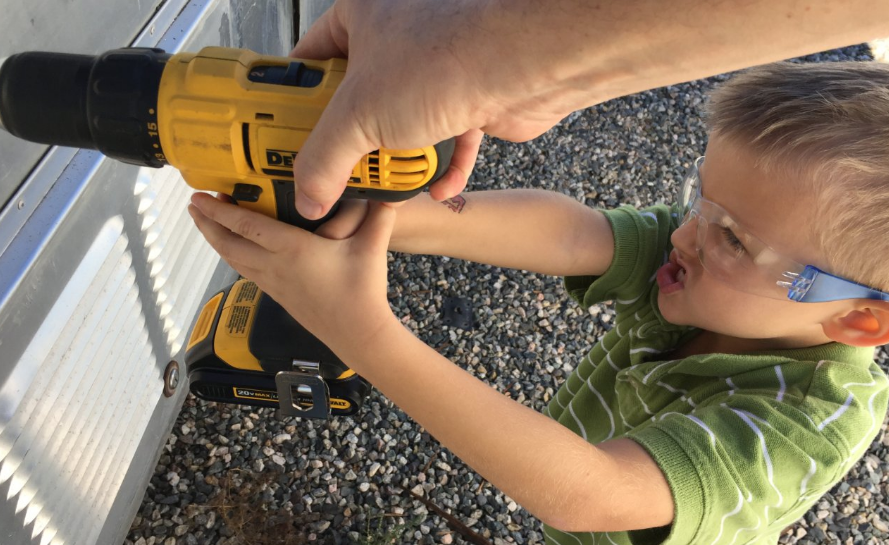
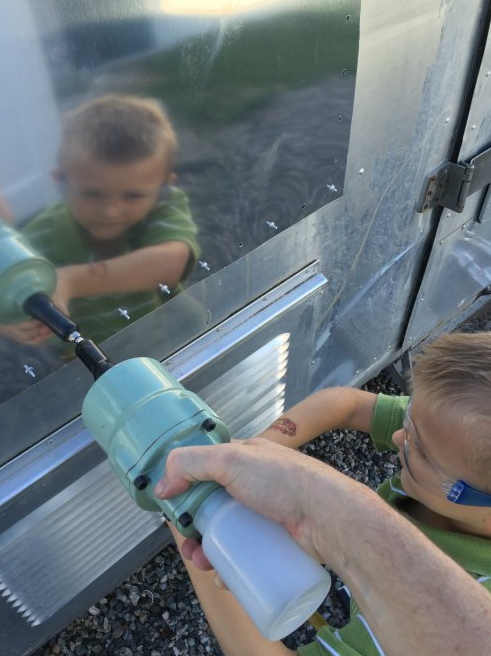
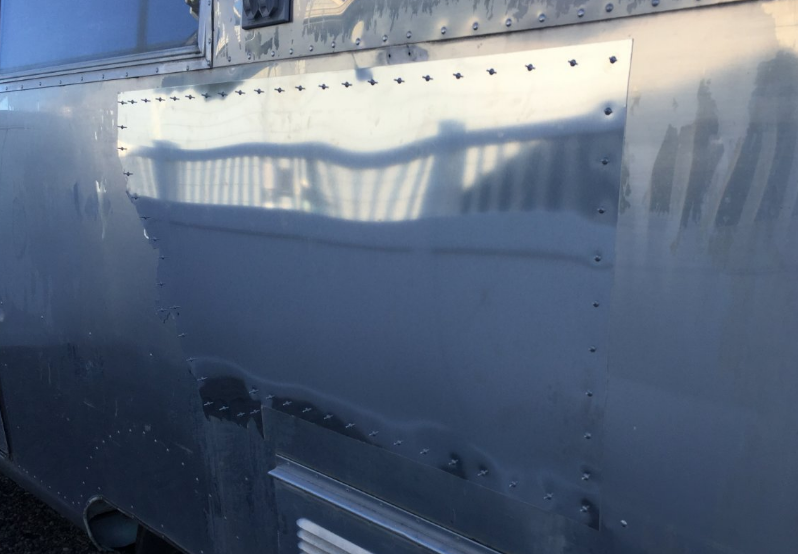
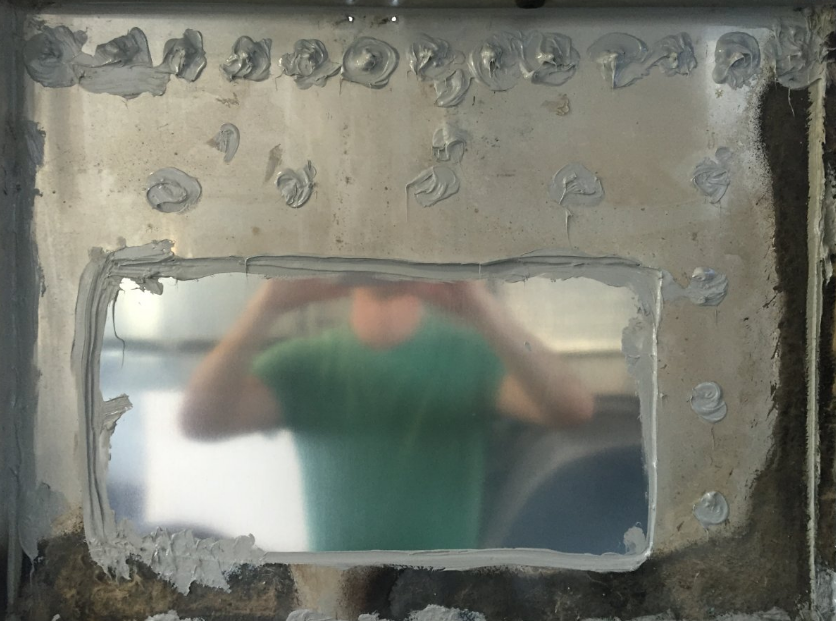
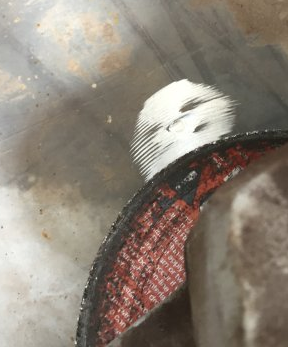
This week I made me some 406 art: 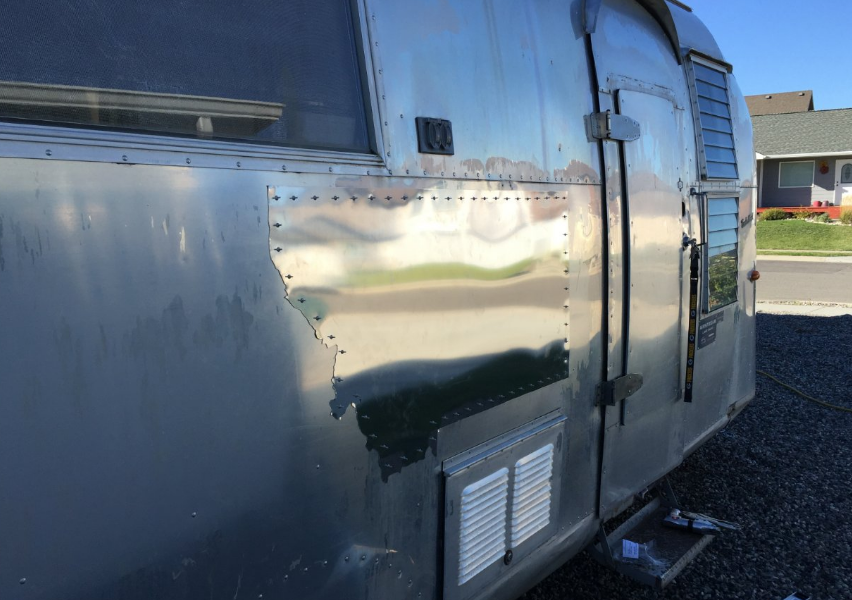 On Friday, it seemed like a rainy weekend in the making. It turned out pretty nice, but since it looked overcast, I decided not not paint the frame. I've had this idea ruminating about a 406 patch on the outside of the skin. It needed a patch, so rather than make it square, I decided to make it artistic. Here's what I did: On the old photo below, the top grill next to the door was not original and not done well. Plus the door handle had repeatedly slammed into the skin when the door caught the wind, creating a large dent. The bottom grill needs love, but it is original, so It will stay.. 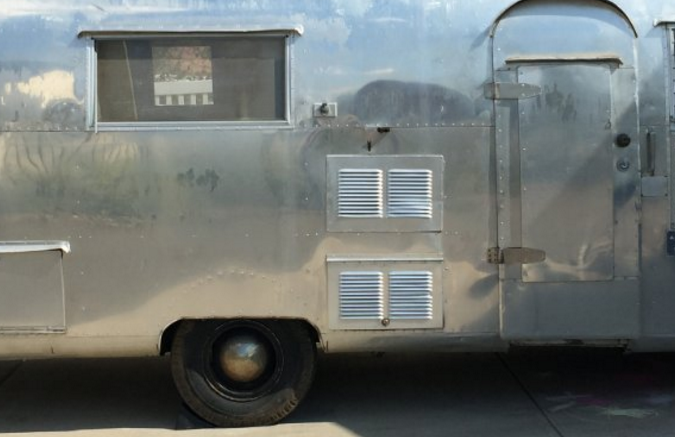 So first I needed to make the patch itself. Sara found a $10 projector at a garage sale a few months ago. It only runs for about 15 minutes before overheating, but that was plenty of time. I found a map and projected it on my aluminum in my darkened garage. 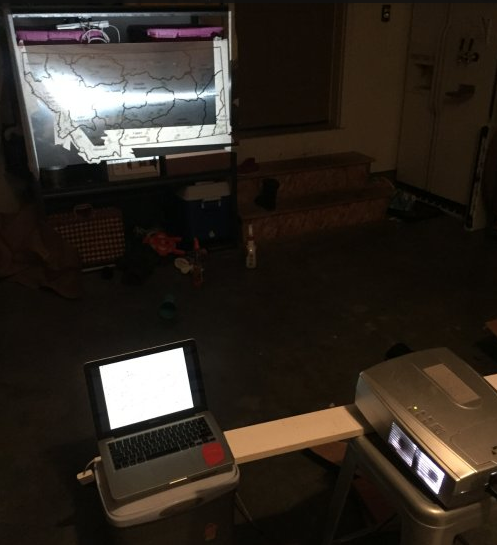 I put masking tape down and used sharpie to trace the pattern. It pulled double duty - easier to mark on and protection against scratches. After I had the pattern, I cut the straight borders of Montana with my pneumatic shears. However, it's impossible to make curves with those. I tried just about every tool I owned to cut curves (first on scrap metal) like the western border of Montana. In the end the scroll saw worked the best. After that I had a helper. We drilled the holes for the future rivets and removed the old grate. Sorry about the gratuitous photos, but I'm a dad and his face makes my day. Under the grate, the hole was rough and jagged. So I evened it out with my pneumatic shears and and cleaned it with steel wool. After that, we put the new patch up on the side, drilled the holes and filled them with olympic rivets. Eventually, I'll need to shave down the rivets to match the look of bucked rivets. But that's for another day.
0 Comments
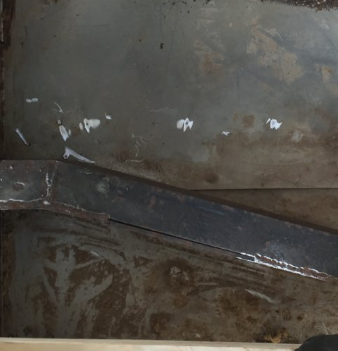
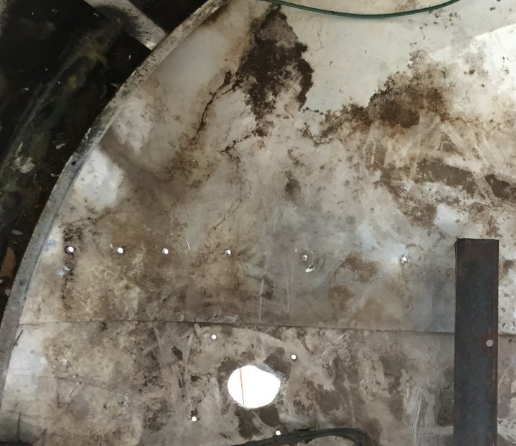
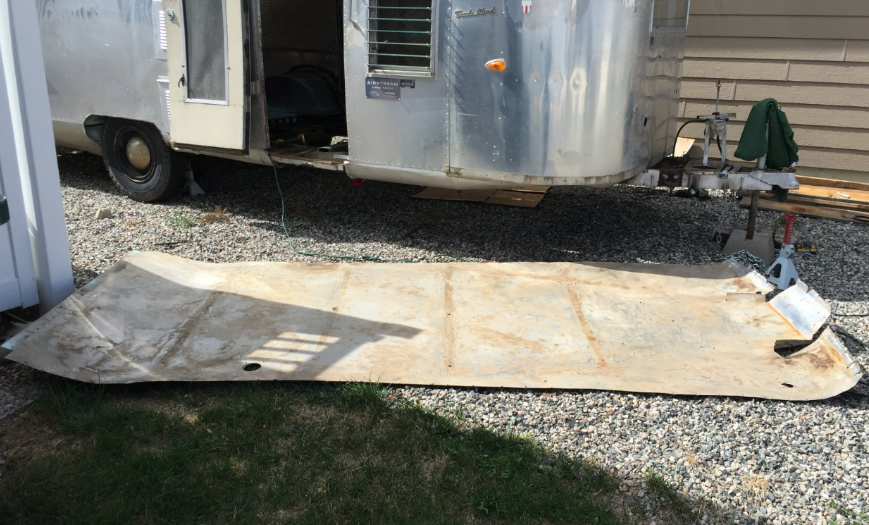
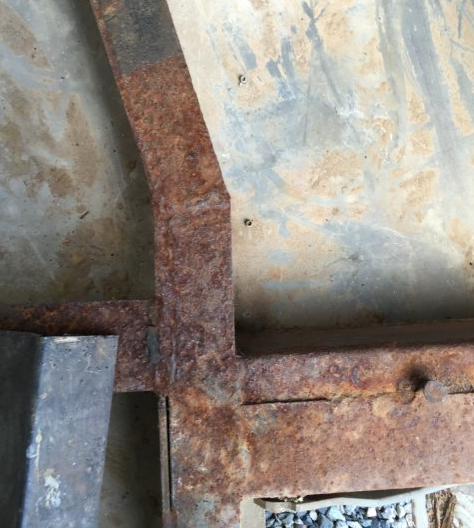
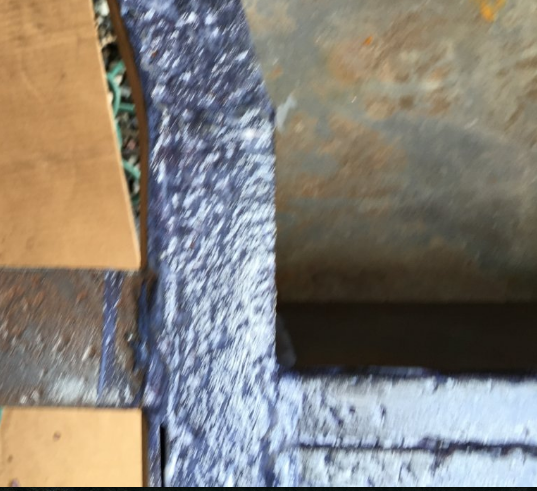
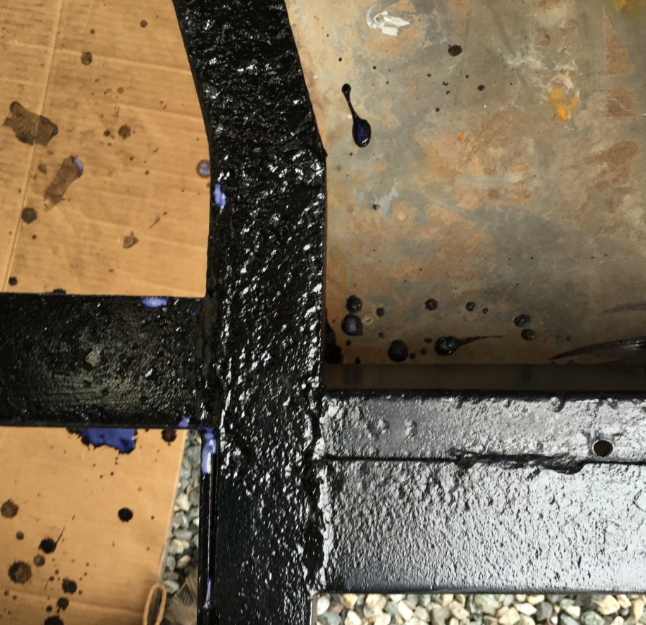
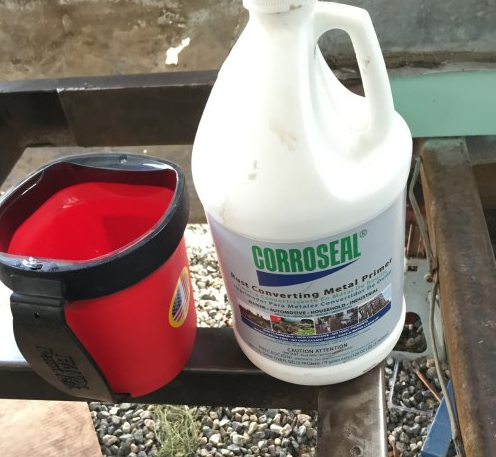
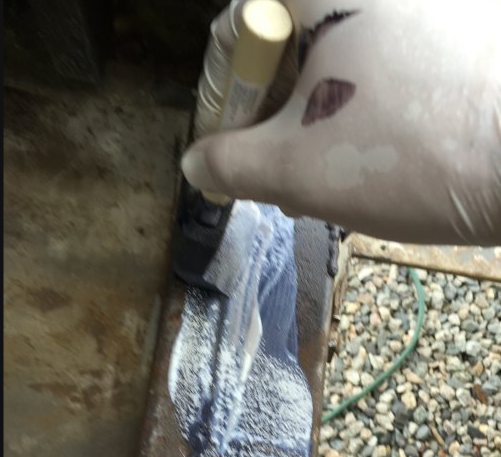
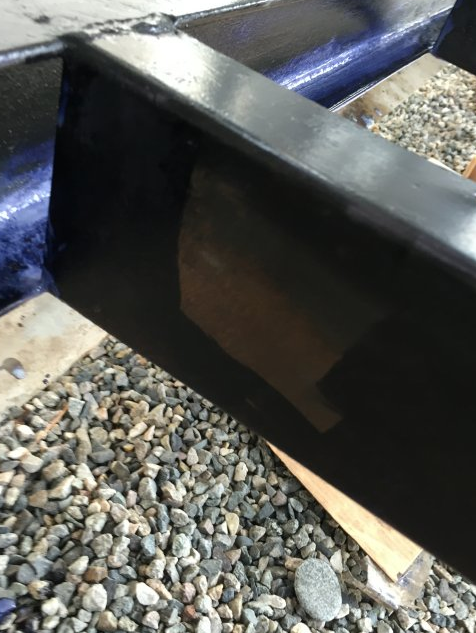
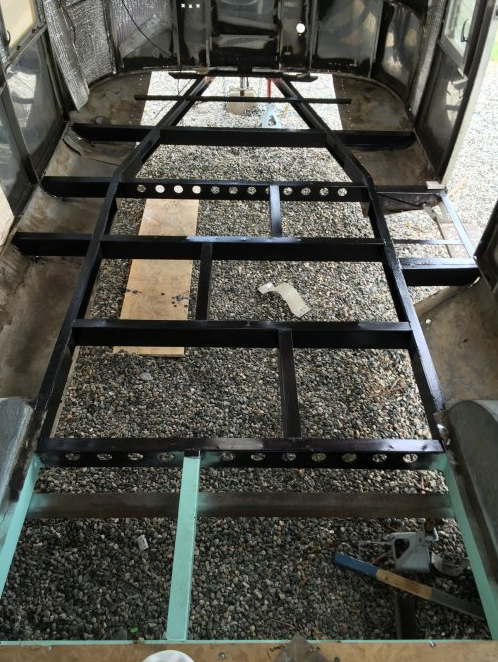
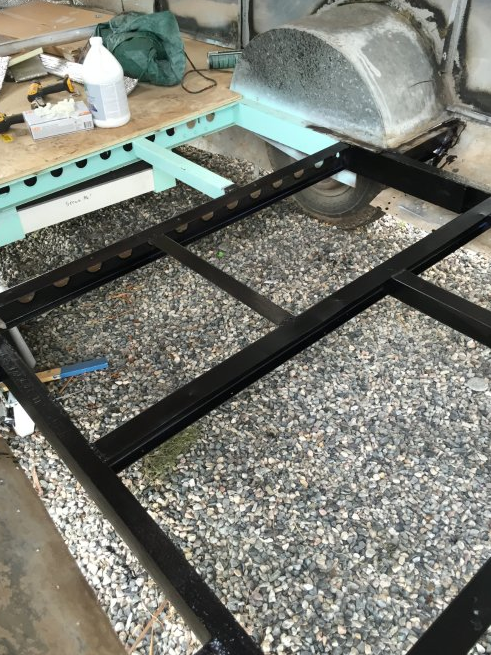
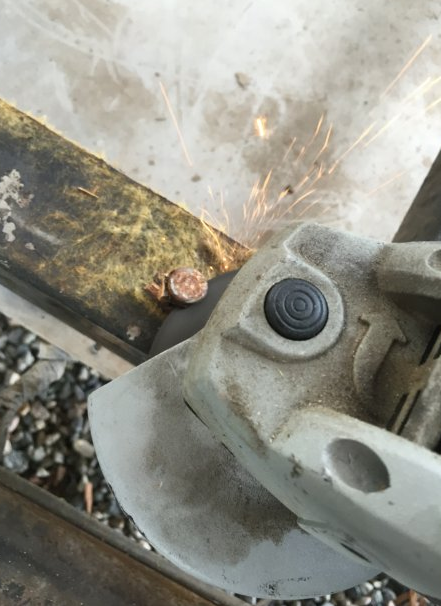
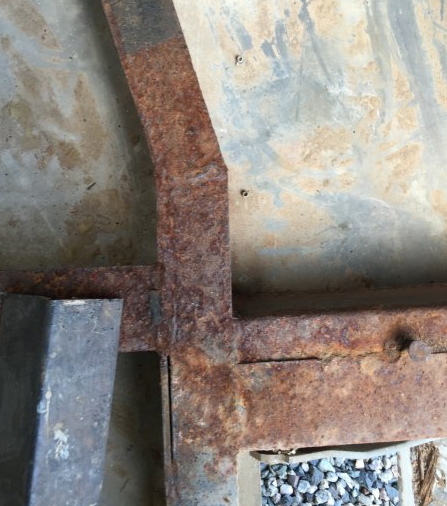
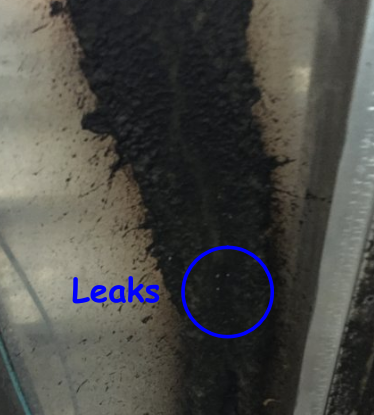
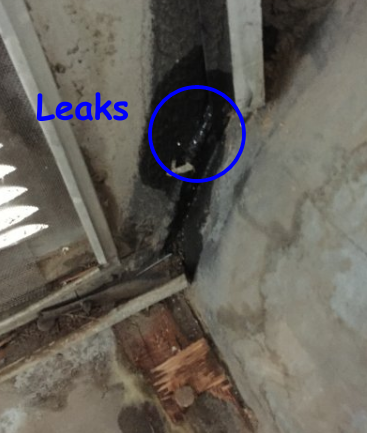
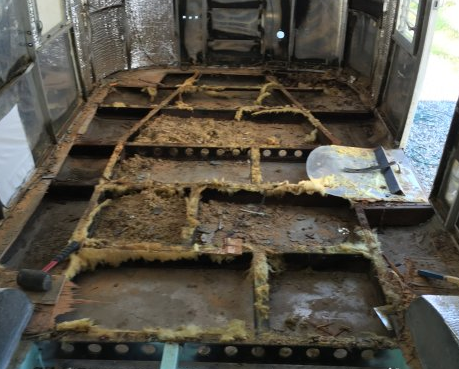
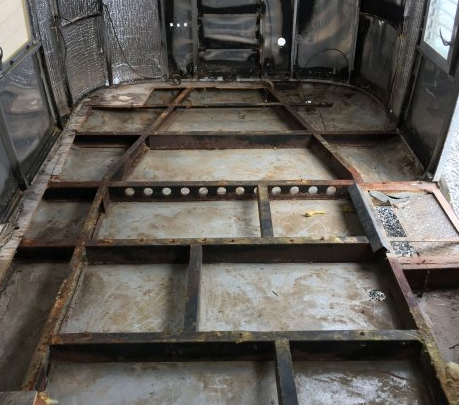
I'm often pretty grubby when I'm done with a day's work on the Airstream, but my reflection in my shaving mirror was so black that that I took a selfie in the shower. I'll post that at the end. I was so dirty because I removed the aluminum belly pan and wire brushed the rust off the whole frame. I was going to leave the bellypan attached to the banana wrap (real terms, I'm not making this up), but I realized that I needed to removed it. The bellypan is the section of aluminum down the middle of the airstream. The banana wraps are the sections that curve in surprisingly complicated ways from the sides to the middle. There are two seams that run front-to-back where the layers of aluminum overlap. 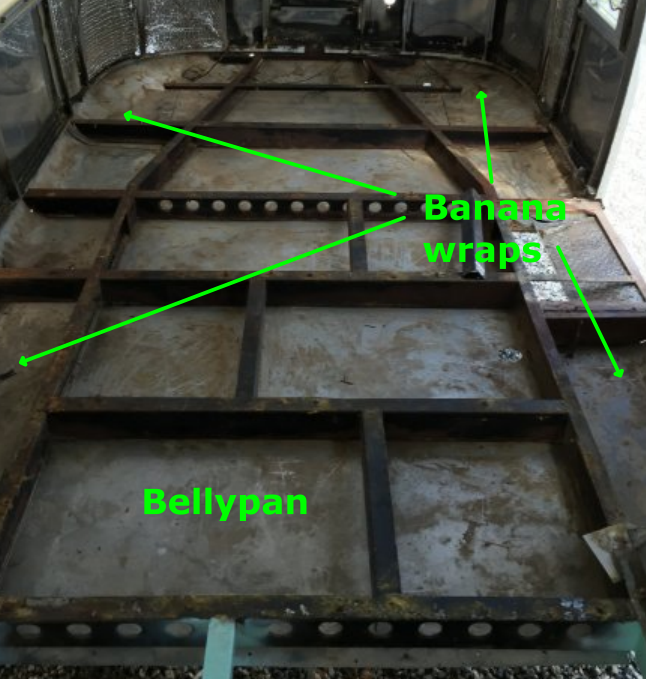 I don't want to mess with the banana wraps on this end. They will need to be patched, but I've read that actually replacing them is miserable. The rear ones unfortunately do need to be replaced, so we'll see. Here's a pic of the same angle with the belly pan removed, you can see it still rolled up underneath in this photo. The banana wraps are attached at the sides, but not along the frame anymore: 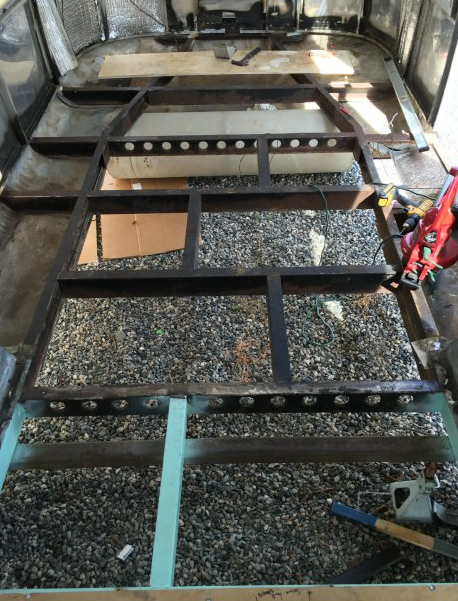 In order to remove the belly pan, I had to remove about 50 pop rivets from the seams. I found it was easiest if I ground them off from the inside. I tried hard not to damage the aluminum, but a few places got scored. There are a bunch of holes I'll need to seal anyway. (Incidentally, this is why I could never build an airplane like my friend Mike. I'm all about "good enough".) So after the bellypan was out, I was able to get to the underside of the frame with my grinder and wire wheel. I took most of the rust off the frame. There were a few places I couldn't reach with the wheel, but, again, "good enough". I used Corroseal again on this side and was amazed again at the stuff. It converts rust into not-rust and becomes a rather hard coating. It feels like magic. It is an acid-based product that soaks in and chemically changes the rust. I took a series of photos of the same part of the frame. I had thought it was going to be the most-rusted part. (I was wrong, there is another part that actually did rust completely through. There's a hole about the size of a dime. But I didn't get pictures and it is in an unimportant place.) Corroseal is very easy to apply, the trick is making sure you really soak the metal with lots of product, but avoid drips. It meant I kept reapplying more product as the previous coat soaked in. So, after a very long day of work, my arms are shot and my back is angry with me. But, I'm satisfied. Its one of those days that I feel like I might actually do this. Yeah, I'm not posting that selfie. I can't believe you came looking for it. Here's proof I was that grimy though: 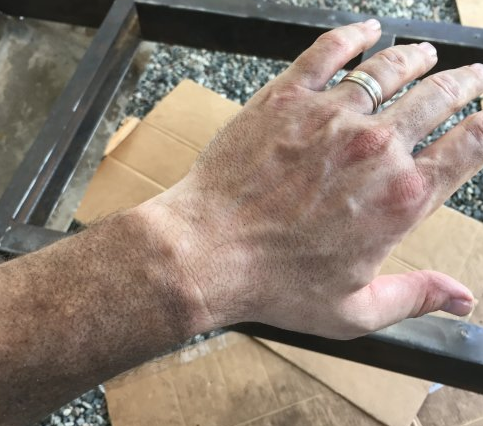 Grinding Using the angle grinder is probably my favorite task so far on the airstream. Well, using the cutting torch was fun too. It feels powerful to see the shower of sparks as I grind through metal. The camera doesn't really capture the image well, though. There's far more sparks as the grinder cuts than the picture below seems to show. Like on the previous side, the wood floor was held on by carriage bolts. The factory bent all of the bolts below the nut so it would be impossible for the nut to back out. I can't be upset because on the other side I used a chemical called lock-tight to do the same thing for the new floor's bolts. But each bolt has to be ground off. No big deal, it's fun work. Sealing (Again!) It's been raining for two days (of course it is; it's Labor Day.) But, I love rainy days. Every time it rains I try to run out and check for leaks. The rear, with the new floor already installed, is watertight now. This past spring I found all of the leaks <knock on new wood subfloor> on that side. But I didn't know about the front of the trailer because the floor was so rotten I couldn't tell leaks from rot. With all of the rot out today, I found three pools of water on the floor on the inside of the bellypan. From there it was simple to trace the leak up the wall to pinholes by rivets and window frames. Most of the leaks are/were in places that Airstream knew they would be. The black paint on the images below is a seam-sealer from the factory. Unfortunately, it didn't last 50 years. It might not have lasted 20, given the rot. But who knows. I feel very thankful for the lack of rust - I think the western climate had a huge part of that. Most frames in 60's era Airstreams with floors in the same condition as my old floor have massive holes and degraded frames. The rain was enough to rot the floor, but the dry air kept the steel from rusting through. Well, that's my unscientific guess. This week I will wirebrush the worst spots to get a better look. 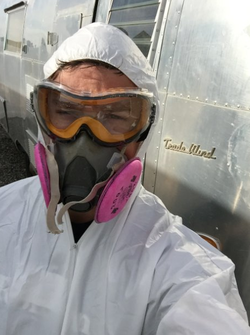 Phew! The nasty, dirty work is done! Today I removed pounds of feces. Pounds. I used my 16 gallon shop vac and filled it about halfway. Granted, some of that was road debris and powdered fiberglass, but there was a ton of shit. Knowing it was going to be gross, I went and got a tyvek white suit to keep some of that away from my clothes. It was as dirty as I suspected it would be and I was glad for the extra protection. I also used a crappy (puns!) saw from harbor freight to cut out the bolt heads under the c-channel. It took forever, but it was what I had. I've decided I'm never buying knock-off tools again. It is not worth it. Anyway, those bolts held the last bit of old subfloor. When they were cut off, I was able to remove the last bits of rot and poo. I'm not totally sure, but I think the frame is in pretty good condition. It is at least as good as the rear was, with no holes on this side. I'm going to ask Cory to check it. The aluminum underbelly is in good condition, too, with very few holes. The few holes that are there can be plugged with rivets and Trempro. So as I worked, my plans changed. I think that I'm going to treat the frame the same way I did on the other side with rust inhibitor and paint, but I'm not going to totally remove the belly skin. Keeping the belly skin on this side will save me at least a couple hundred dollars -- and no one looks at the belly skin. It just needs to be watertight. That seems possible here.
I'll remove enough rivets to hopefully let it sag out of the way for painting. Before painting, I'll need to remove all the bolt heads in the center with a grinder and then wire brush the bad spots. Then I can remove rivets and prep for paint. I'm glad that this work is done. |
AuthorI'm not an Airstream Jedi, yet. Airstream Jedi would have sounded presumptuous, like I know what I'm doing. That couldn't be further from the truth. Padawan is a title I can hope to live up to. Favorite Links:Knots Per Hour
My friend Mike is building an airplane. Check it out. Archives
August 2018
Categories |


 RSS Feed
