AIRSTREAM PADAWAN
  • Blog
  • About
  • Contact

Episode II
A New Hope

Rough Wiring & Vent Stacks

2/10/2017

2 Comments

 
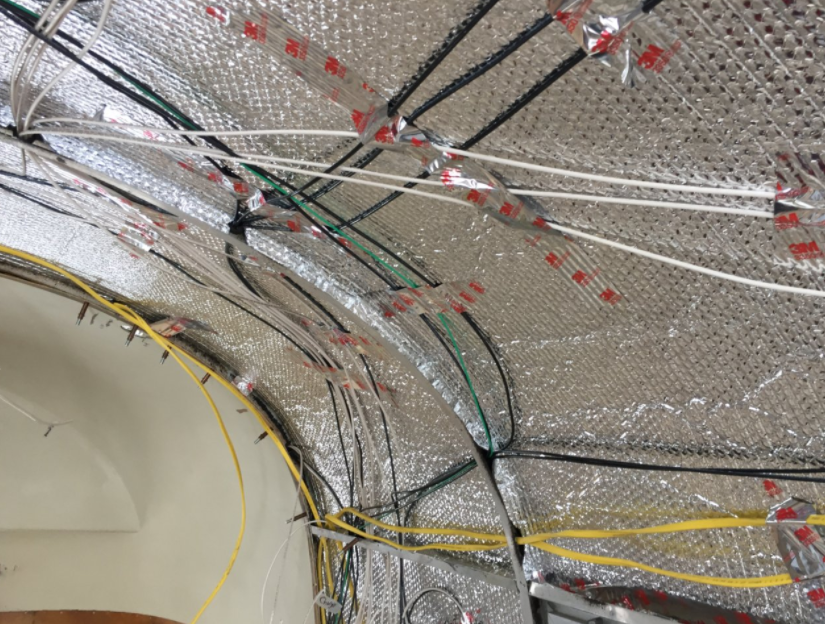
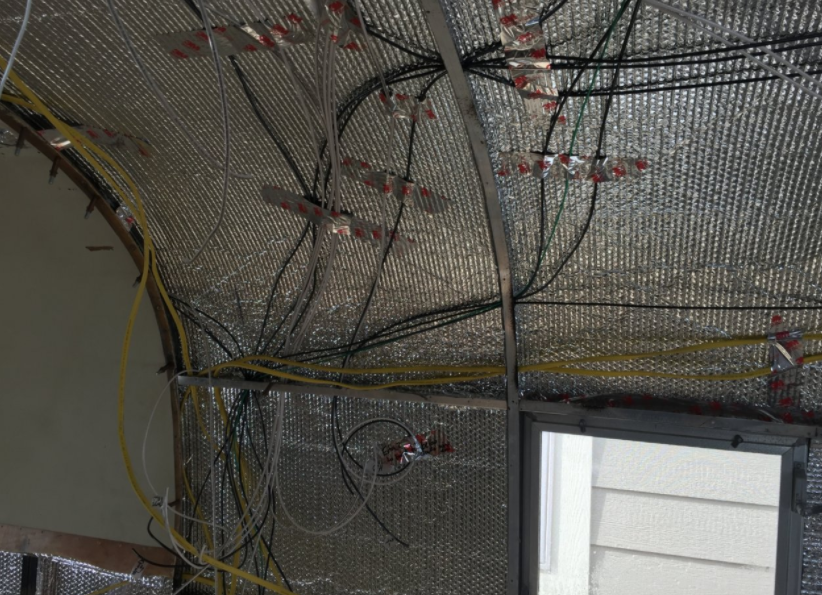
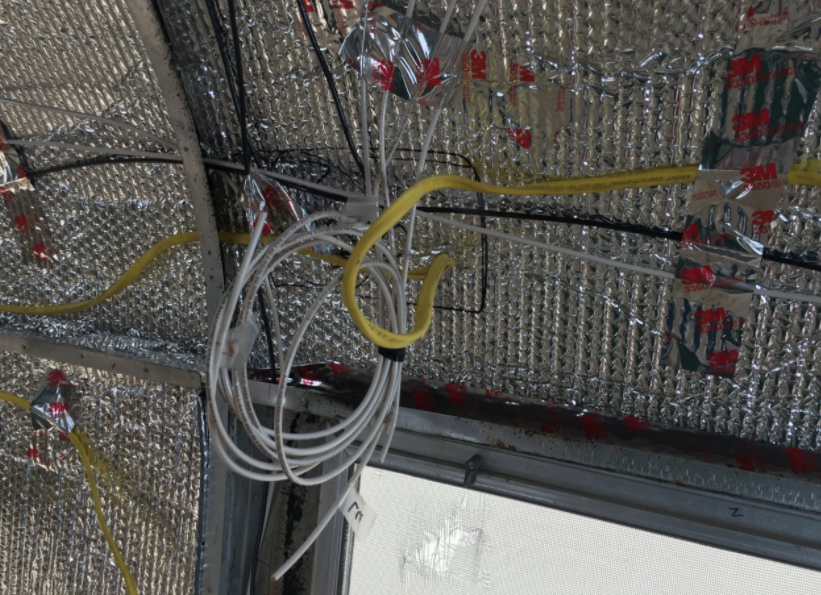
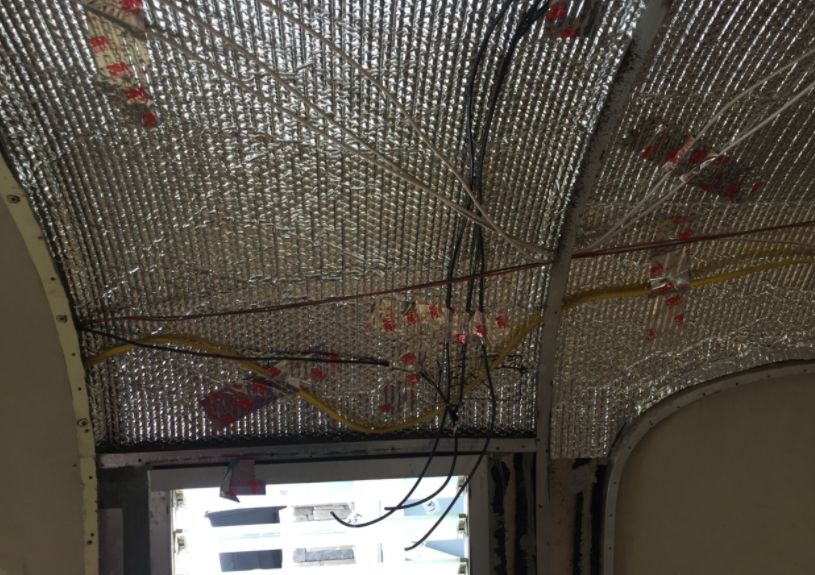
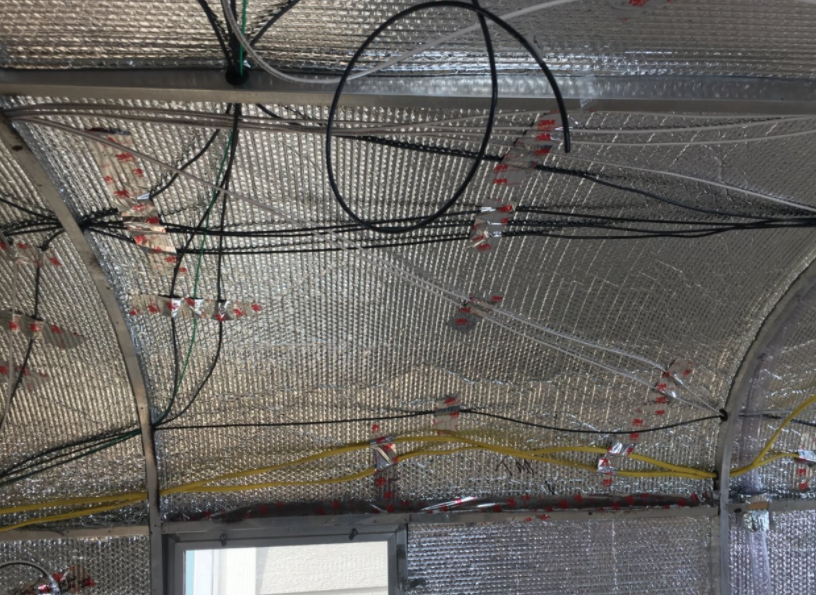
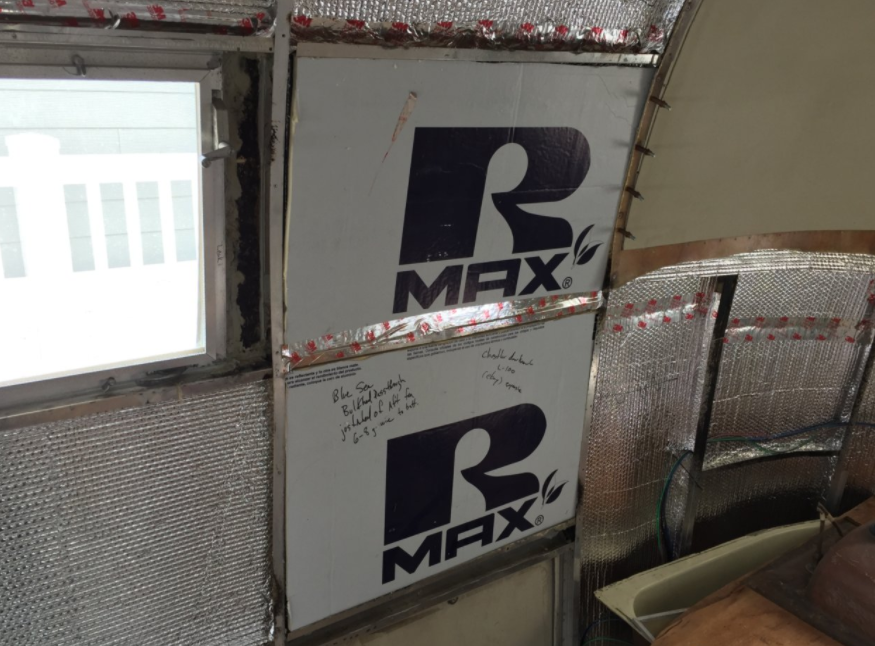
The rough wiring is nearly done! I've got all the wires pulled, taped in place, and ready for the final layer of insulation. I also engineered a new solution for vent stacks from the waste tanks. I put them inside the walls. (I'm sure my friends who are *actual* engineers are cringing right now.) In the post below, I'm going to walk through the electrical choices that I made and I'll explain the new vent stacks.
Wiring plans:
I ran separate 12V hot (black) and neutral (white) wires for the following circuits. With the exception of the wires from umbilical cord (various colors, see last post) and a line strictly dedicated to the CO/Propane detector (green), all my 12V DC lines are 10 gauge. This is a bit overkill on wire size, but I'd rather be safe than sorry.
  1. ​​Lights. All lights will run of DC power and will be LEDs, so one main run feeds the overhead lights, front reading lights and accent lights. There will be switches in various spots (always switch the hot leg).
  2. Kitchen. I'm not sure if the kitchen vent fan will be AC or DC, so I ran both types of lines there. Regardless, the kitchen needs both types of power. AC for outlets and appliances, DC for lights and maybe the vent.
  3. Bathroom. The lights in the bath have their own DC lines. There are two AC outlets in the bathroom also.
  4. Fans. I have a dedicated DC line running to the fantastic fans in the roof.
  5. Fridge. Most RV fridges need both types of power, so I put both lines in.
  6. Water pump. Runs off DC.
  7. Various outlets. I've run an AC line to supply a few power outlets inside and out.
  8. Accessory ports. One of the handy parts of rewiring is being able to add new tech. I wanted to install two lines (one to each sleeping area, multiple outlets in each) that charges technology devices like phones and tablets. As technology changes, these can be "upgraded" because 12V battery power is 12V battery power now and forever. For now, I'm installing 5V USB ports.
  9. Air conditioner. We are not putting an air conditioner in, but I want everything in place if I change my mind in a decade. So, I ran AC to the outlet and a drain line for condensation. I'm trying to figure out if I need to run DC lines for a thermostat controller and if so what type/quantity.
  10. Hot water heater. I have not run a line strictly for this (but I have several extra lines run in the vicinity). I didn't run a dedicated line because I will probably buy a cheaper model that isn't electric start. It's easy to light a pilot light and electric start just seems like one more thing to break.
  11. Solar power bulkhead. We are not installing solar panels, but with the interior skins off it made sense to prepare for the possibility. So I'm almost finished installing the bulkhead pass-through wires from the roof.
  12. The umbilical cord. This is a multi-stranded line running from the tow vehicle to the running lights, brakes, etc.
  13. Propane/CO detector. Since this line will never get touched/spliced I made it green and 14 gauge.
  14. Speaker wire. Though I didn't technically use speaker wire, just extra red/brown, I wired up some built-in speakers for the dining/couch area.
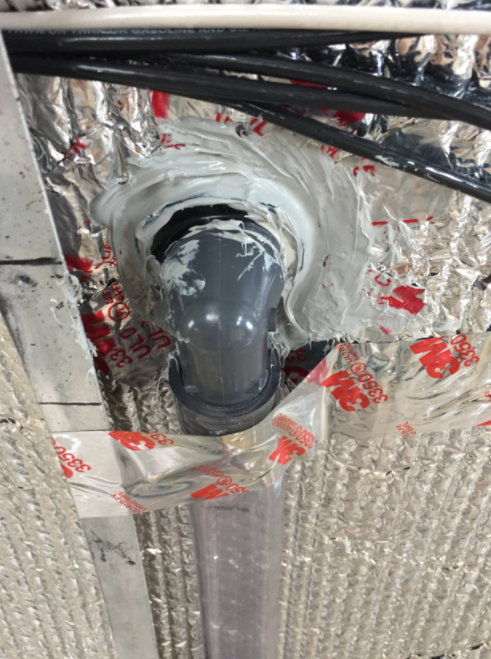
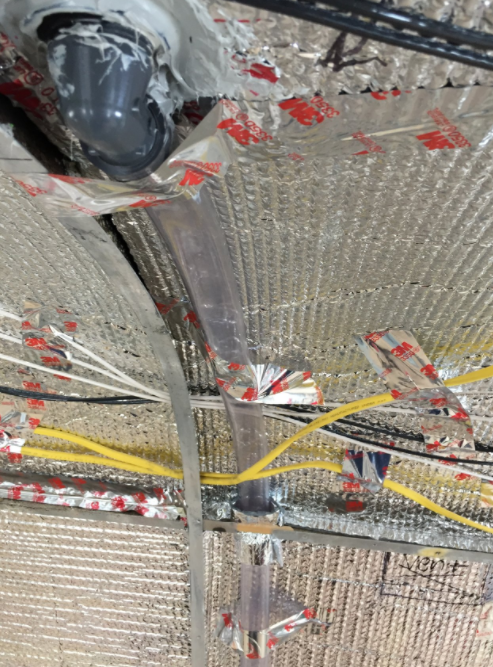
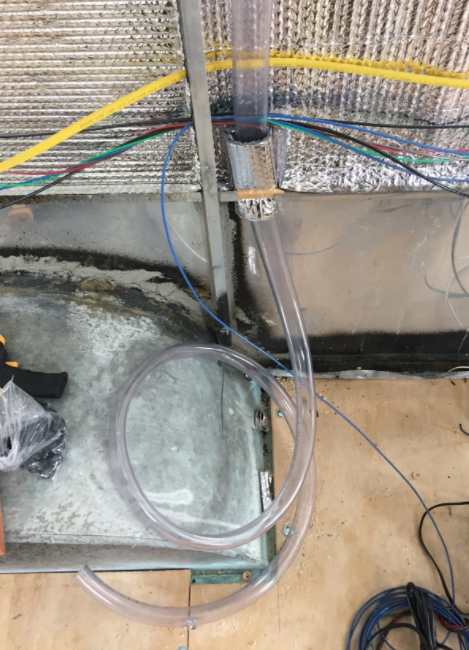
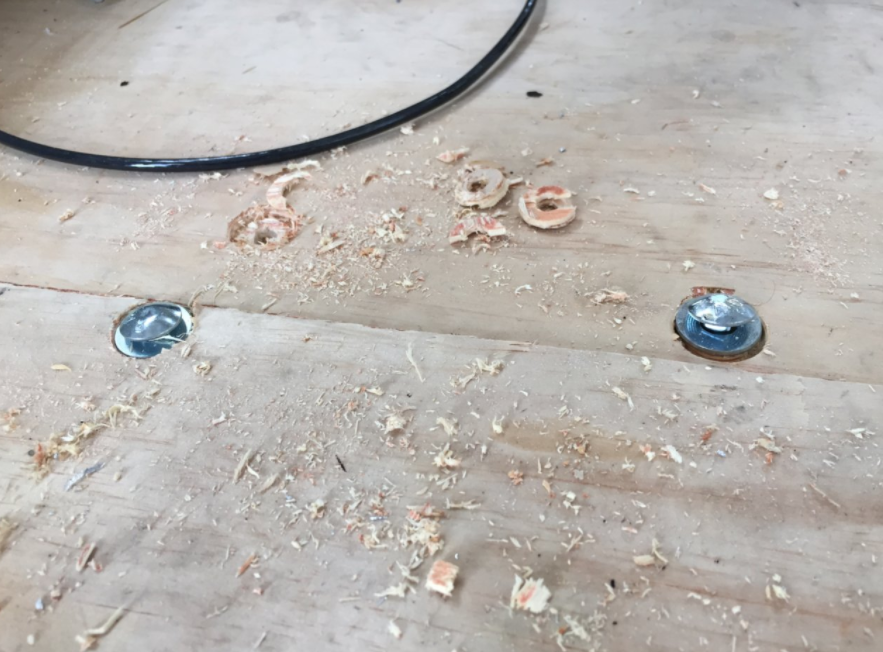
Vent Stacks:
There are three vent stacks that exit the roof. These vents allow the waste tanks to vent any built up gasses to the atmosphere. Moreover, in order for the sinks & tub to drain into the tank, the displaced air needs somewhere to go.  

In 1962, these stacks were hard pipes coming out of the tanks, from the middle of the floor up to the roof. I guess if I was trying to restore Eisley to 1962, I'd need to put them back the same way. That's never been my goal. I think they're ugly. So I bought flexible tube and fittings and buried the vents inside the wall. I used 1" I.D. tube, which should be plenty for atmospheric venting - particularly since this isn't getting the constant use of a home system.
I didn't get very good pictures of the vent holes from the inside or the new rooftop covers. The vents will tie into the plumbing system whenever (next year?) I get interior plumbing installed.
Lastly, I'm bolting the second half of the subfloor down and installing the final layer of insulation. More to come on that process next time.
2 Comments
Jim
2/12/2017 11:17:37 am

While I can't say inspiring because I haven't moved from the couch, I really admire your effort and persistence. Great work!

Reply
Mark
2/12/2017 06:59:20 pm

Thanks Uncle Jim! My hope is to pull it out to New England some day (and around the country with the family). I look forward to the day I get to show it to you.

Reply

Your comment will be posted after it is approved.


Leave a Reply.

    RSS Feed

    Picture

    Author

    I'm not an Airstream Jedi, yet.  Airstream Jedi would have sounded presumptuous, like I know what I'm doing. That couldn't be further from the truth. Padawan is a title I can hope to live up to.


    Favorite Links:

    Knots Per Hour
    ​
    My friend Mike is building an airplane. Check it out.

    Archives

    August 2018
    July 2018
    June 2018
    October 2017
    July 2017
    May 2017
    April 2017
    February 2017
    January 2017
    December 2016
    November 2016
    October 2016
    September 2016
    August 2016
    March 2016
    February 2016
    December 2015
    November 2015
    October 2015
    September 2015
    August 2015

    Categories

    All

Powered by Create your own unique website with customizable templates.
  • Blog
  • About
  • Contact