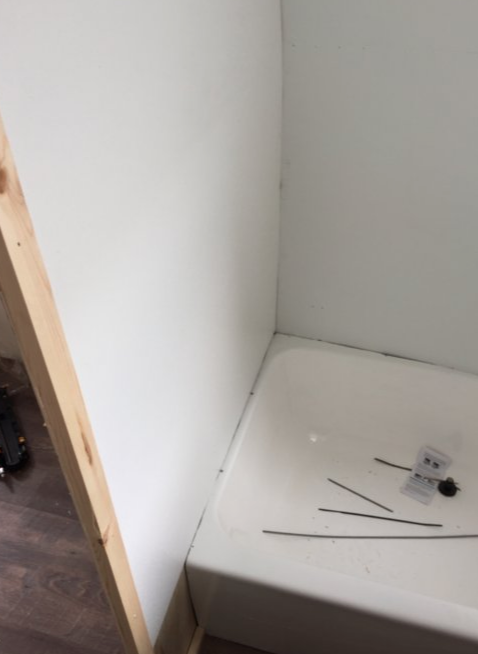
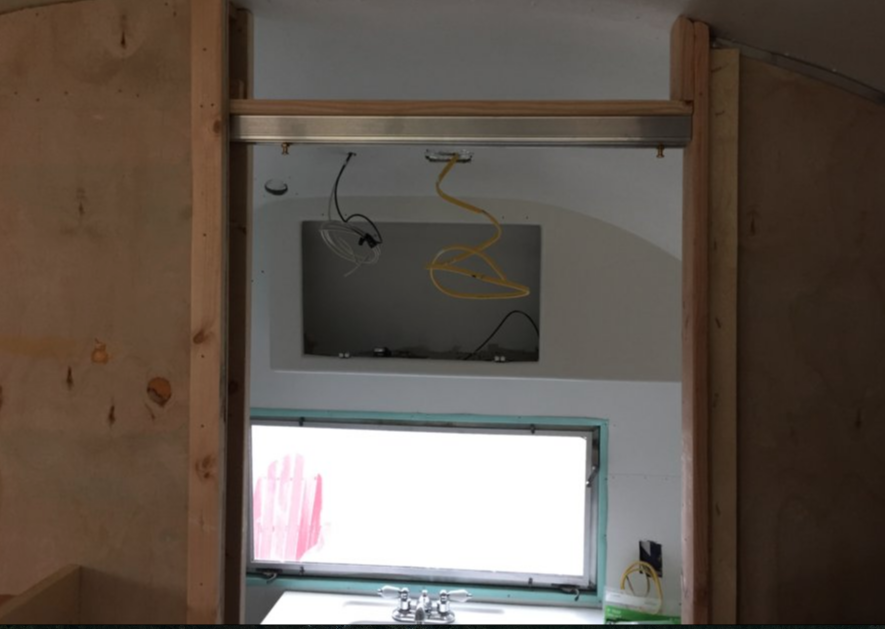
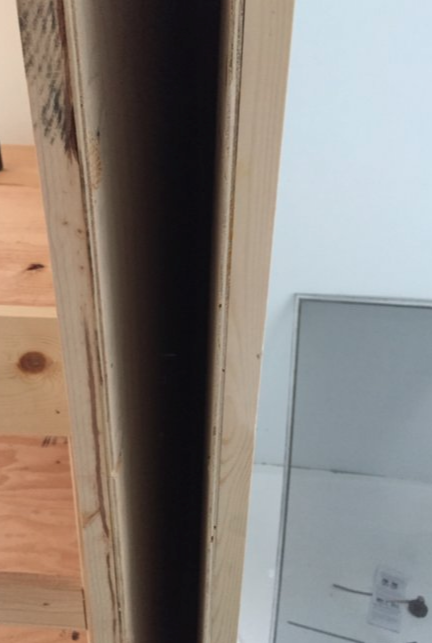
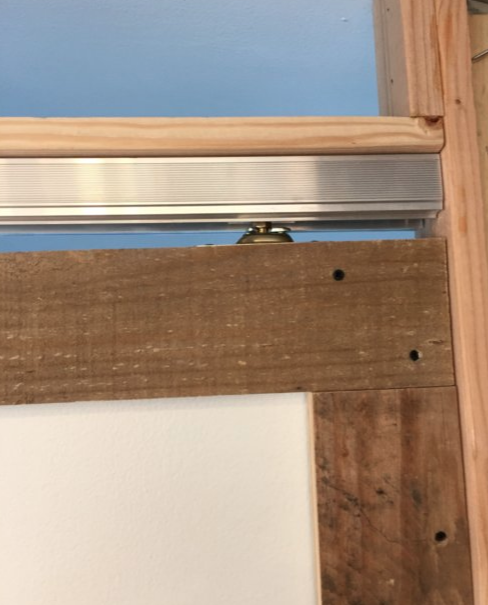
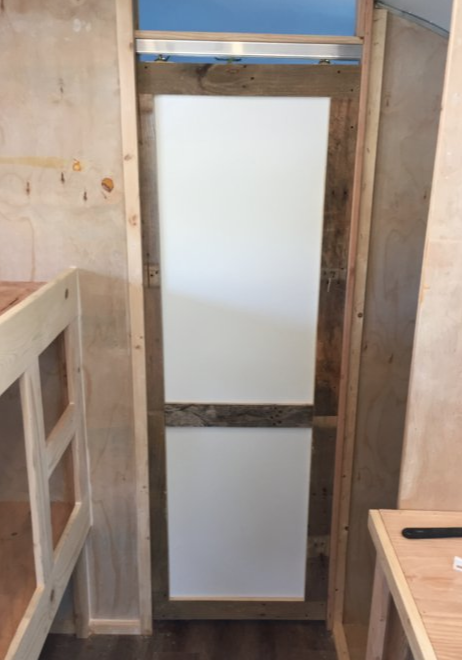
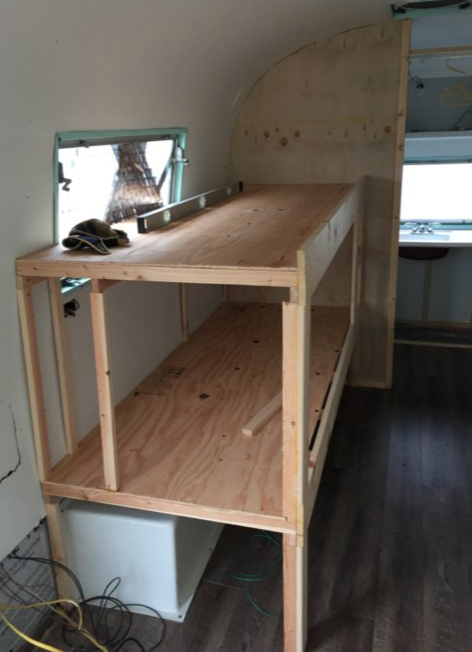
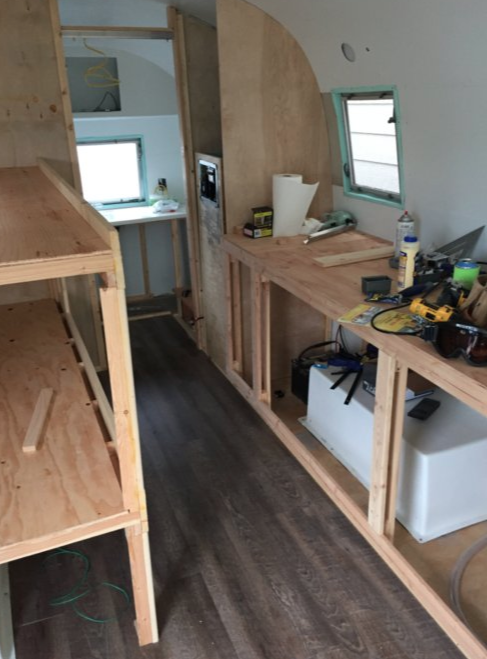
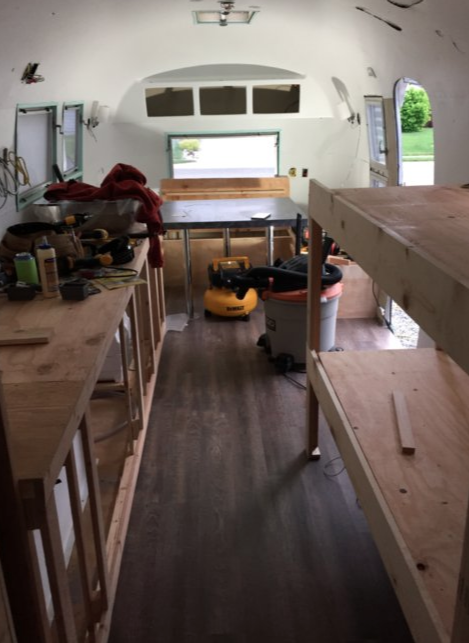
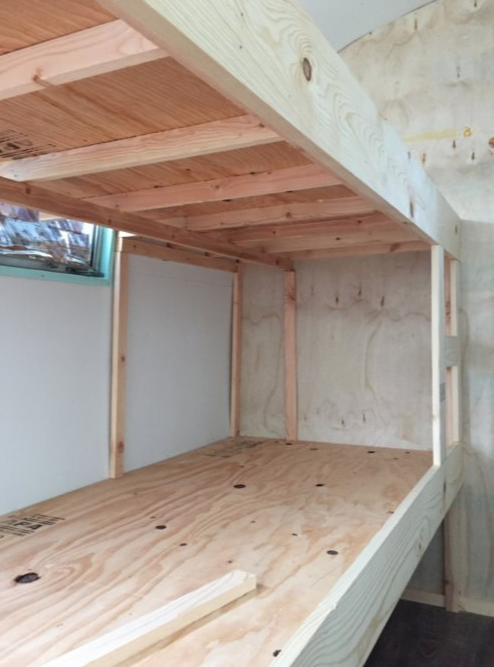
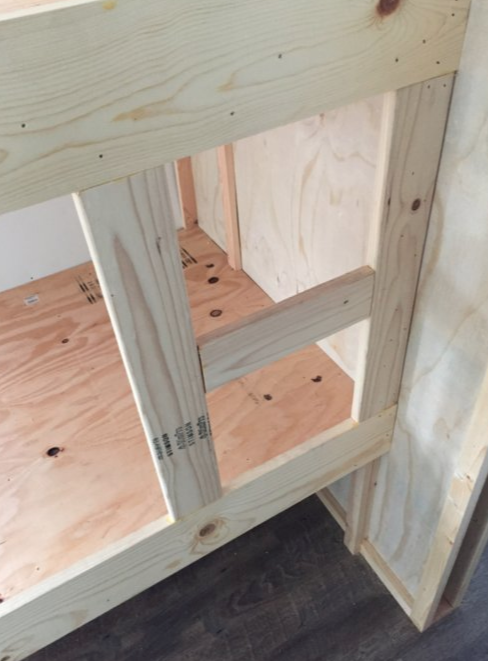
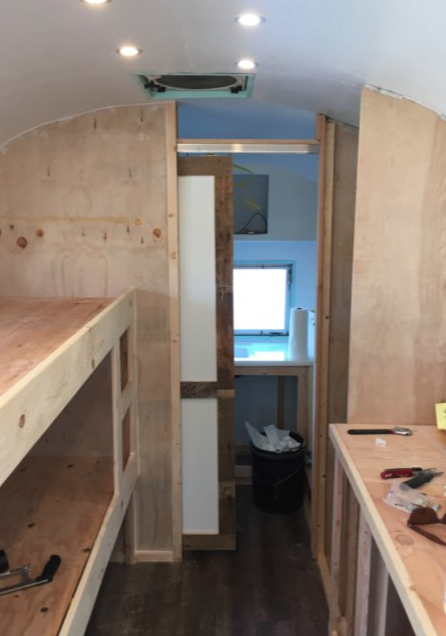
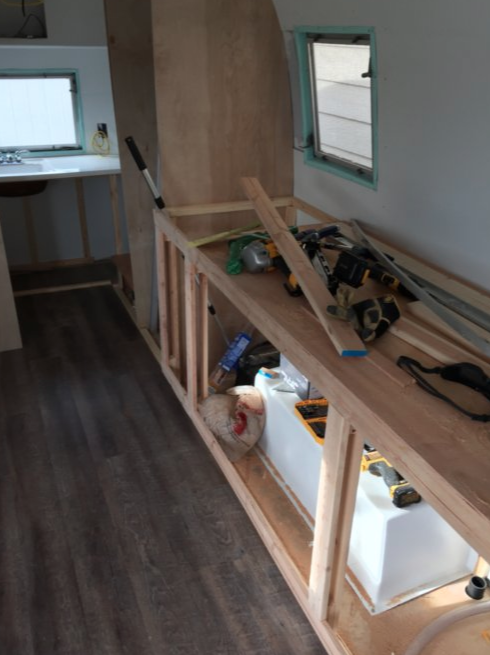
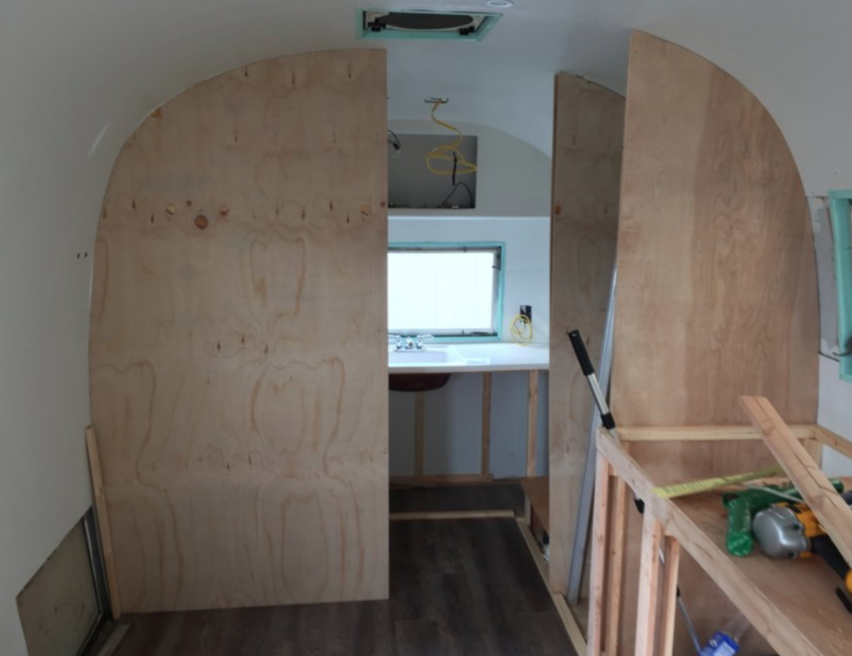
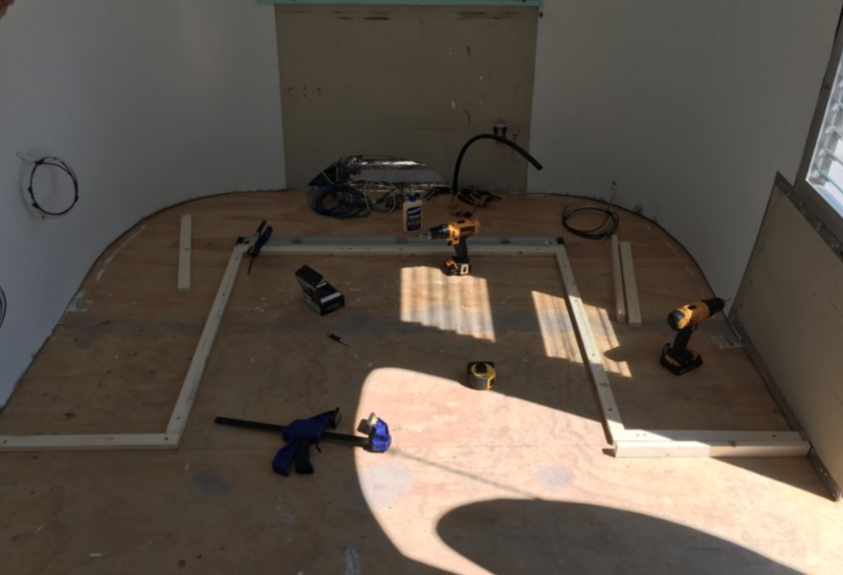
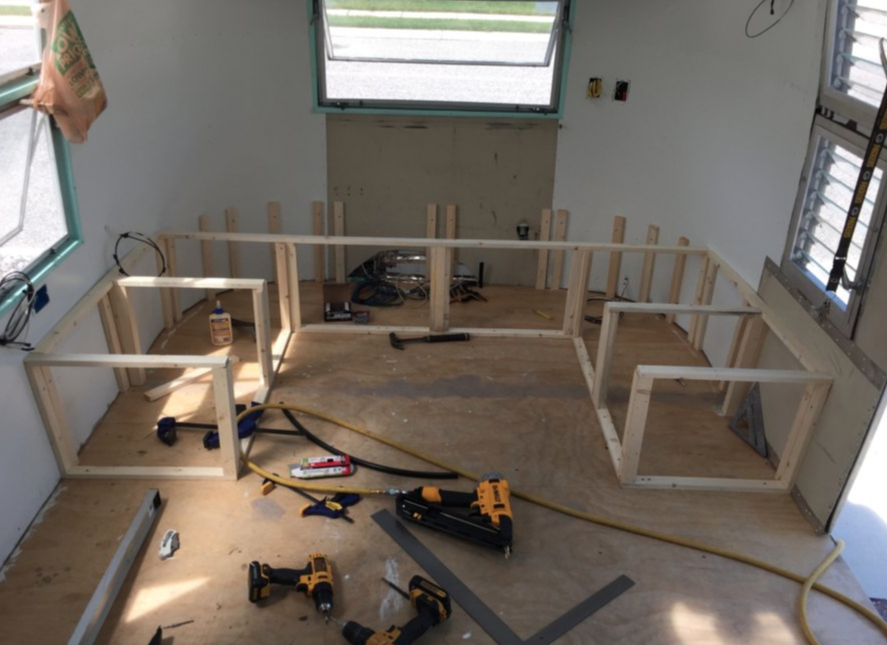
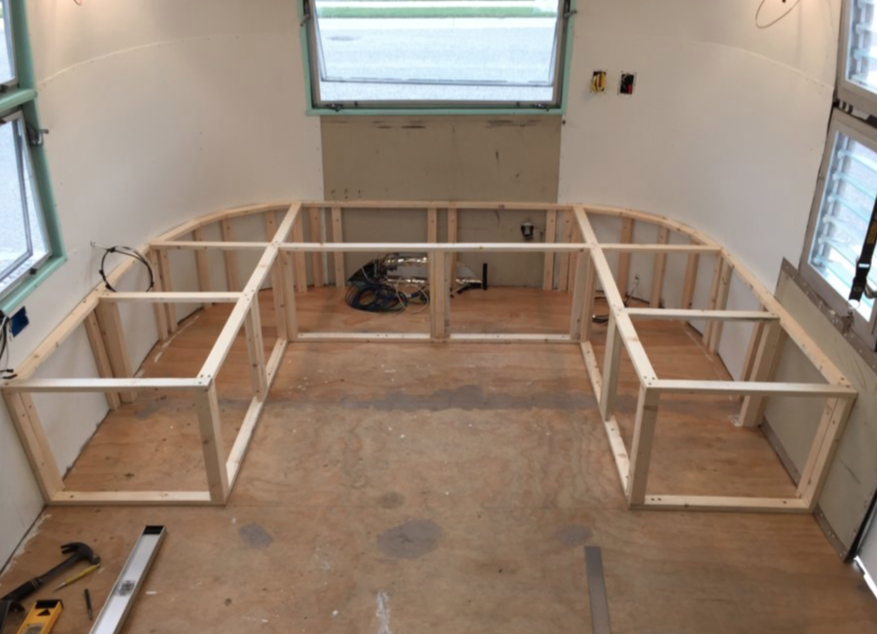
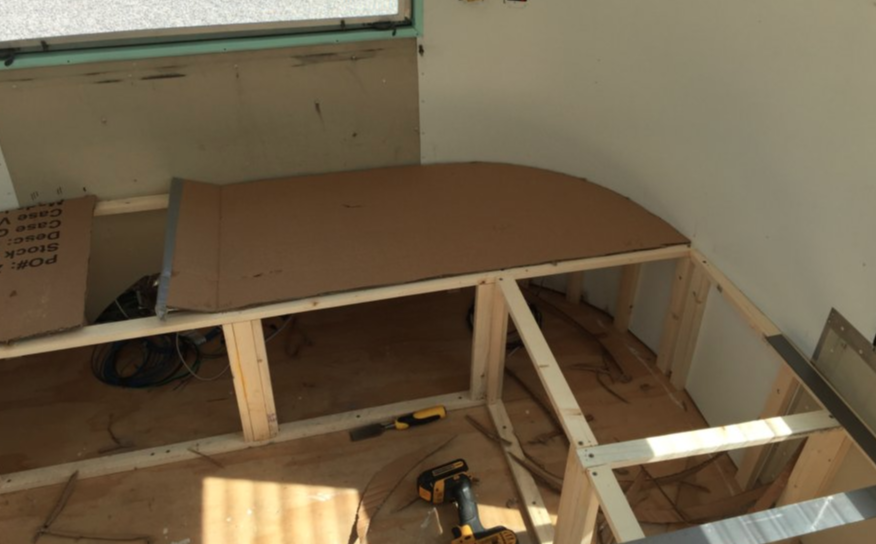
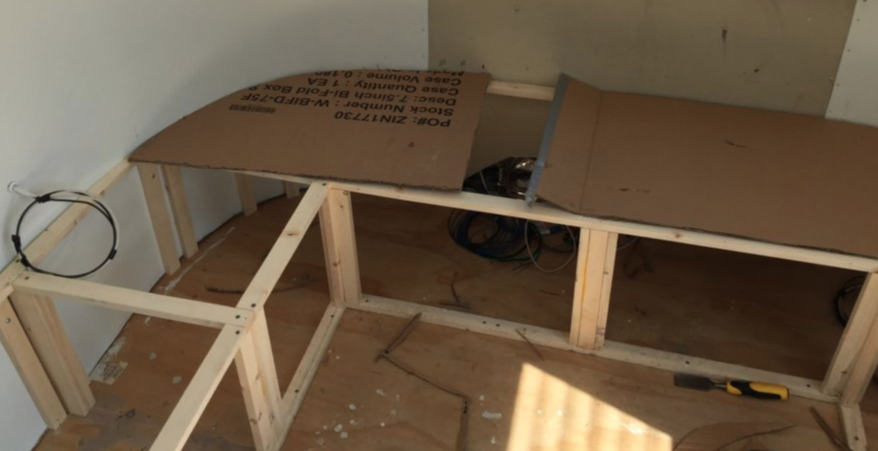
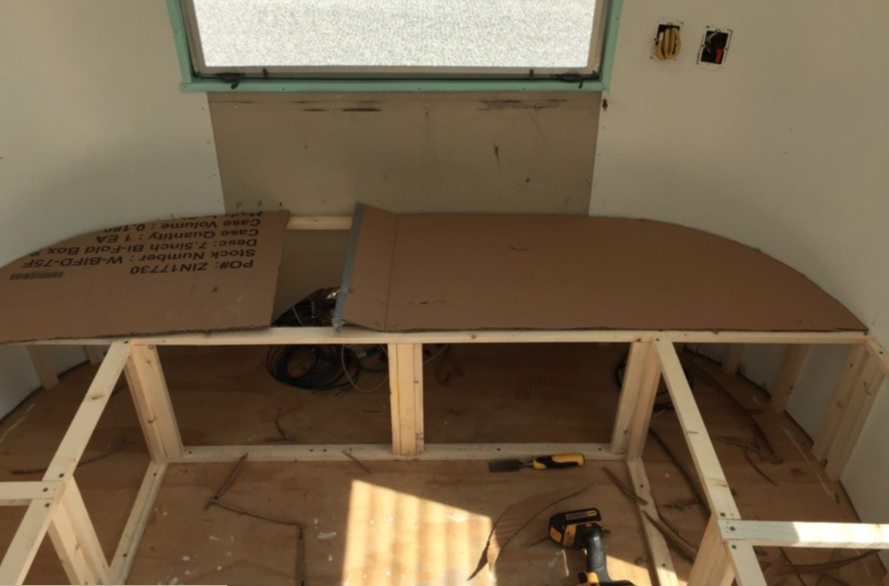
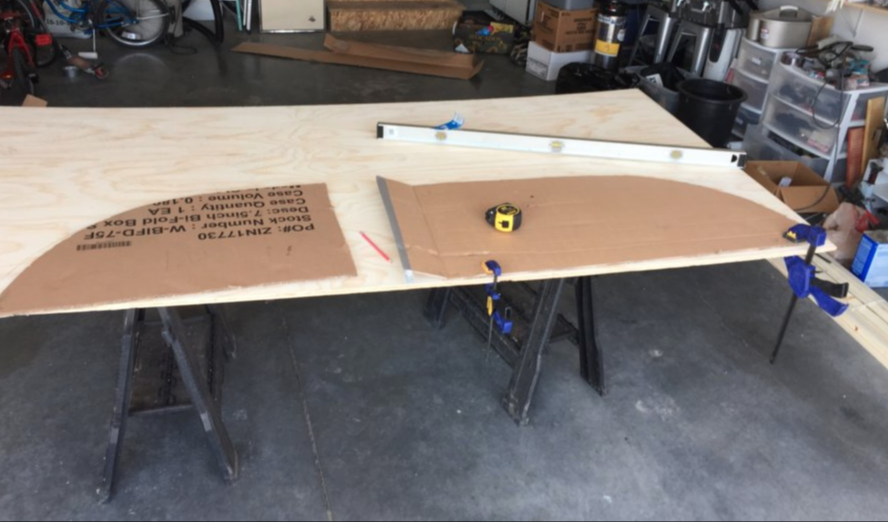
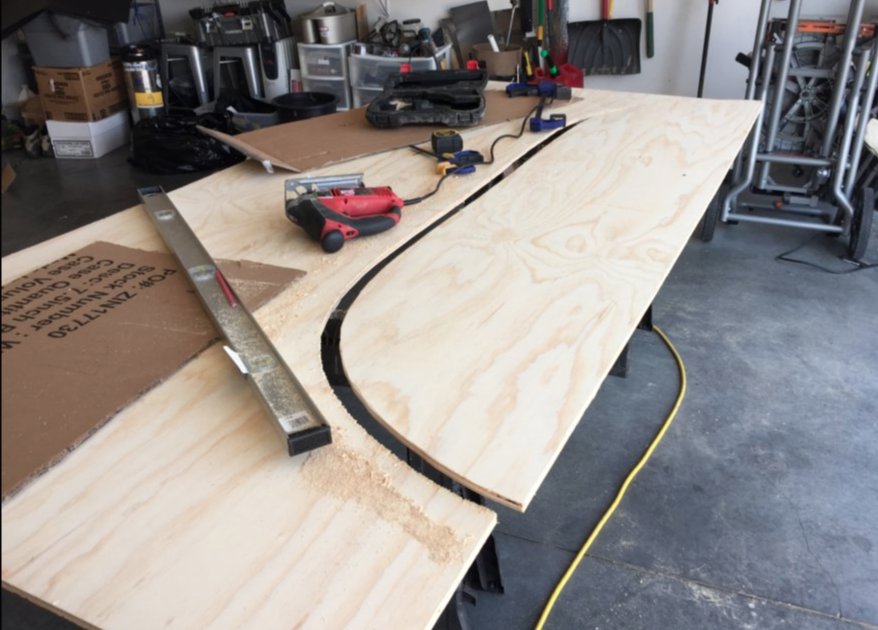
More CarpentryLast month, I began work again in earnest. Winter was over, the temperature was warm and my deadline was looming. First, I finished framing the kitchen and bath cupboards. I must not have stopped to take many pictures. Next, I put in the bulkhead walls for the bathroom. One side of the bath has a tub and will eventually have a shower. I took extra effort to caulk every inch of this side with bathtub caulk. I also used a shower board on the backside of the wall. Hopefully, this will keep water where it is supposed to be. For privacy, I installed a pocket door. I think most Airstreams of this era just had a curtain, but if I have to have a toilet, I want a door. It slides well and fits nicely, but not perfectly. I'll tweak it next summer - it needs a stop behind it so that it does not go so far into the pocket. But that is minor. Also, I painted the door before installing to make it easier on me. You can see the beginnings of the style we chose. Rough wood and clean white. Along the way, I started the bunk beds. I messed around with the height of the beds some. My main problem is that if the top bunk is above the window, there is too little headroom. If it is below the window, the bottom bunk is squished. I decided to cut the window in half, though I don't love the result. But both kids will get some view, which is a plus. (If you click on any of the pictures, they will pop up bigger to see details.) 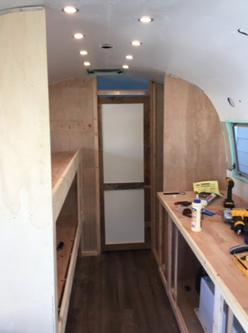 Another challenge was how to brace the bed across the window. I put a brace running the length of the top bunk about 2/3 deep. My hope was to not need a vertical brace in the window. It still was not enough and I ended up with one brace in the window. Other than that, I am happy with the result.
One other thing that I did at this time, but for which I don't have good pictures, is caulking small rivet holes all over the interior skins. It was a small task, but it had a huge result. The interior walls look much cleaner. May ended with bulkhead walls mostly installed (the last one was still somewhat loose) and a real sense of what the interior would end up looking like. I can't wait to show you the paint, cupboard doors, and countertop! June has been a transformation. It better be because we're leaving soon!
2 Comments
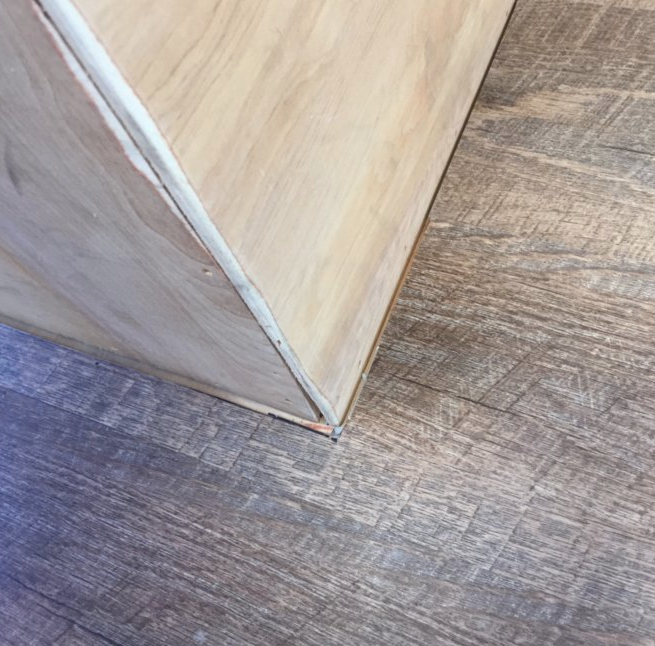
The Beginning of CarpentryFor my wedding, my groomsmen gave me 10 bottles of wine. Each bottle was intentionally chosen to age and be ready to be opened on each of our first 10 anniversaries. It was a magnificent, extravagant gift. Sara and I were poor. She worked at Starbucks, I worked nights at a boys' treatment center. We didn't have a wine rack and didn't think we had the money to buy one. However, there was a local lumber mill that had a scrap pile. So one day I scavenged scrap wood from the pile and cobbled together a wine rack. It was the ugliest thing. This winter, I began the process of building the kitchen cabinets, the bathroom cabinets, the interior walls, and all things made of wood. I am still a terrible, terrible carpenter. I really cannot emphasize this enough. I can do plumbing; I'm pretty good with electricity; I've hung and finished drywall; and, I can paint expertly. Carpentry and I do not go well together. I did not let that stop me. I could have used pre-made cabinets, but they are heavy and expensive. So I built them out of 1x2s and 1x3s. Basically, I measured up our kitchen countertops and tried to get the dimensions as close to normal as I could, with as little lumber as I could.
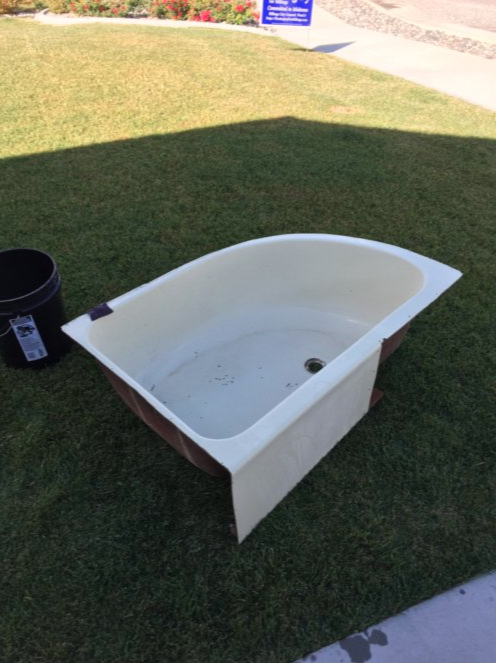
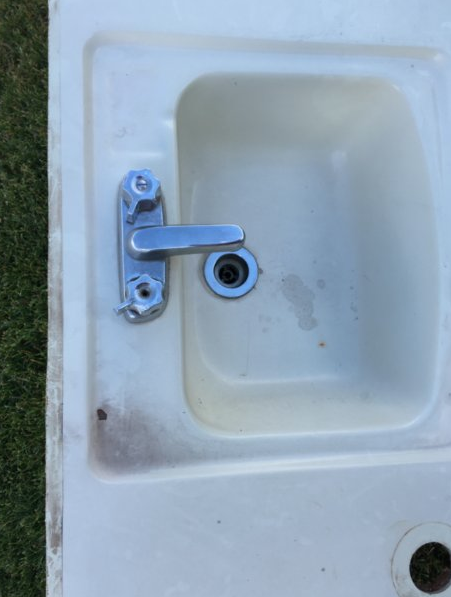
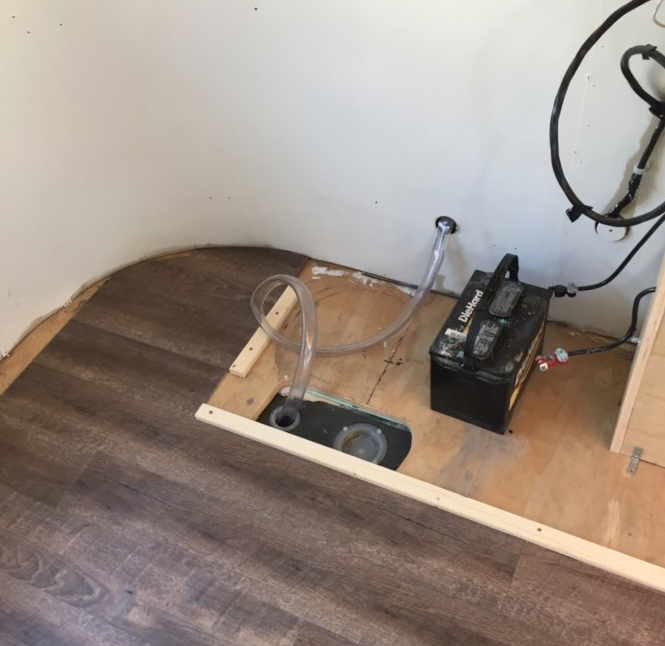
The doors are all unique sizes, based on the area underneath. Two were based on the wheel well, one based on the size of the water heater, and the three others just fit in the area between. Also, the wall of the Airstream is not perfectly straight, so it was hard to make the front square. I had to cut just about every piece in the cabinet more than once. Mostly, I'm not good at precision, but also its just hard for me to visualize each piece until the others get there too. In the end, I was able to get its depth within 1/2" of square over the 117" length of cabinets. For most of the winter, I was certain that the cabinets would turn out like the infamous wine rack. Today I finished them. I'm dying to post pics, but I have more steps to write about before I can do that. A Sink and a HoleIt's hard to make a sink funny or interesting. My students know that's how you start any piece of writing. This is about a sink. It's not interesting. If you saw a picture and only read these words, you get it. I put in a sink. See, no sink: 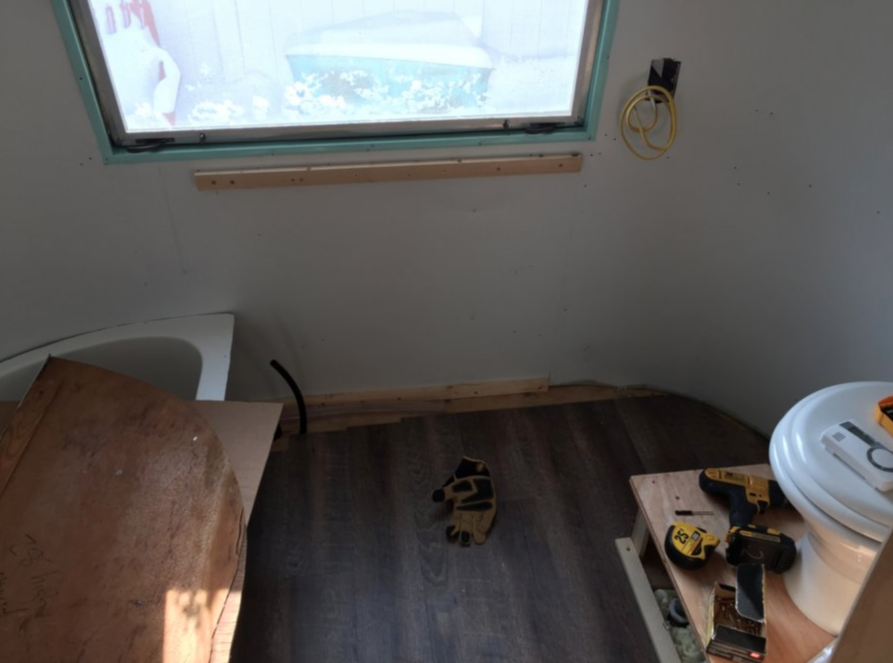 There is no sink in this photo. Don't spend too much time looking. It's not there. Then, sink:  There is a sink in the photo now. Look closely. You will find it. This is not a hidden picture puzzle. If you look closely, you are sure to spot the difference. Astute observers will note that the sink is not floating. I used small pieces of wood to hold the sink up. Each piece was too small by itself, but together they did the job. On to the next amazing topic: A hole. There was a hold in the side of the Airstream. I made the hole actually.  Then, I plugged the hole using a hot water heater I had lying around.  So far, the hot water heater is doing a fine job plugging the hole. This is its only function. I'm hoping that some day soon it will also heat water. But, there is no propane line to fuel it. Nor is it hooked up to AC power. In fact, there is no water line at all to bring water for it to heat. So it is a great hole plug.
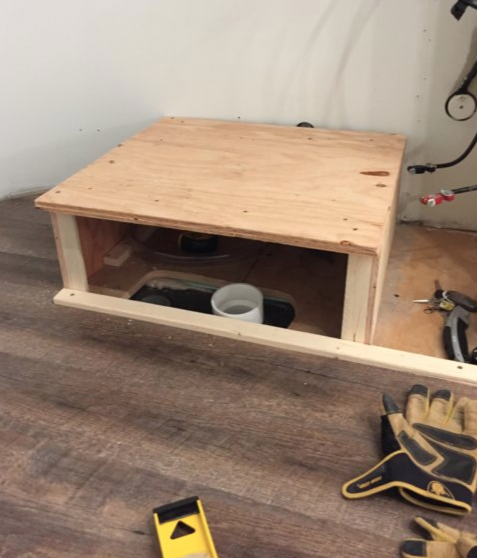
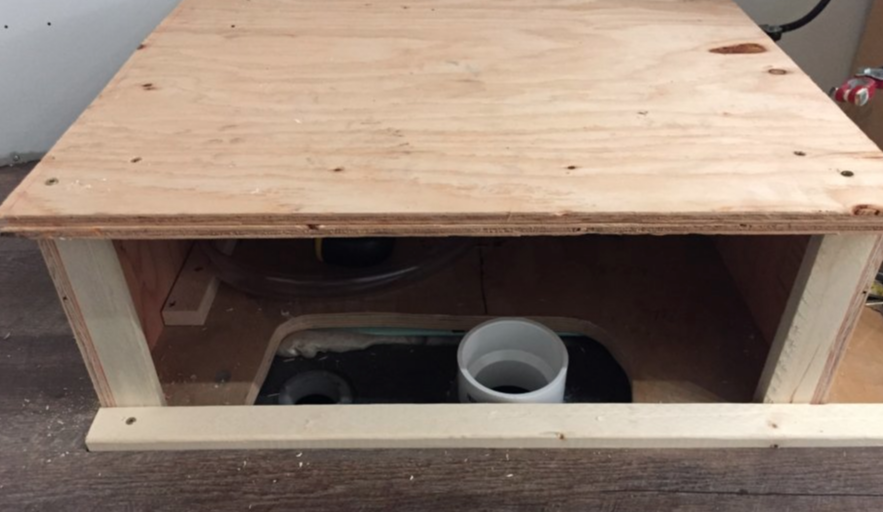
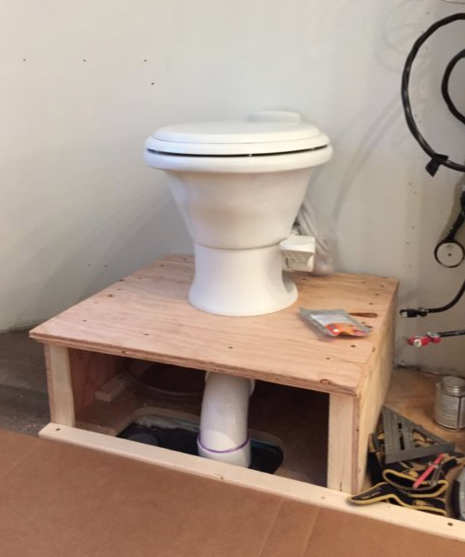
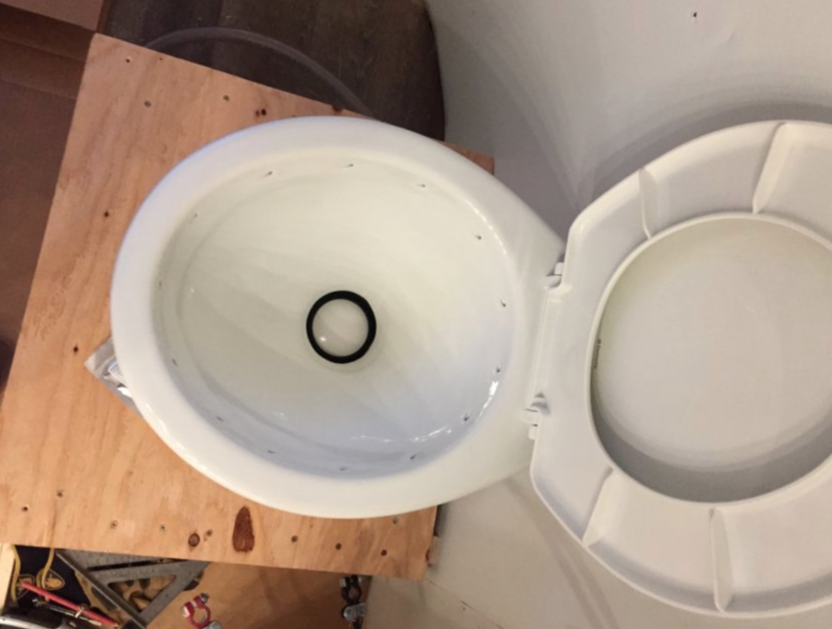
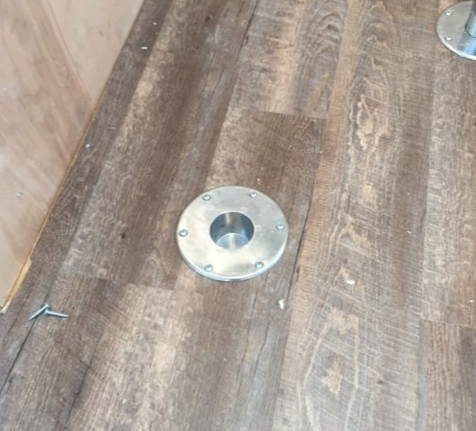
No one would fault you if you stopped reading these posts. The Most Essential ItemLast fall, we ended the summer with something slightly more than a metal tent. If I recall right, we had several lights working on battery power, our dinette installed but not finished, and the vinyl planks installed on the floor. Something like this: I began the next phase on that most essential, most required, most valuable of all RV equipment: the toilet. Ok, I'm being cheeky. I wouldn't have put a toilet in at all, except for the fact that it wasn't my decision. I hate outhouses, but I also am not looking forward to using a septic hose. There's no-win here, but like I said, it wasn't my decision. Way back, years ago, when I installed the tanks, I made a mistake. Check that post out in the archives, especially if you are reading this as a how-to. I bought the wrong holding tanks and couldn't stomach the idea of wasting $500 to re-buy the right ones (did you catch the puns?). So while this is what I did, it's not what I'd recommend. (Leave a comment with an email address if you want the advice I'd go back and give myself.) I started with the 3" plumbing I'd need to get from the tanks to the toilet flange and build a box. From there, it was a matter of measuring, cutting a hole, and installing the flange. Unfortunately, none of that is pictured here. But, hopefully, everything works as well as I designed. I installed the toilet. It ended up being a nice little elevated throne. My big fear with that run of pipe is that I have a child who loves toilet paper. I'll need a short snake, just in case. I think one use of a toilet snake and he'll be cured of using too much paper.
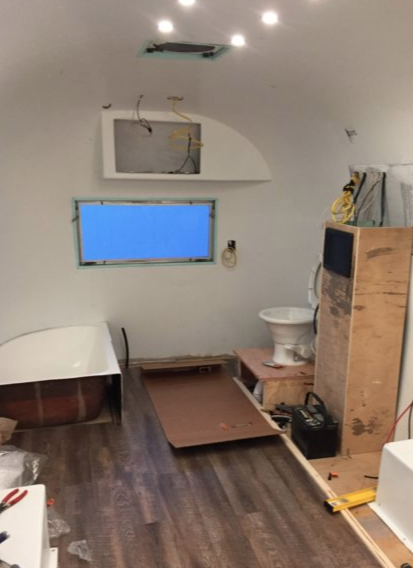
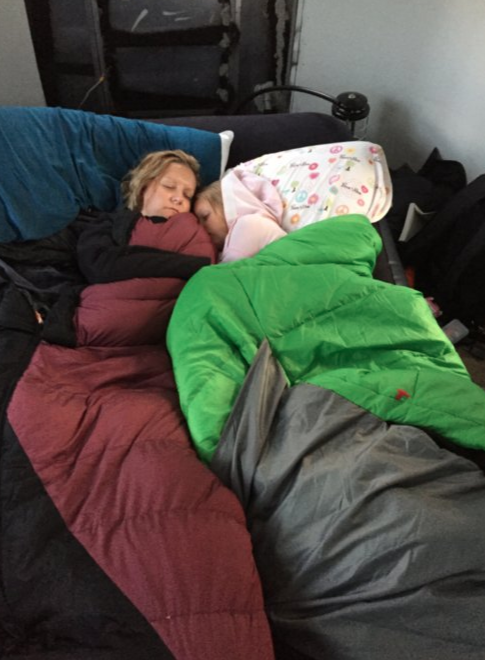
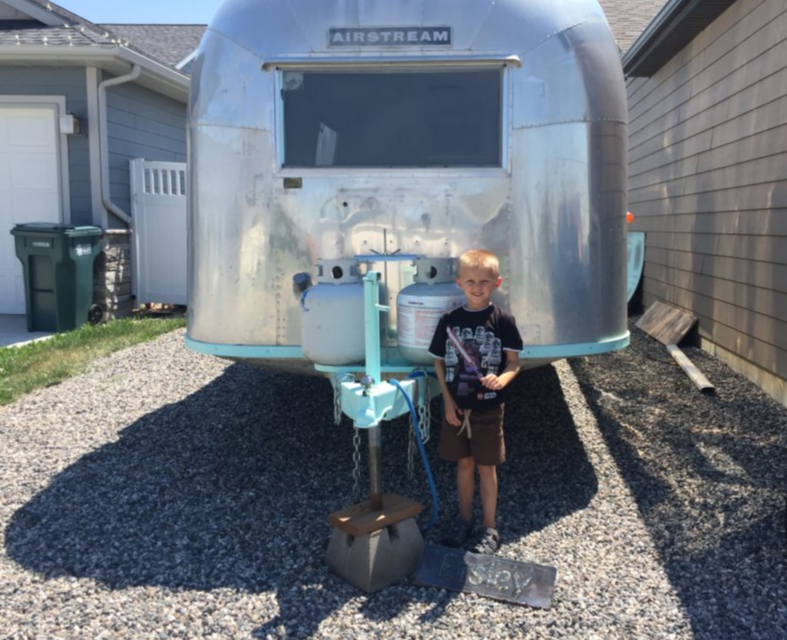
We're a close family, but our bathroom did need walls. More on that effort tomorrow. Plus a sink. It seems that I've taken a winter off in reporting the progress. In my defense, I'm pretty terrible at this. Is that a defense? Well it's all I have to work with. Let's start with summer's hope: We decided we're taking Eisley across the US this summer. Four people. Five weeks. A little, unfinished Airstream. Haha! If you look at the last post you might wonder how that's gonna go. Actually, if you look inside Eisley today, you'll wonder... but I'll get to that.  That is the hope, right there. If I look at it too long I get butterflies. What could go wrong? That's a totally normal maiden voyage, right?
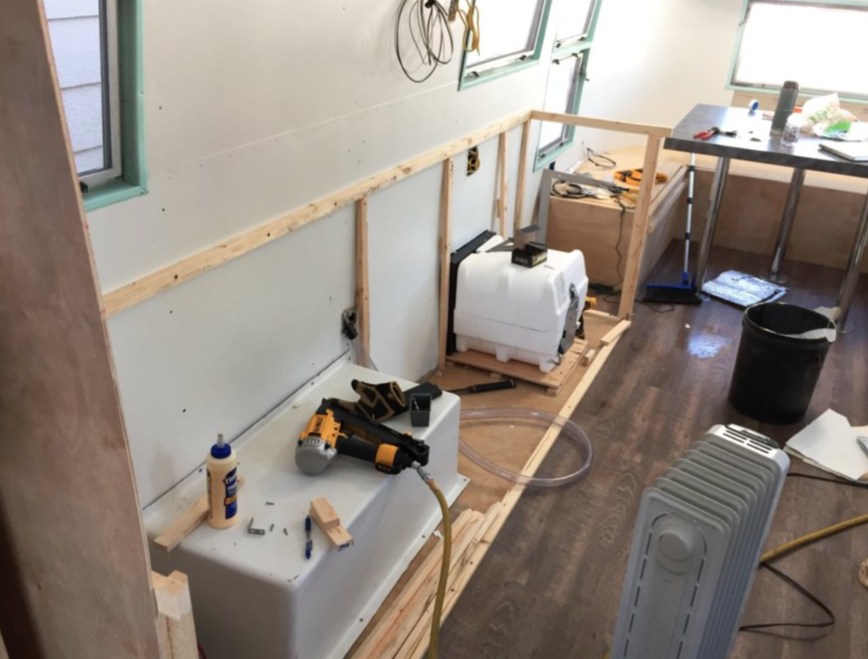
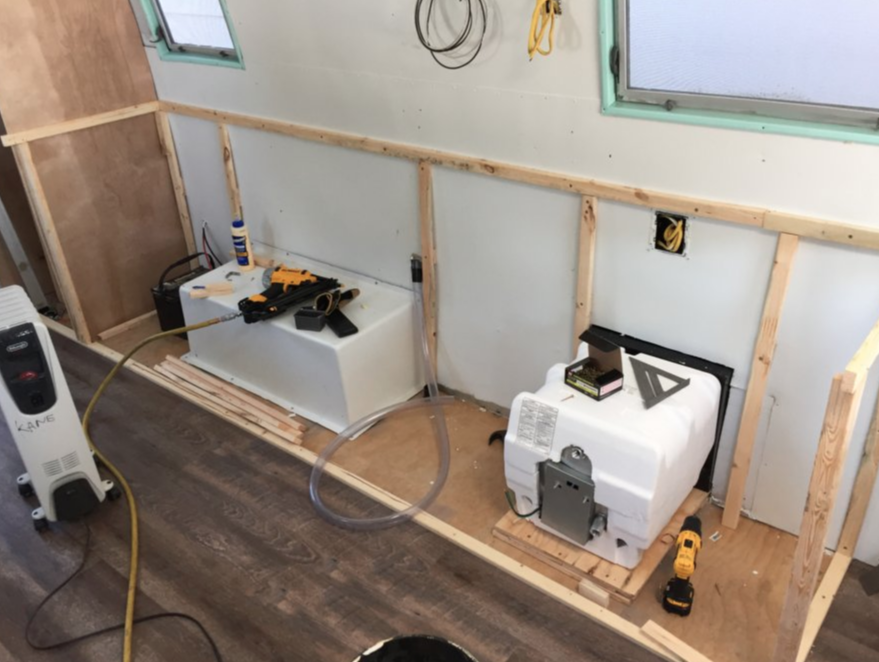
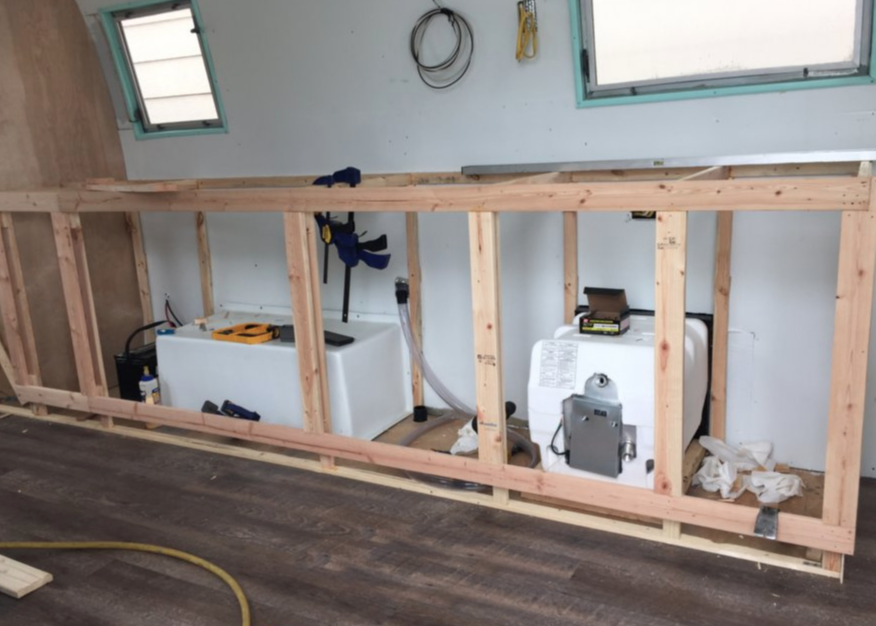
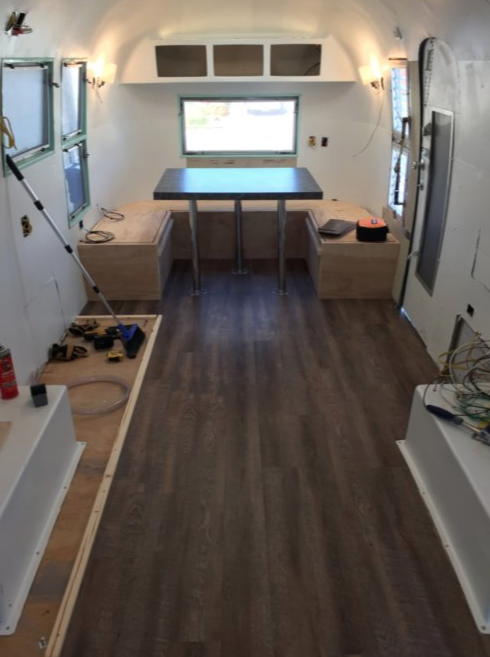
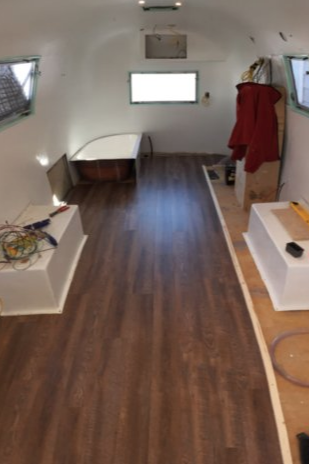
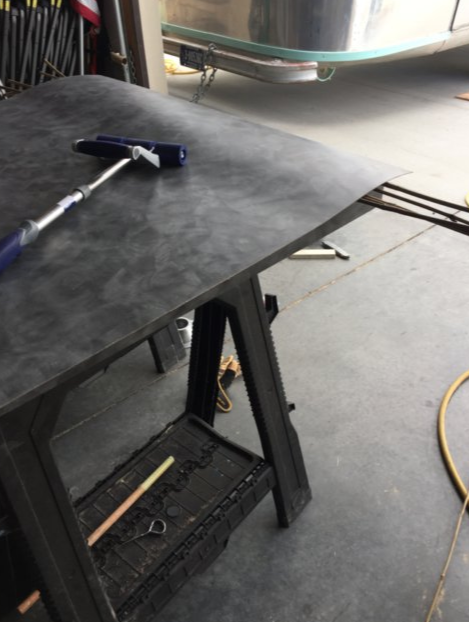
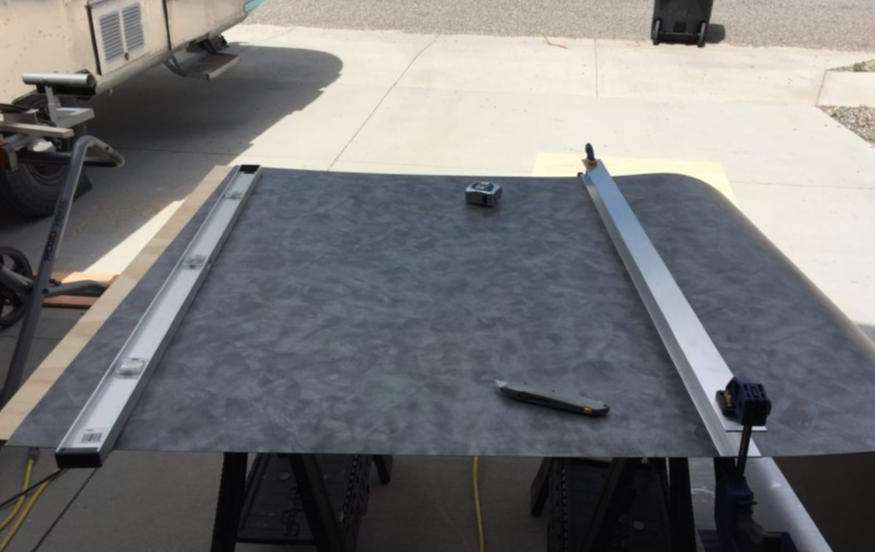
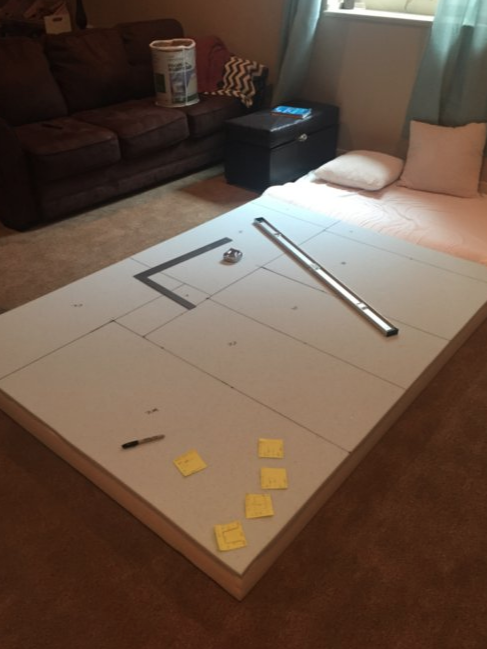
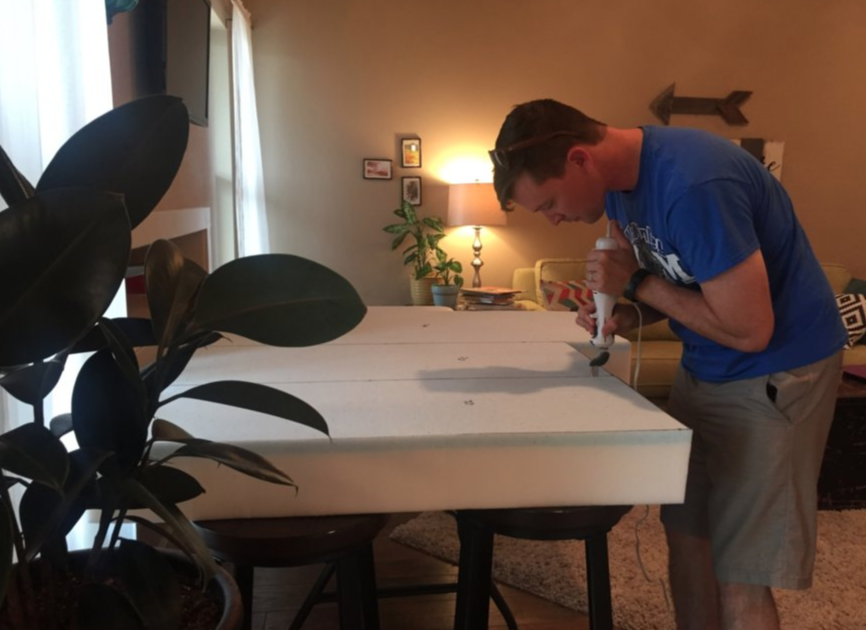
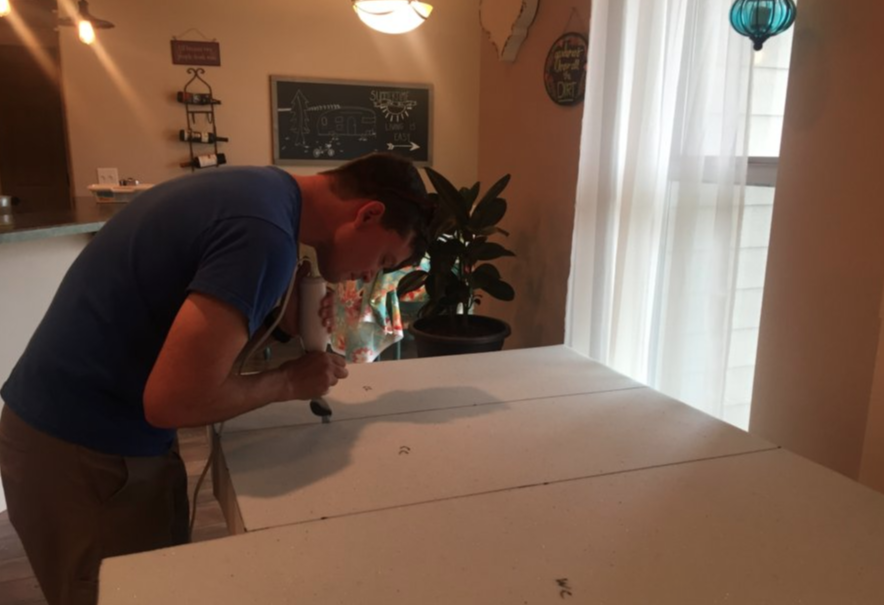
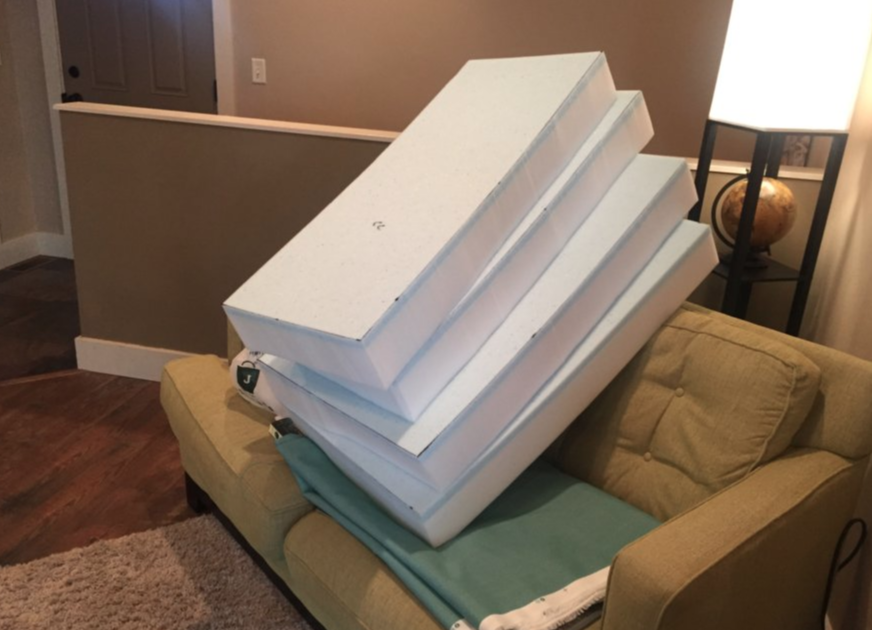
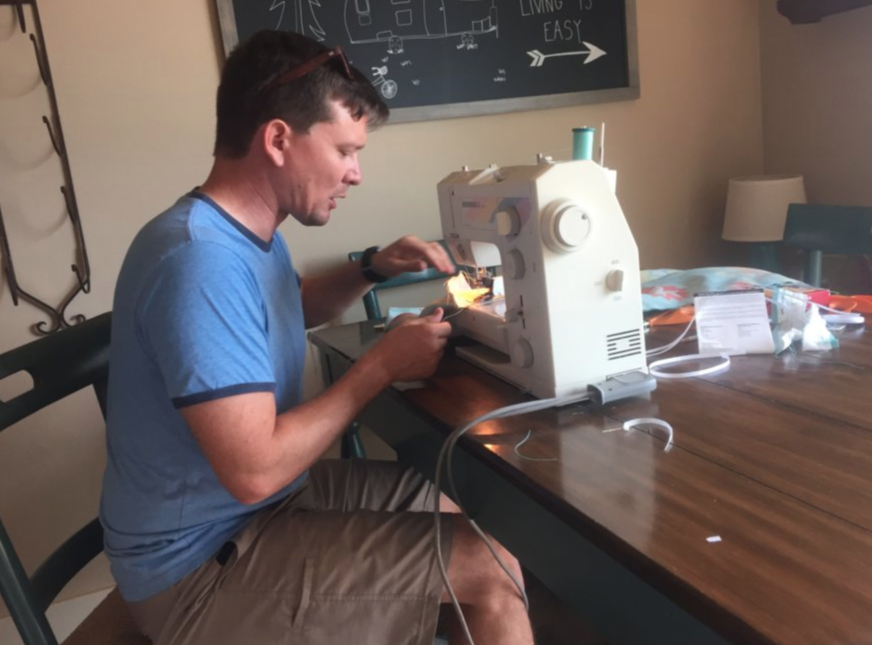
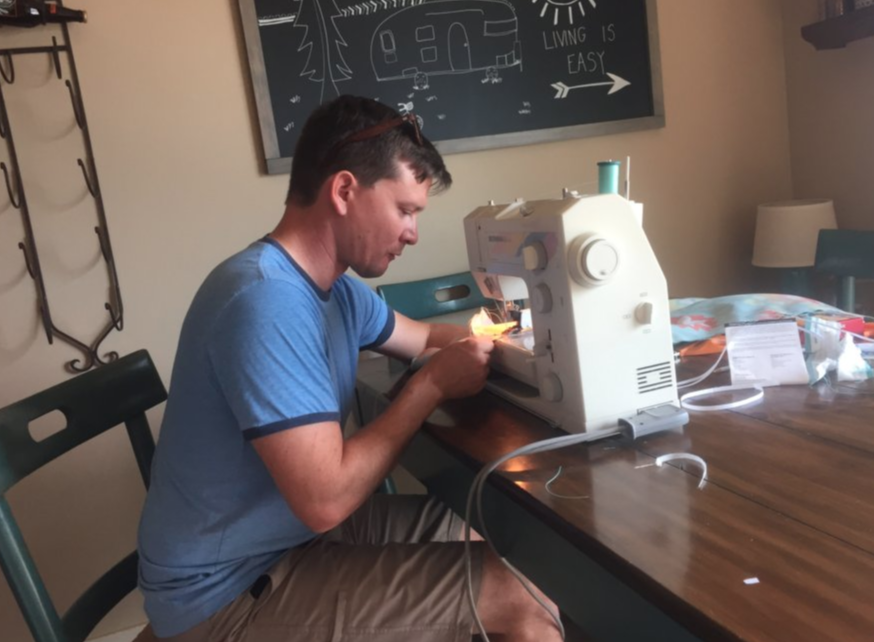
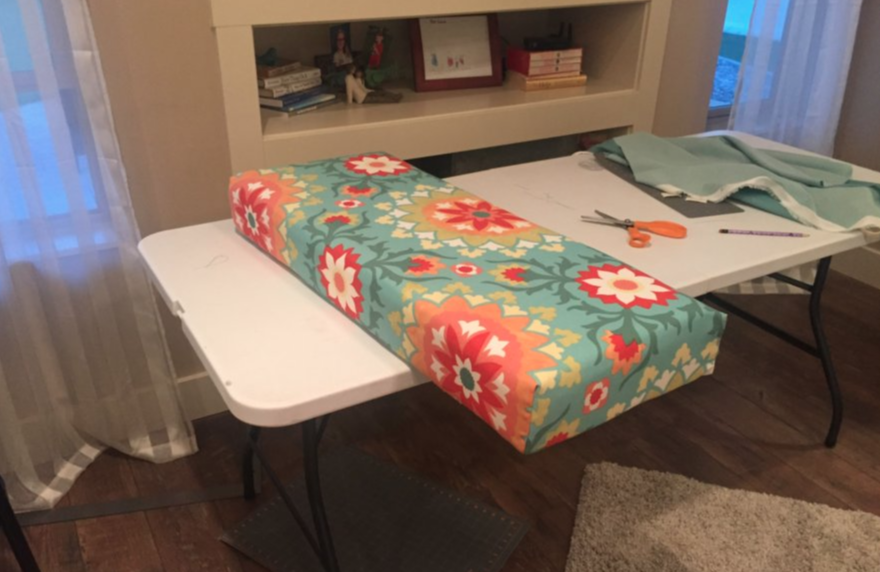
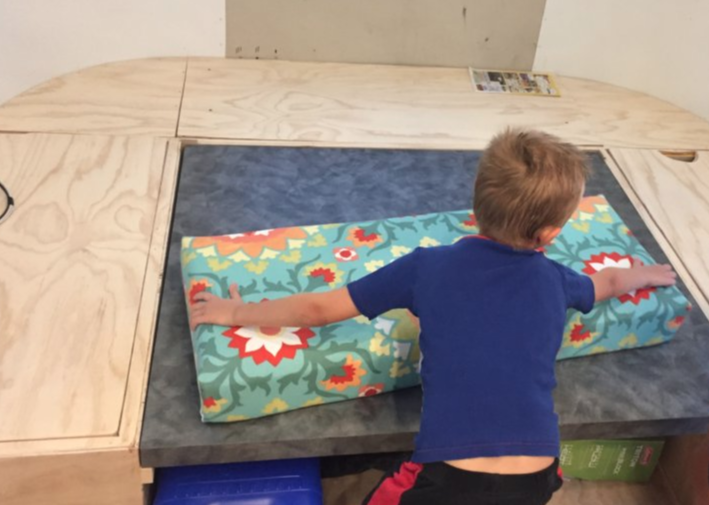
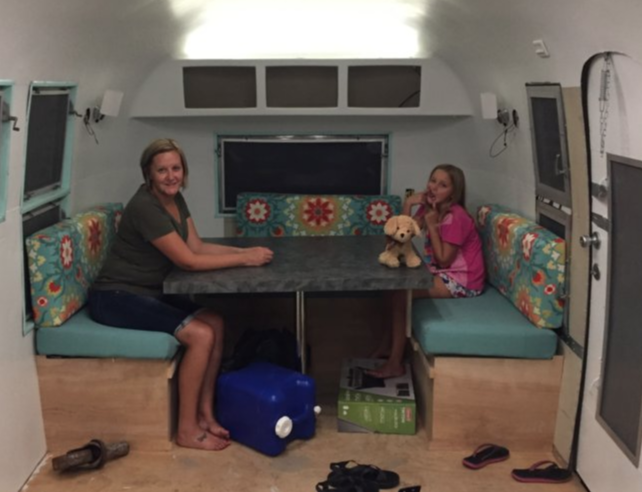
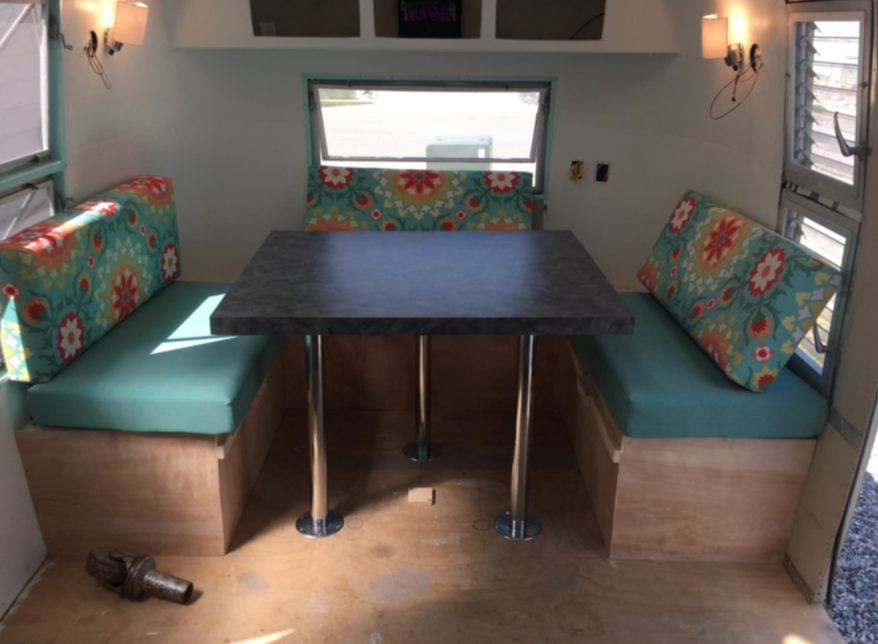
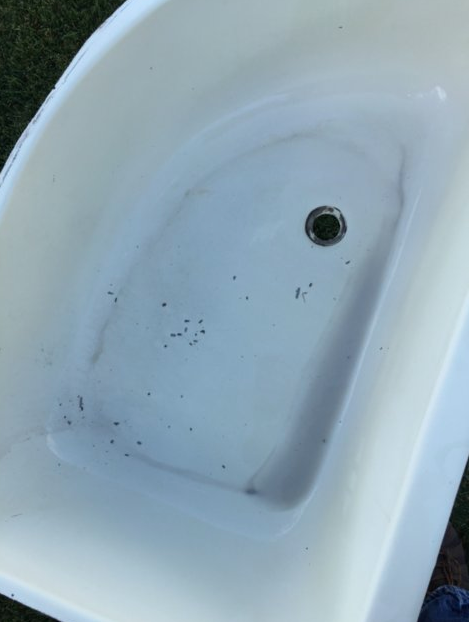
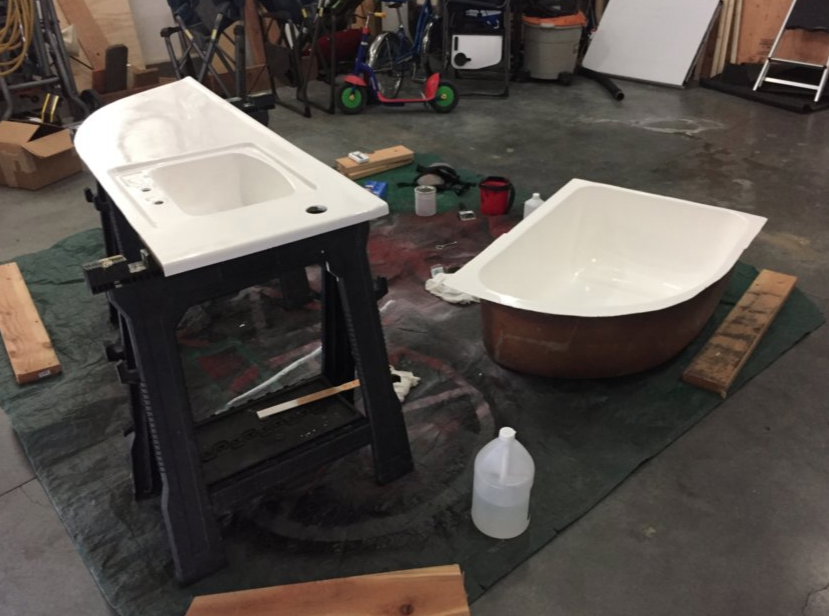
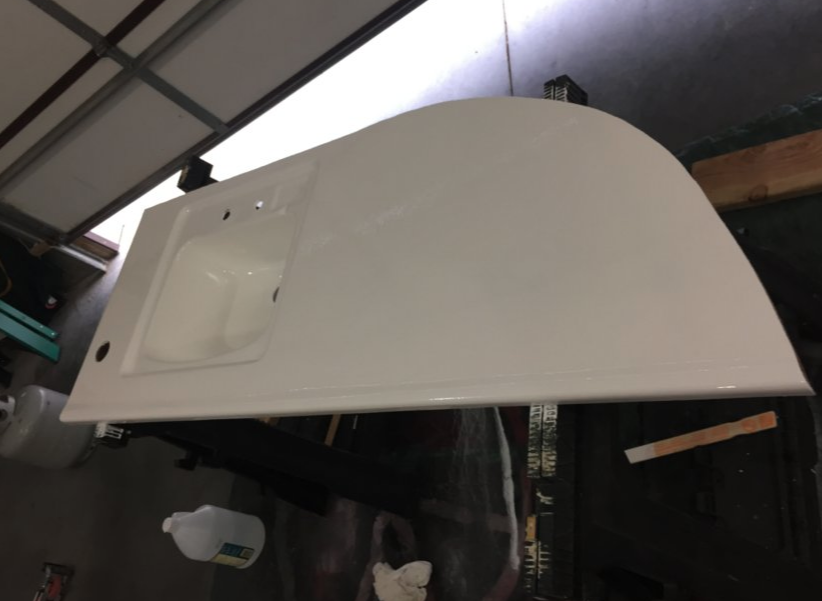
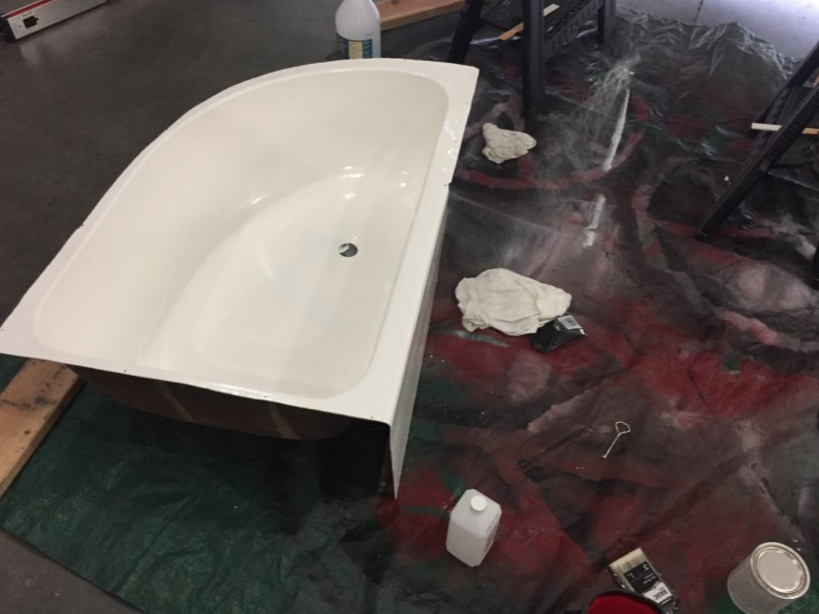
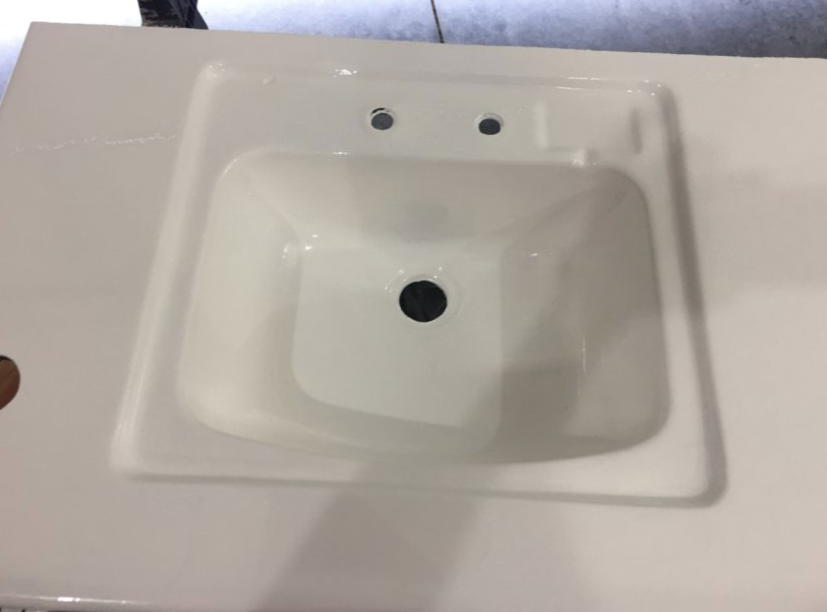
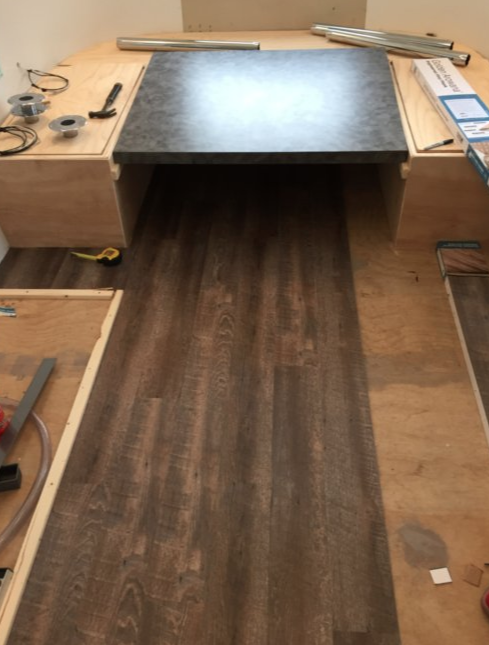
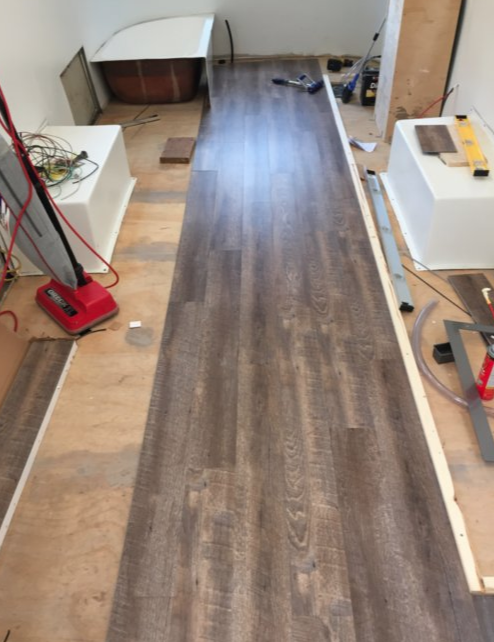
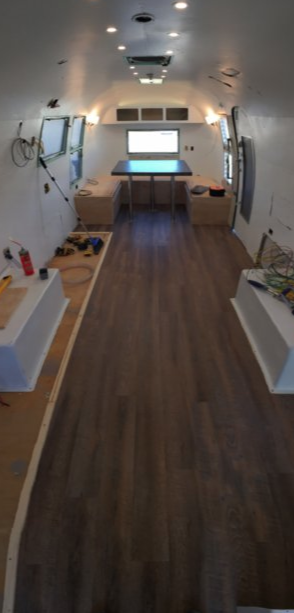
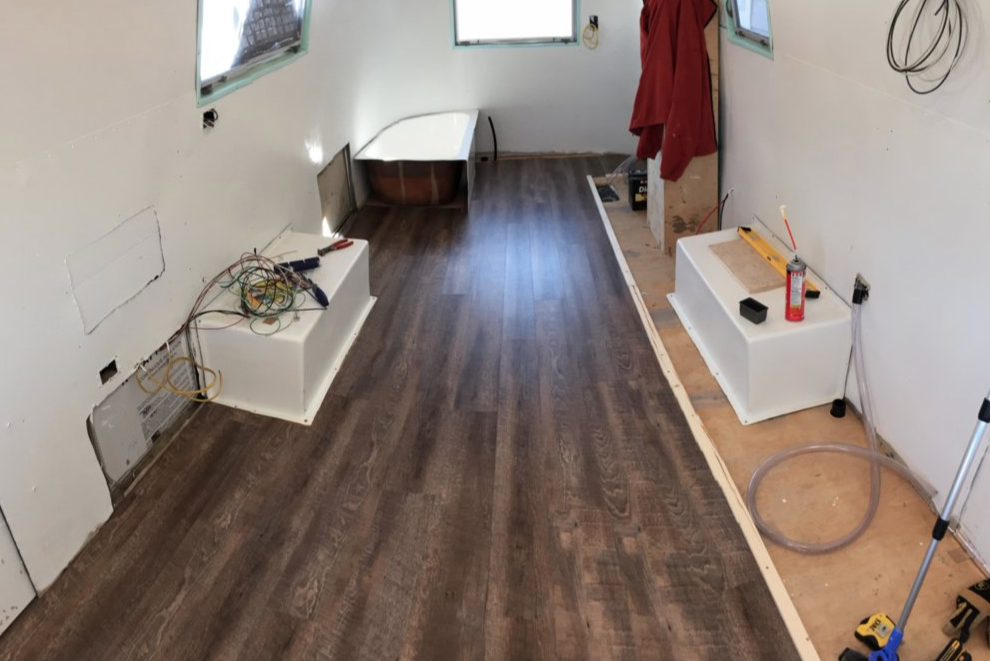
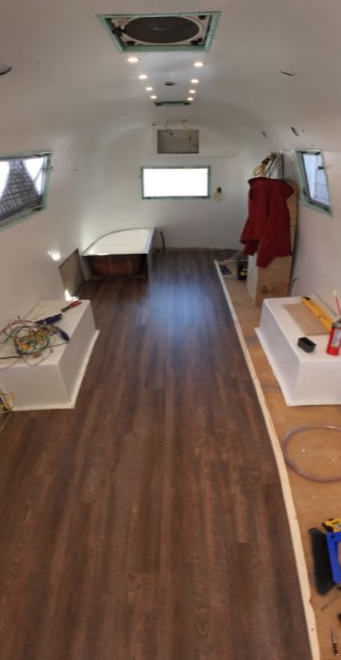
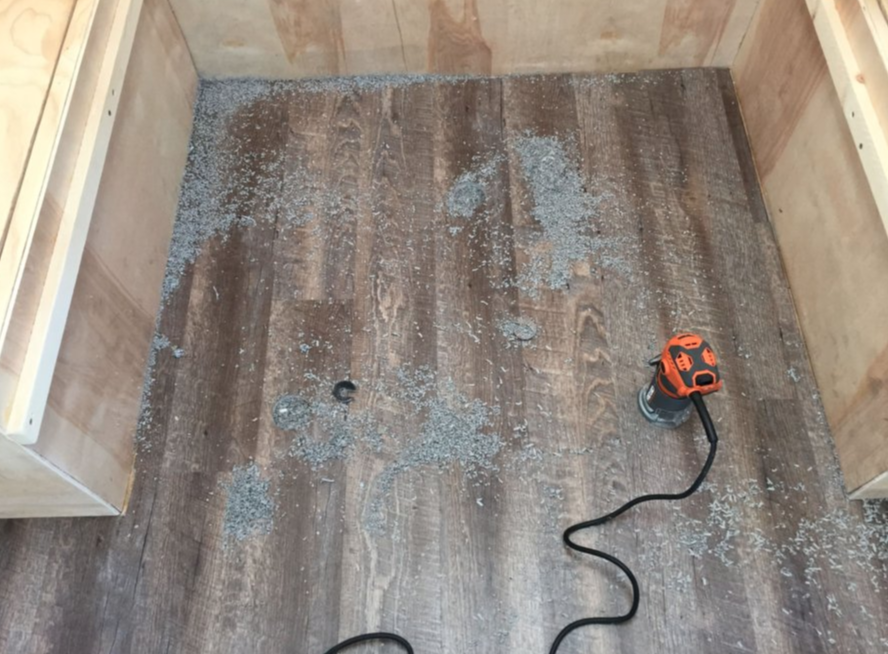
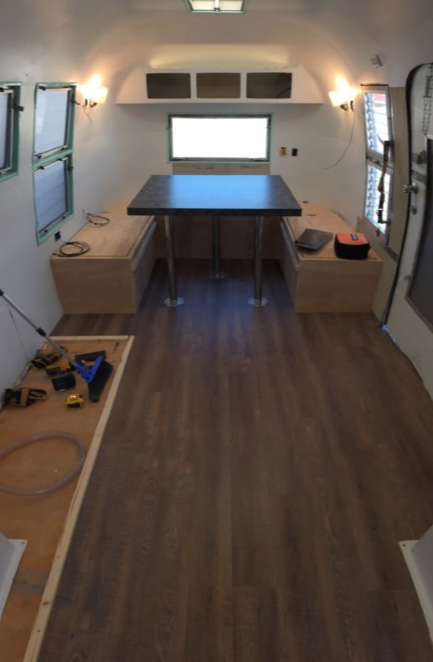
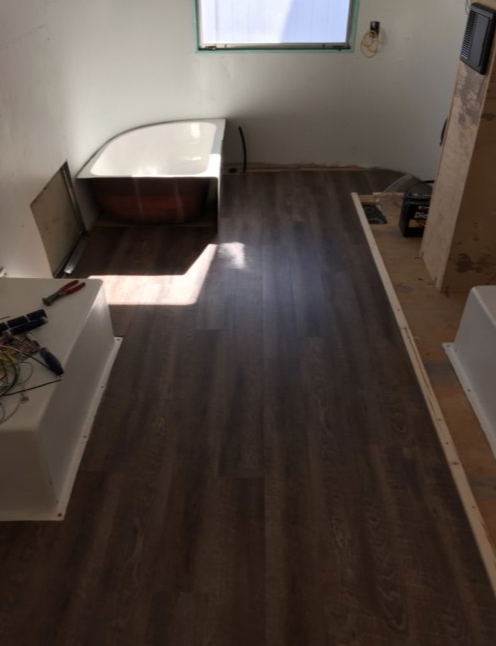
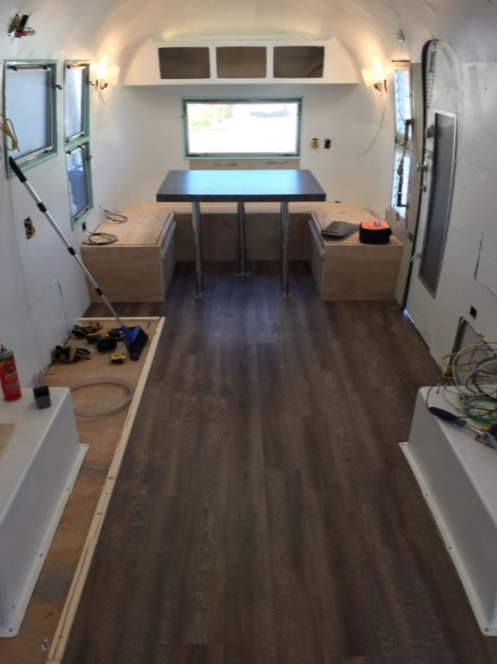
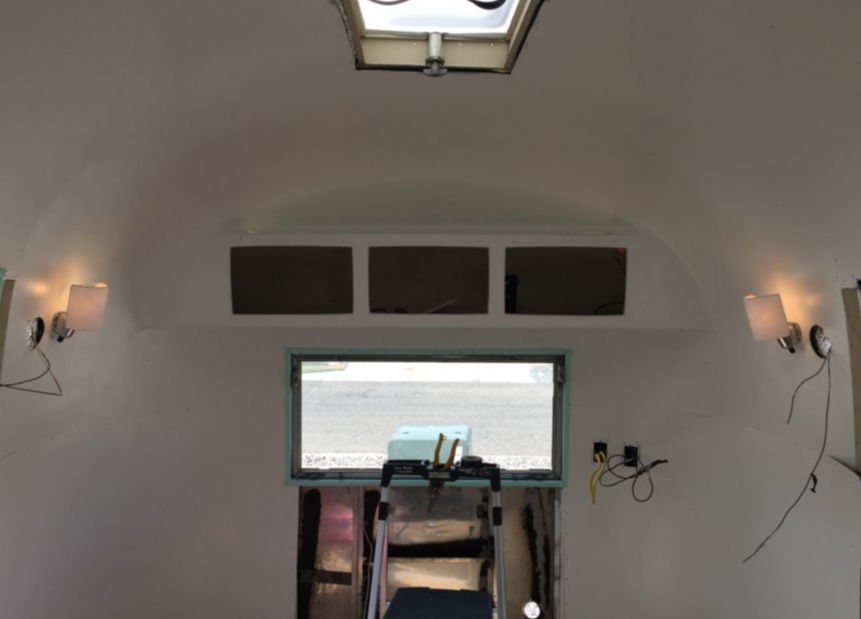
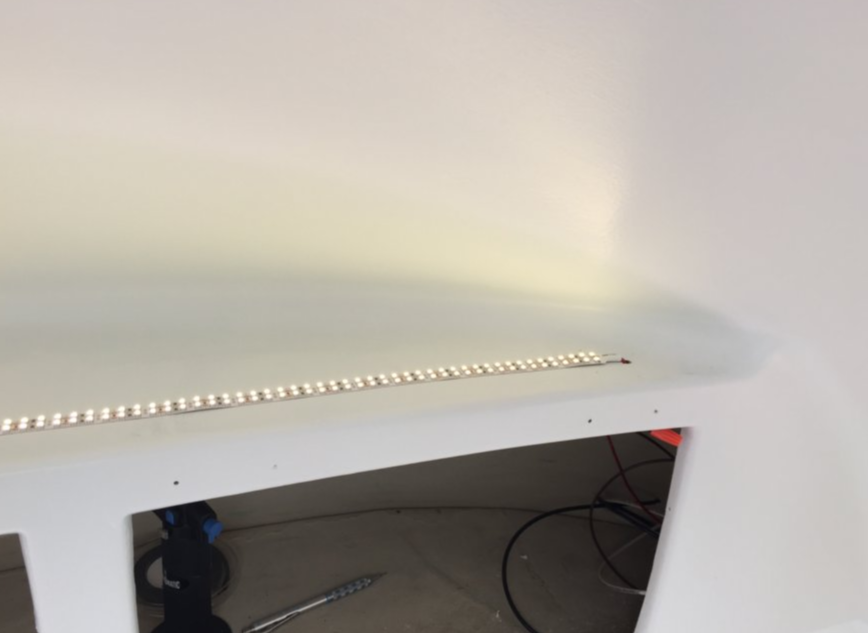
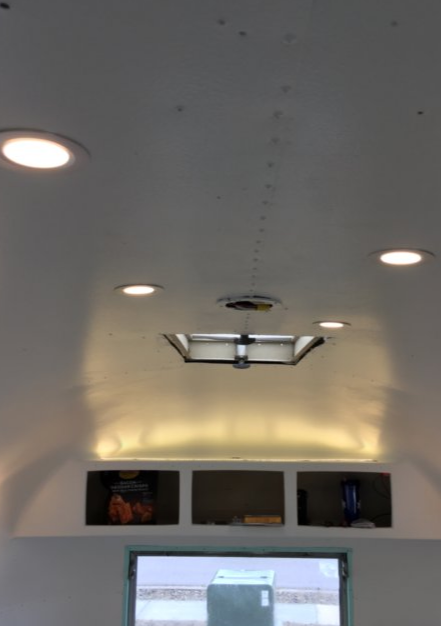
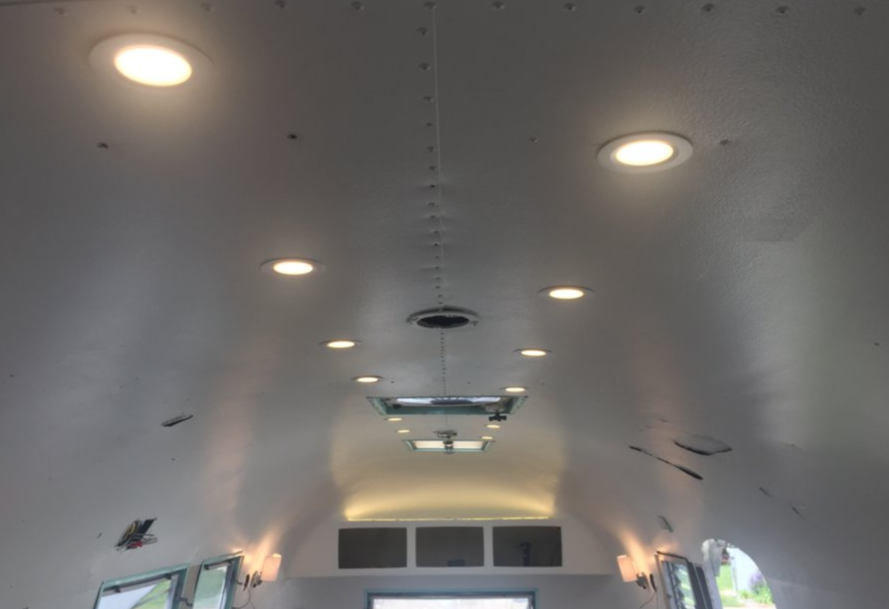
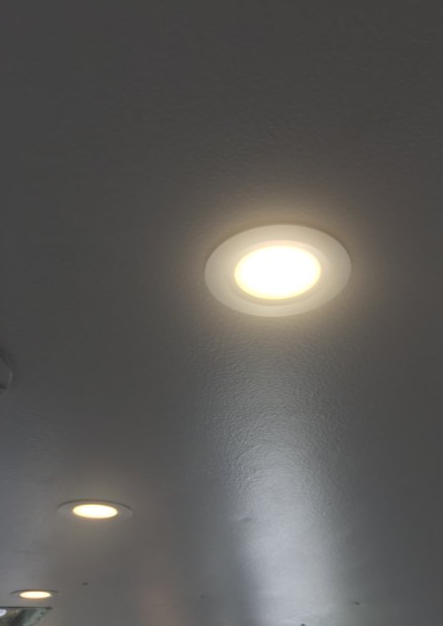
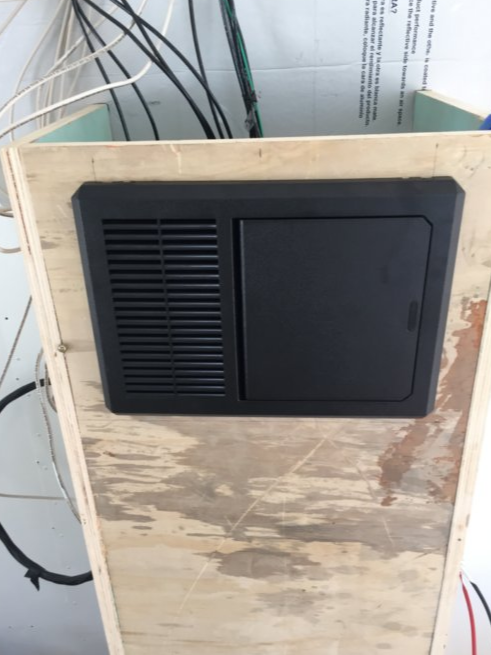
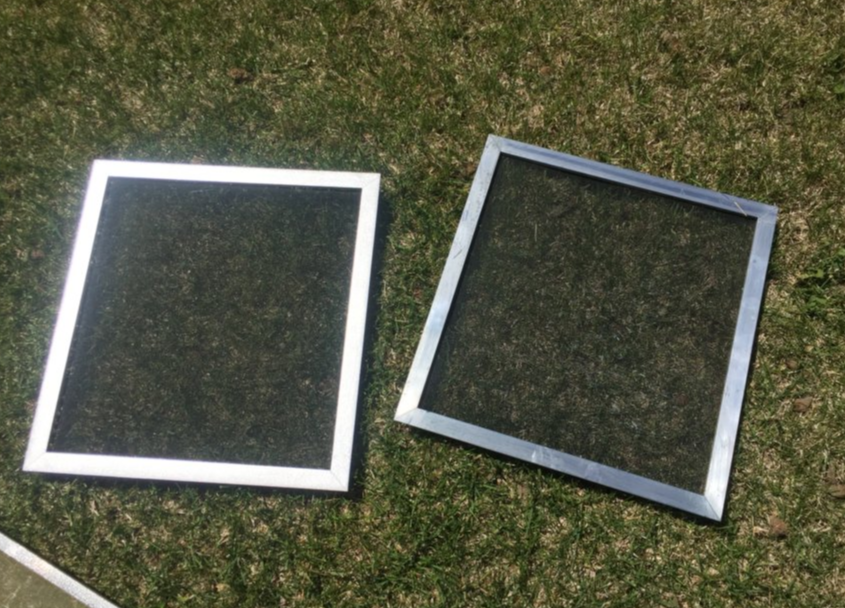
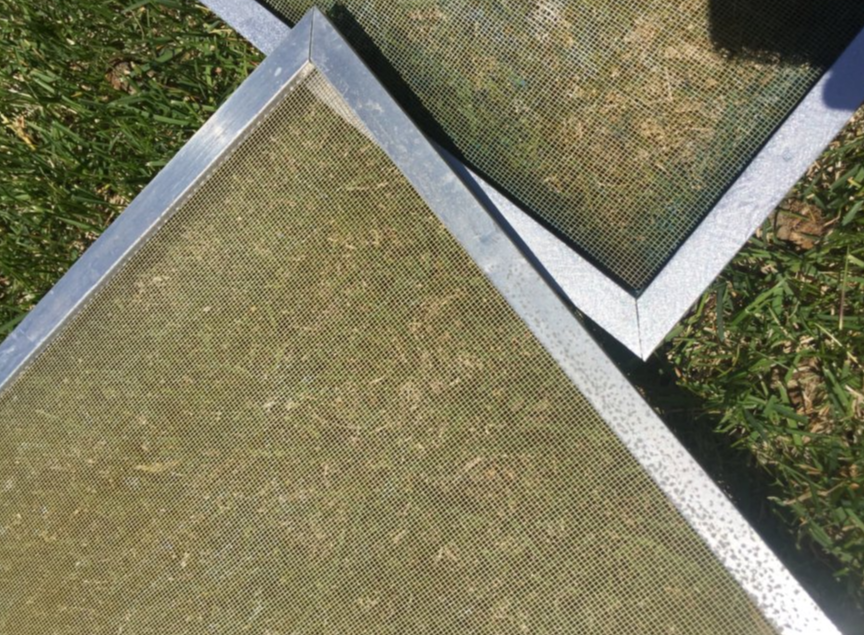
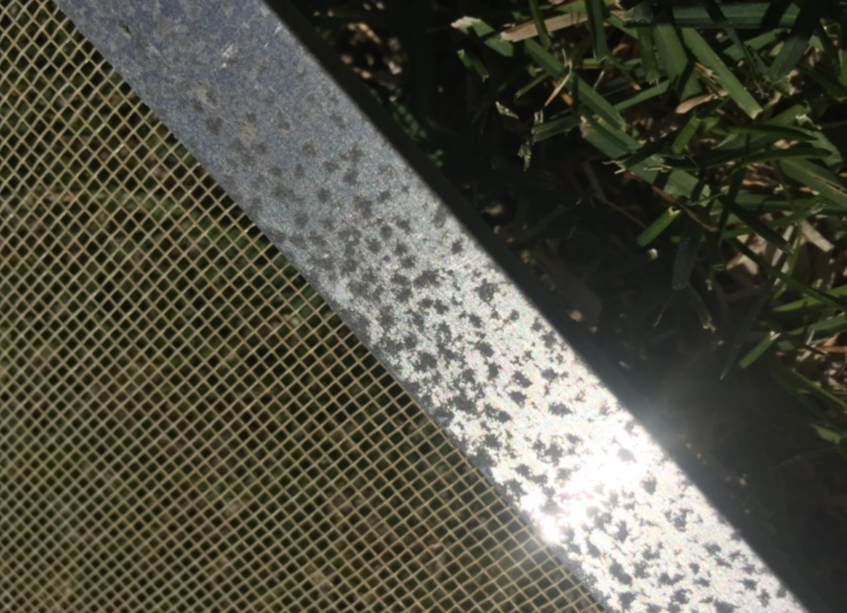
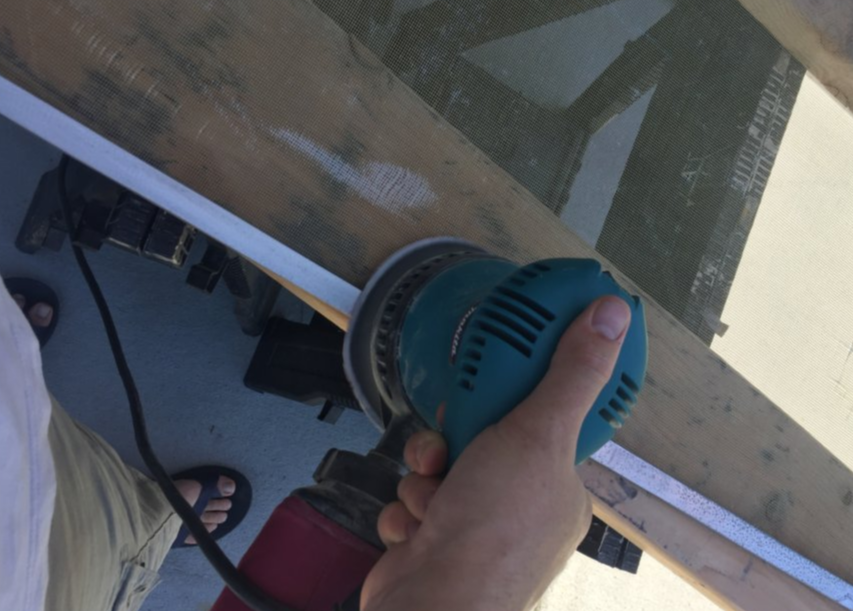
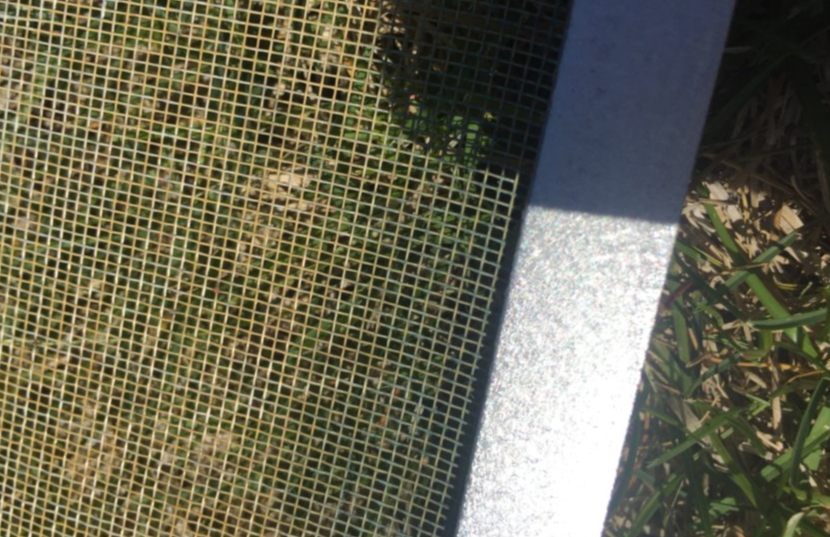
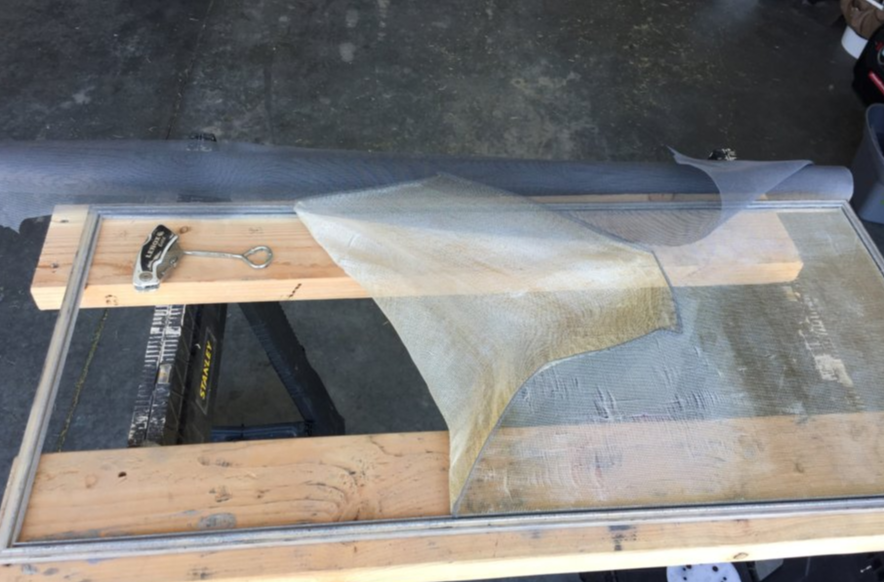
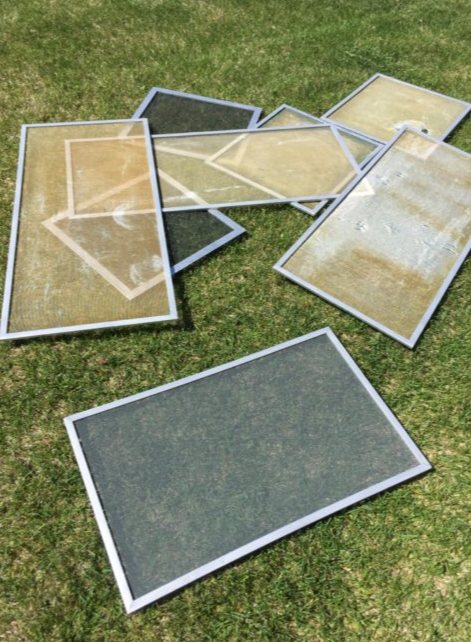
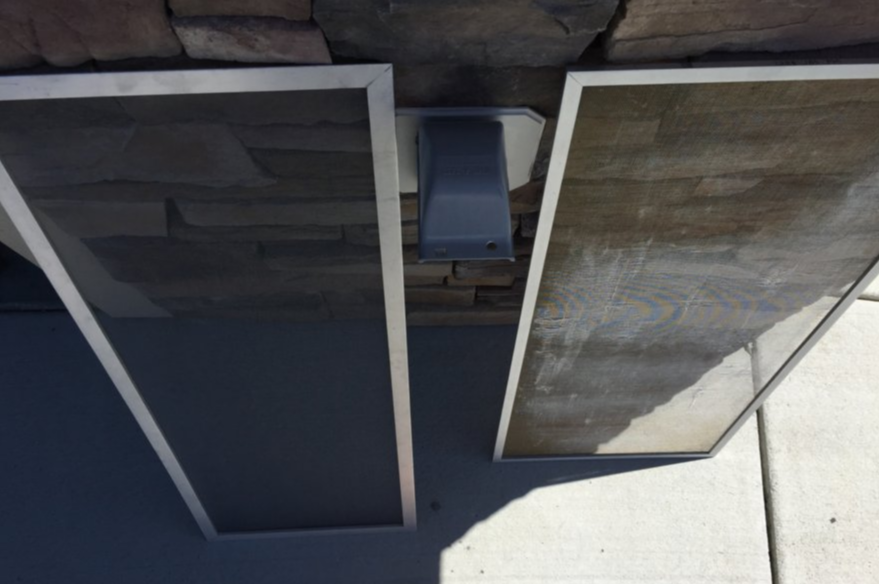
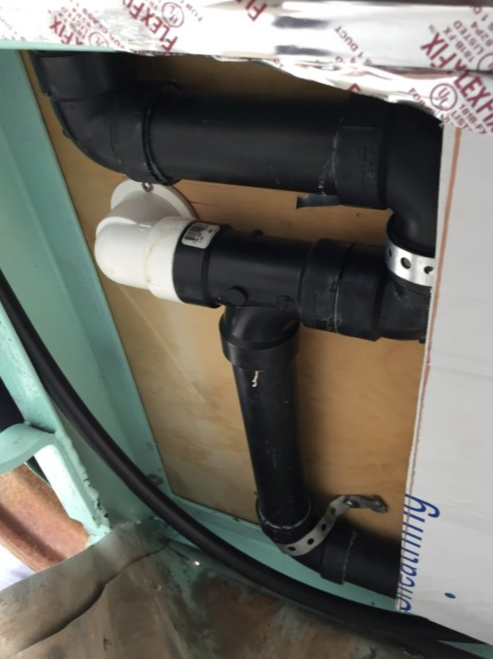
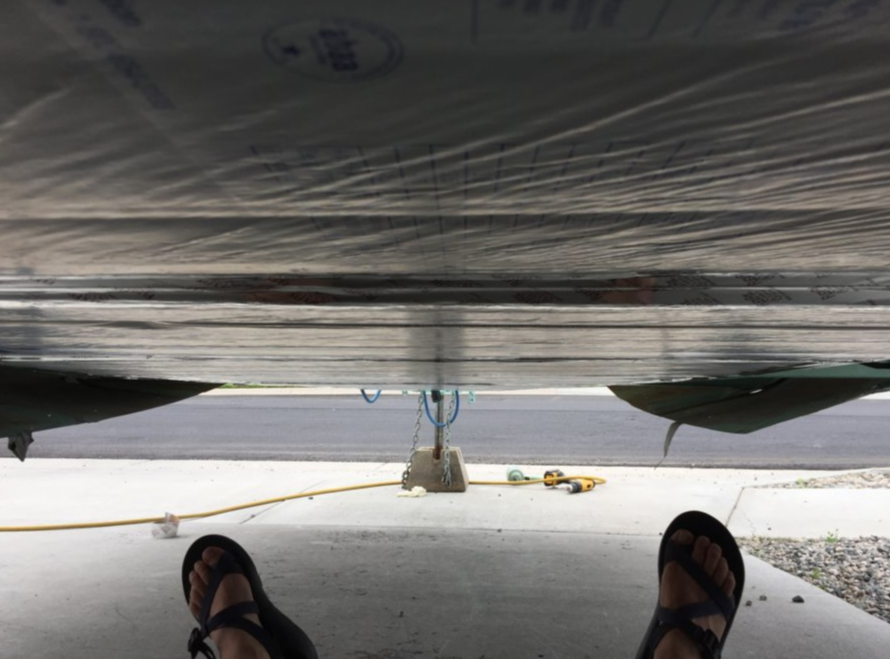
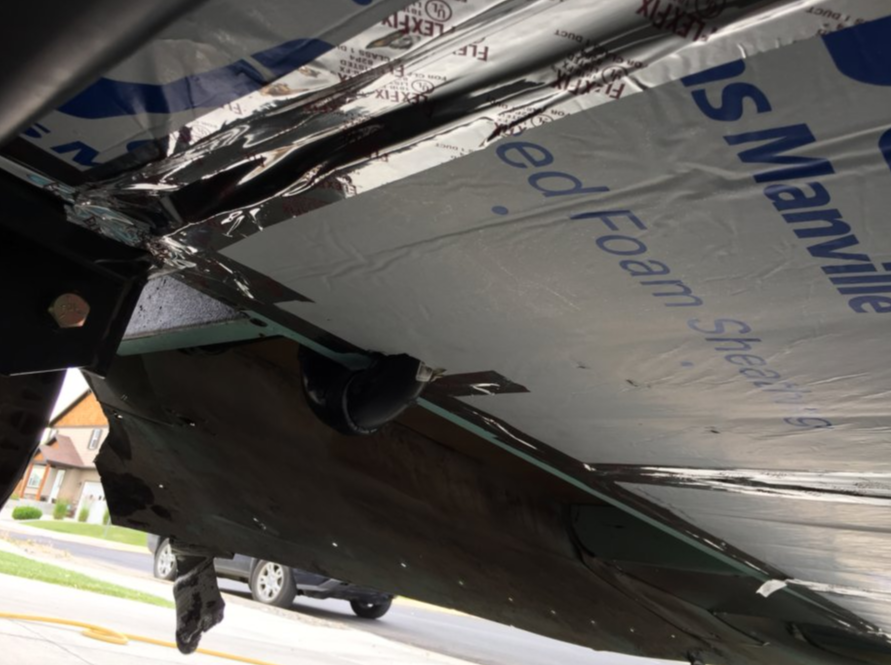
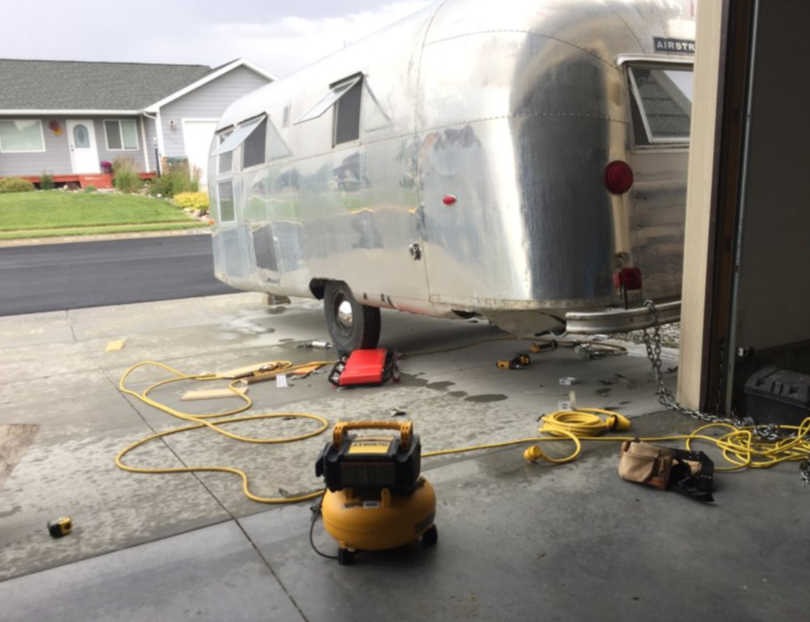
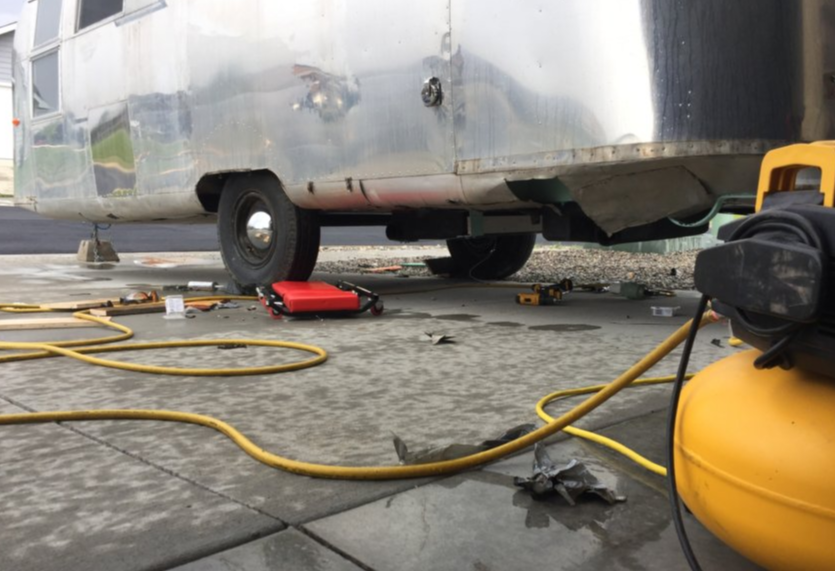
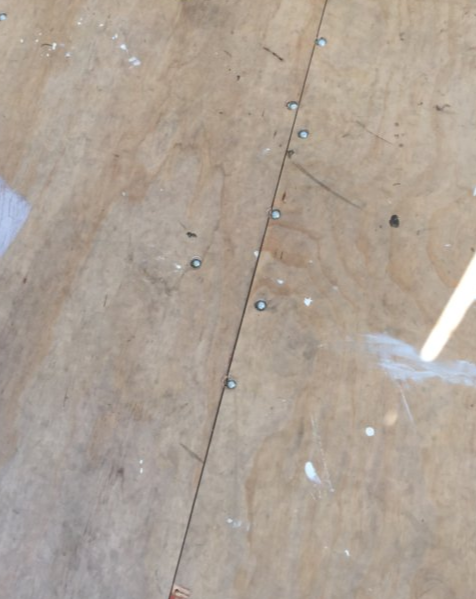
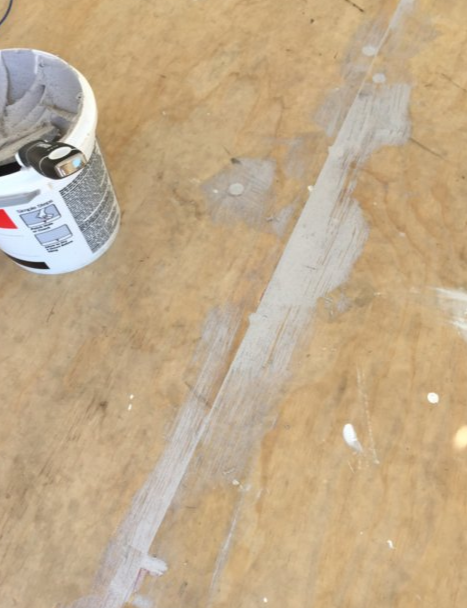
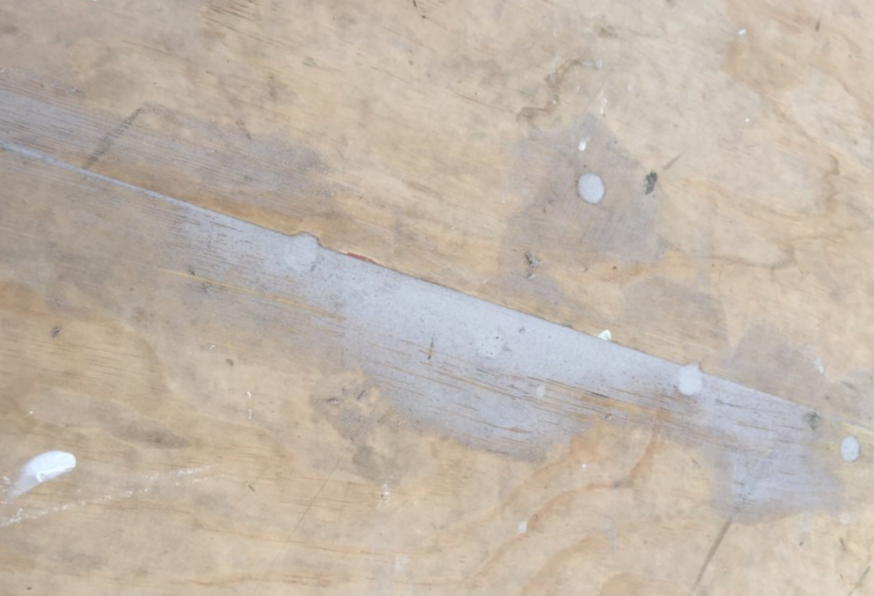
Did I mention that nothing has really been tested? Heck, major systems are still not even installed yet. In the next few days, I'll show you winter's work. I got quite a lot accomplished, but no where near enough. June has been, and will be, a huge construction push inside Eisley. Sara says its a perfect example of how we do life. When we were expecting our first child 10 years ago, what did we do? Resigned our jobs and moved across country. My first year teaching? Bought a home. Sara's first year teaching? Decided to have a second kid. We tend to gravitate toward crazy. I guess with real stability developing as a family, we needed a dose of chaos. Anyway, this summer we're planning of lots of visits to extended family, big cities, and the ocean. My daughter is just about to enter 5th grade (how on Earth did she get so old?) and a part of the curriculum is US History. We will explore some significant places on the East Coast so when she learns about them in school, she has a context. Much closer to my heart, my kids have never seen the ocean. In my dreams, sometimes I walk on the beach with my mother picking sea glass. I want these memories for my kids. My plan is to bring you with along the way. 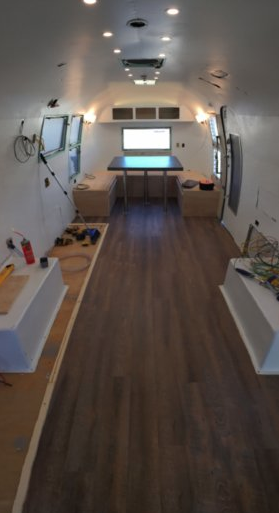 SummerDuring one of our trips in July, my wife's and my air mattress sprung a midnight leak. If it's happened to you, you know. We woke up in a plastic taco, smooshed together like meat and cheese. Of course, there are times when such smooshing is not such a bad thing. However, this was more of a get-your-armpit-out-of-my-nostril kinda thing. So I began the business of building the dinette when we came home. It becomes a bed in the evening and a table during the day. There were lots of people who have done this work before me. I read hours of blogs and posts on www.airforums.com. In the end, I sat in the end of the trailer with sticky notes, a pencil and a carpenter's square. I measured, wrote, erased, and measured again. A few bloggers/posters mentioned how there is never enough counter space in a camper. One lamented that he made his benches too deep (his were 24"). This was one of those decision I sweated over. I measured every chair in our house, from the dining room to the couches. Eventually, I decided to make my benches 20" deep which would allow for an oversized table. Furthermore, I decided on 14" from floor to top of the bench (not including the eventual cushions). Fourteen inches would be too low, but I figured on 5" thick cushions. That is also thicker than most, but I had an epiphany I'll tell you about further down. Anyway, I'm very happy about my measurements. The benches feel deep enough and the table feels big - even big enough for board games in rainy weather. After I measured, I drew everything out on the plywood. Then, I used cheap firring strips (1x2s) from a box store, 1/2" (I think) plywood for the top of the benches, glue and screws. You can see the photos above to see the progression, but it was pretty straightforward work. I was worried that the 1x2s would be too weak, but it is incredibly strong. I faced the benches on the vertical sides the thinnest ply I could get. It actually measures 3/16" with my tape measure, but I don't think that is the nominal measurement. Of all the luck, it is the exact same thickness as the original bulkheads, so I have the right material for that future step, too. Next, I made the table: I apologize, but I must have forgotten to take pictures during this process. Basically, I took the same plywood, reinforced it with scraps, and used a laminate sheet to cover it. I made a few mistakes along the way - I am new to router work and scratched my new table before it ever got placed. But as my wife so kindly put it, "We have kids." Nothing stays scratch free for long... After the table, we made made cushions. This was the most out-of-my-comfort-zone project yet. I've never used a sewing machine; Sara had one from high school. She was convinced we couldn't do it, but that's how I normally start a project. Here's the epiphany I had about cushions: Foam for cushions is very expensive. Very. I wanted thick comfortable cushions. After all, these cushions become our bed. We priced the foam at the local fabric store and I had heart palpitations. Then I got online and found a mid-quality memory-foam mattress. It was about 1/5 the price. Would it cut right? So when it arrived, I measured out all of our cushion dimensions on it. We bought a cheap electric turkey knife and I cut. It was exceedingly difficult to hold the knife perfectly vertical. (If you are reading this blog and considering copying me, I cannot emphasize this enough.) We used two tables for support, cutting down the middle. I was very careful, but I still was FAR from perfect. Fortunately, our plans for the cushions (youtube video here) made the fabric about a 1/4" shorter in all three dimensions than the foam. This tension caused my foam-cutting mistakes to be unnoticeable. We ran out of foam for the corners. I'm waiting until I buy the foam for the bunk beds to fill in the corner rounds. In the end, I am very proud of the cushions. You might notice a difference in the table legs above. I initially tried to put two legs in the center, to maximize ease of entry/sitting. However, that was very unstable. So I added a third leg. This worked perfectly. We slept well once those 5" memory foam cushions were installed! October WorkWe are finally catching up to present day. A week or so ago, I realized that the days were getting cooler. The tub and sink still needed to be worked on in consistently 60° weather, and those days were fleeting. The tub and sink were both very scratched (the sink had a hole) and they were almond color. The reviews about this type of epoxy paint for tubs all said that the brush-on version was easier to do well. I'm not sure; it was very difficult. I followed every step to the T. I washed and scratched and washed some more. In applying, it took 4 thin coats (the box said two), but it finally covered. Now, if there's one handyman skill that I feel semi-pro in, it would be painting. I'm good at it. I can paint a straight line without tape, just sayin. So, when I say this was the most difficult paint I've ever used, please realize know that's saying something. No matter how hard I tried, I still got drips and waves. I'm going to call it "textured". TodayIn order to get bulkheads and bunk beds into place, the finished floors needed to be installed. 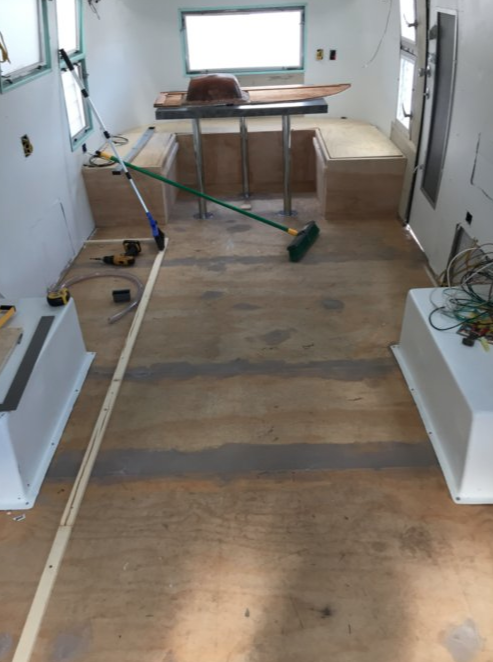 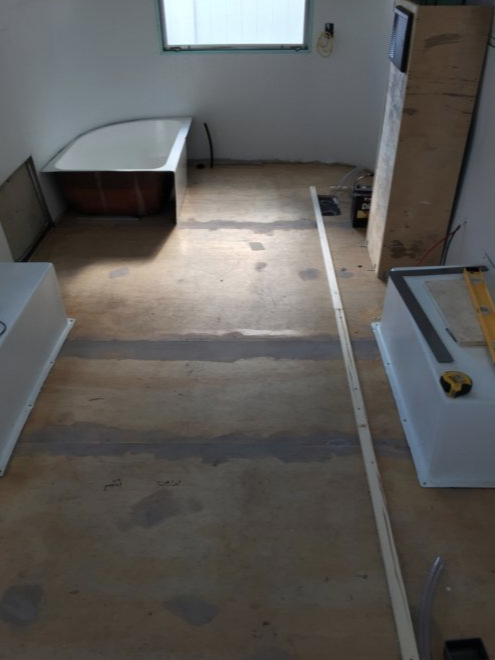 Before I started, I put one more skim coat of floor leveling compound over the seams and bolt heads. The manufactured vinyl laminate is pretty good at overcoming imperfections, reportedly, but I wanted the best, smoothest subfloor I could manage. After that dried, I installed a border for where the cabinets will be. At $2 per square foot, I didn't want to pay for laminate under them. Plus, this is a floating floor, so it's not supposed to go under. I searched all over Billings and found the vinyl laminate that I wanted. It was a grey faux-wood from an orange box store. After buying it, I had to run to Costco. They had a nearly identical vinyl laminate for about 2/3 the price. So I returned the other and went with Costco. It's also worth mentioning that I bought the click-together version. I understand the "grip strip" version is not as durable. Really, click together planks are like Legos. They need to be tapped into place with a wood block and hammer, but otherwise they are simple. Still, it took me part of two days to do it. I needed to make many cuts and stagger the planks in an eye-pleasing way. I wish I had the cushions in for the picture, but they're in the house. You'll have to imagine. I love seeing this transformation from ugly to beautiful. My next step is bulkheads, bunk beds and rough freshwater plumbing. All of this work happened in April, May, and June of this year. I'm sorry for the delay in writing, but at the time it was all I could do to get ready for camping. Since then school started. Now that I finally have my feet under me, I can sit down to write and remember. ElectricalI wired in two wall sconces and an led strip on a dimmer switch first. Those were the easy ones. Next, I wanted task lighting. The two areas that need task lighting are in the galley and in the hallway/kids bedroom area. For this lighting, I bought led pucks that sit flush with the ceiling. They are really quite amazing little lights. They are about 1/4" deep and barely sip electricity. Using a hole saw, I cut out holes and ran wire. I also needed to build a temporary box to hold the electrical panel. Using my old car battery, they lights will last for about three nights of normal use. The wall sconces are not LED, yet, so if we use them the battery dies pretty quick. I'm going to purchase two new fully sealed AGM batteries for next season. Window ScreensThe screens were scratched and dirty. That was easy to replace; in fact, I had leftover screen from a hailstorm a few years back. All that's needed is a cheap (less than $5) plastic tool and new roll of screen. There's a plastic cord that holds the screen in, but it was in good shape and I reused it. However, the frames were corroded. The corrosion was deep and resisted coming off, even with steel wool. I heard that there were some specialty power tools for this kind of thing. But before I went and bought yet another tool, I decided to try my orbital sander. I discovered that my orbital hand sander (with normal 60 grit paper) put a very attractive pattern of scratches into the aluminum. The finish went from smooth to scratched-on-purpose. I like the scratched look much better, actually. I don't know if the pictures do it justice. It looks very intentional. Designer even. Bellypan and PlumbingThere was a little plumbing to do before insulating and sealing the bellypan. The bathtub and both sinks needed drain lines into the grey water tank. Then, I used 1" foam board and reflective tape (to keep it in place until the bellypan went back on). I reused the old bellypan aluminum to save money. I had to patch holes, but aluminum is expensive. I also figure the bottom will eventually look grubby again. After it was all done, it was remarkable to see an intact underside. The belly has been open for a long time. Also, I built a dinette on the inside this summer. Next time I'll show how I've began to create furniture on the inside. I even learned how to use a sewing machine.
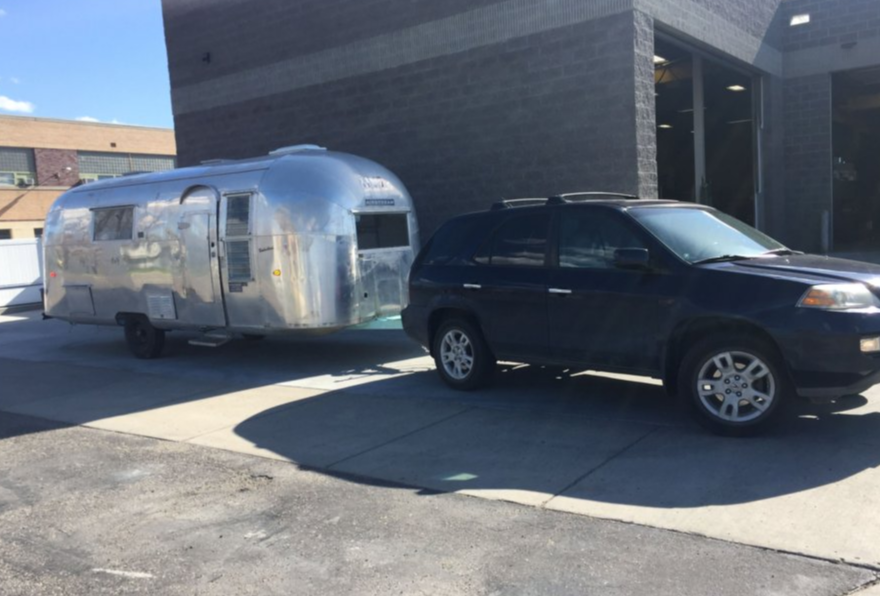
It has been over two months since my last post! In future posts, I will retroactively describe the construction over the last two months, but WE'VE BEEN CAMPING!!! In July, we took 4 camping trips and each was very different from the others. Cascade Campground, Inaugural Trip for my birthday, Red Lodge, MT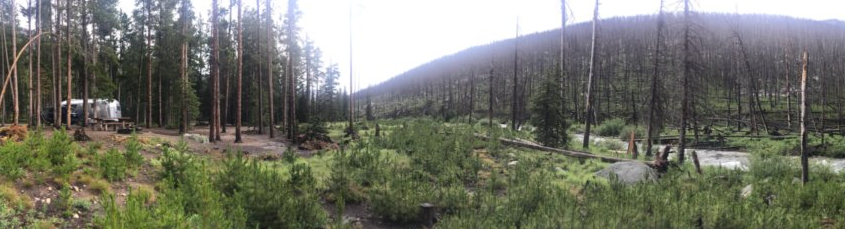 Our first trip was on my birthday. We pulled Eisley up to Cascade Campground in Red Lodge for two nights. There was one other group in the campground, but they were quiet folks, too. It felt like we had the whole mountain to ourselves. Cody Rodeo, at a KOA in Cody, WY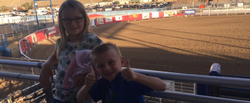 This trip was the opposite of our first. We stayed in a packed KOA. It was little more than a parking lot with a pool. This was not our favorite version of camping, but it allowed us to go to the rodeo. The rodeo was awesome! Basin Campground, in the Beartooth Mountains, Red Lodge, MT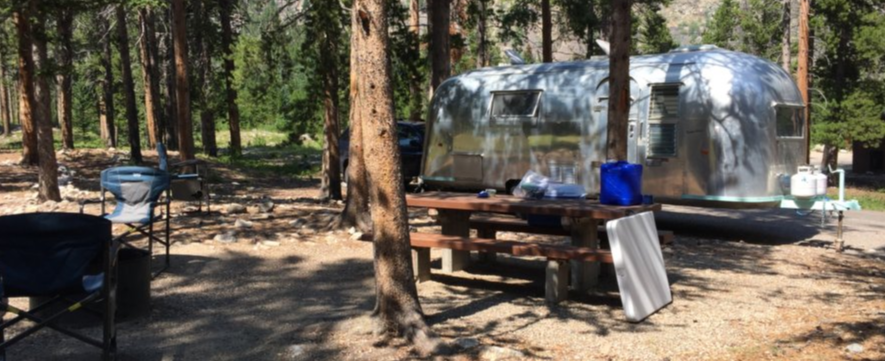 This campground is pretty close to our first site, but the experience couldn't be more different. We went on a weekend instead of midweek. It was packed, but that kinda became the best part. We bumped into close friends with kids the same age as ours. Instead of a quiet, family-oriented experience, we had a very social one. The kids ran around playing while the adults sat around the fire and enjoyed good conversation. Yellowstone National Park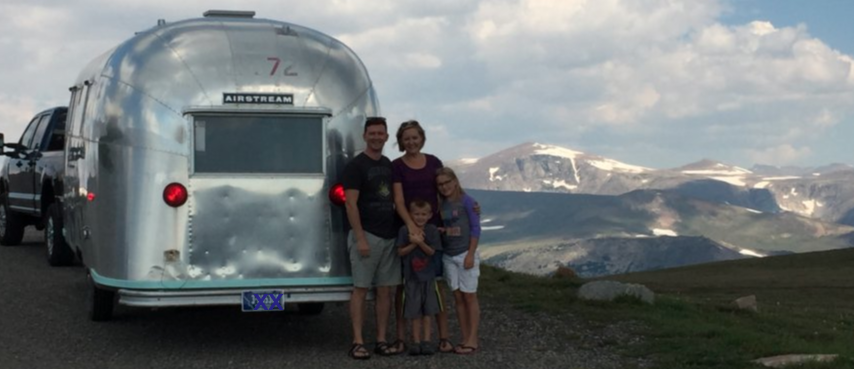 On the way to Yellowstone, in the Absaroka-Beartooth Mountains. For this trip, we decided to give our little-engine-that-could some well-deserved rest. Our small SUV has handled all of our local trips with determination and aplomb, but this trip to Yellowstone had several mountain passes. We rented an F20, 3/4 ton truck to pull Eisley up over the Beartooths, though the park, and back. It was awesome. Despite having been to the park many time and the crowds being the worst we've ever experienced at Artist Point, we felt like Yellowstone itself gave us a personal tour. We decided to hike down to the lower falls - in the distance of 3/8 of a mile we became the only people on the trail. It was a steep, switchy trail, but it was only a 3/8 mile! We sat and had a snack with the falls all to ourselves. We stayed at Canyon Campground, in the middle of the park. Our campground was full (we reserved one of the last sites about 10 months ago), but it was quiet and felt comfortable. You could tell other people were there, but not close enough to bother. Lastly, on the way out a mama grizzley and her cub chose to walk right in front of our truck. We were the only people on the road (at first) and it was like they were there just for us. There were many moments where I was sitting in a camp chair reflecting on all of the work of the last two years. These days were the result of the hard work, good advice, and help from my friends and family. My kids' lives have been enriched. My wife and I have shared memories. Summertime and the living is easy.
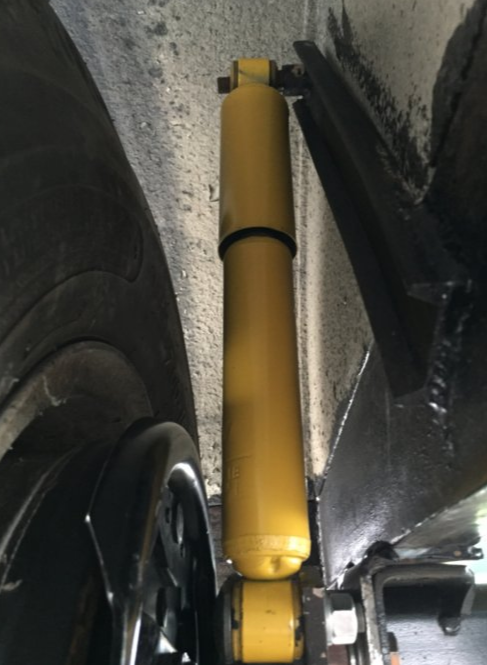
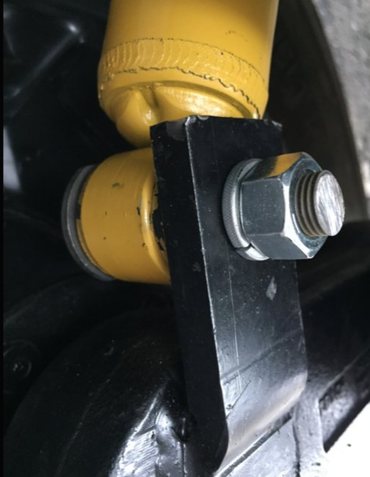
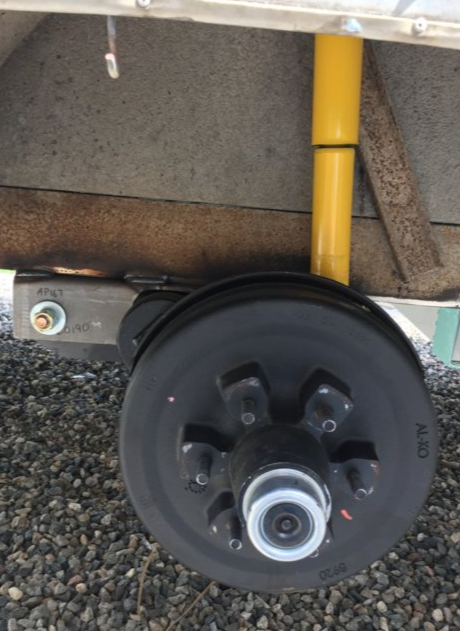
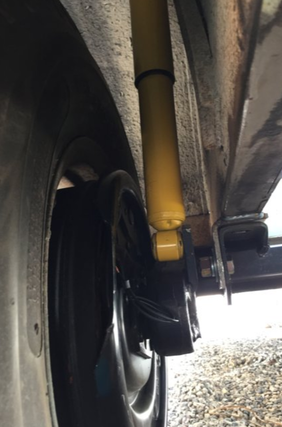
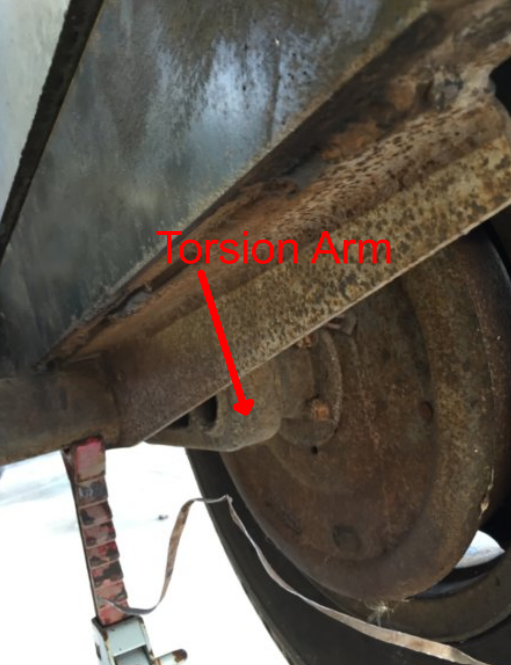
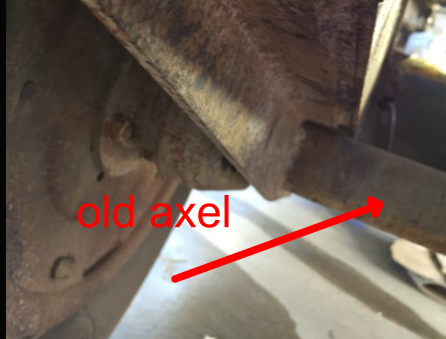
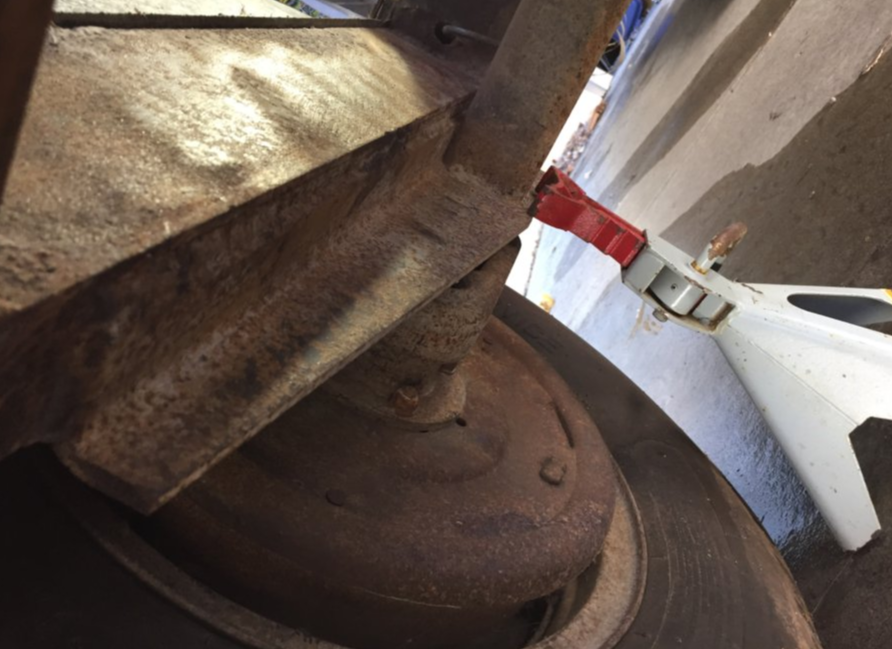
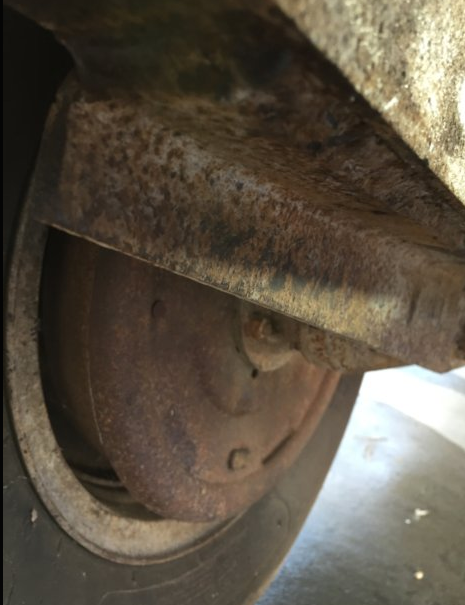
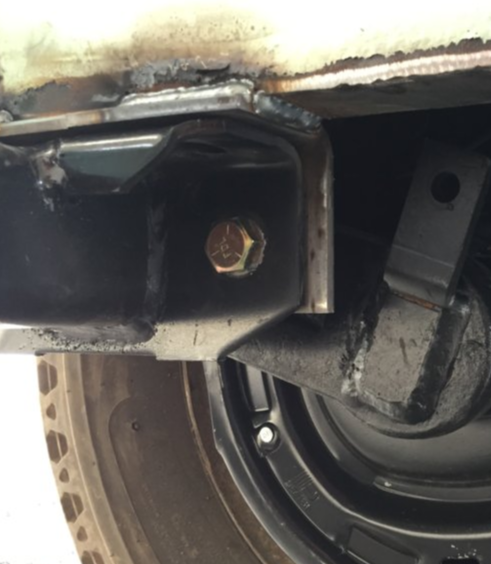
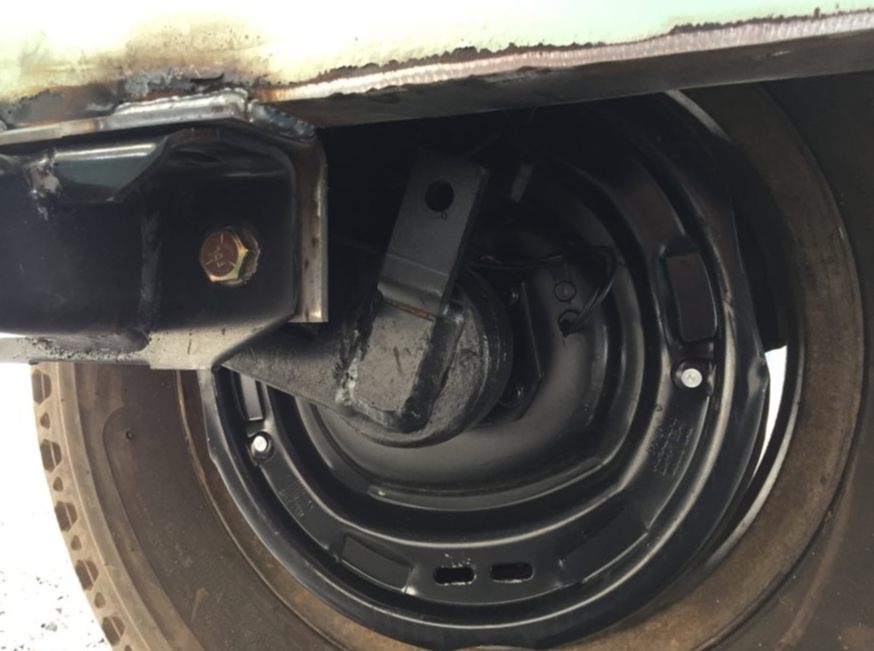
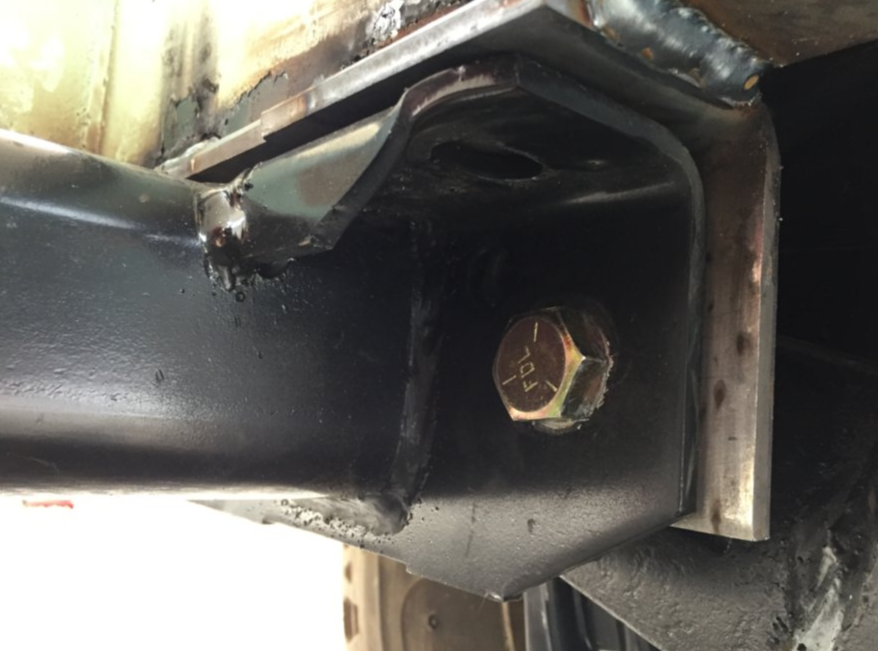
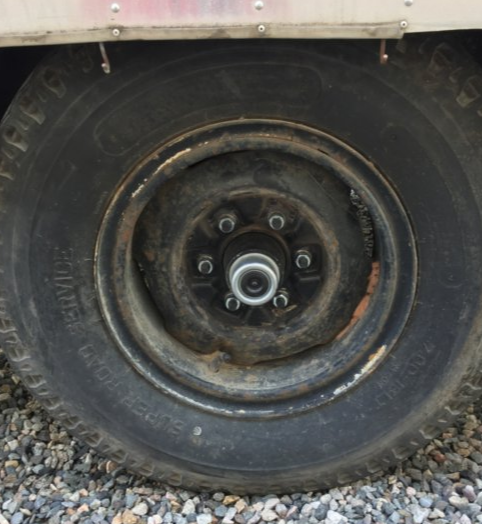
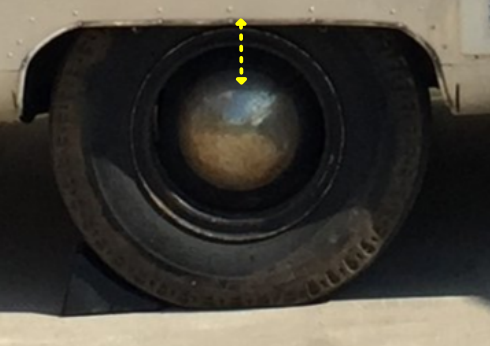
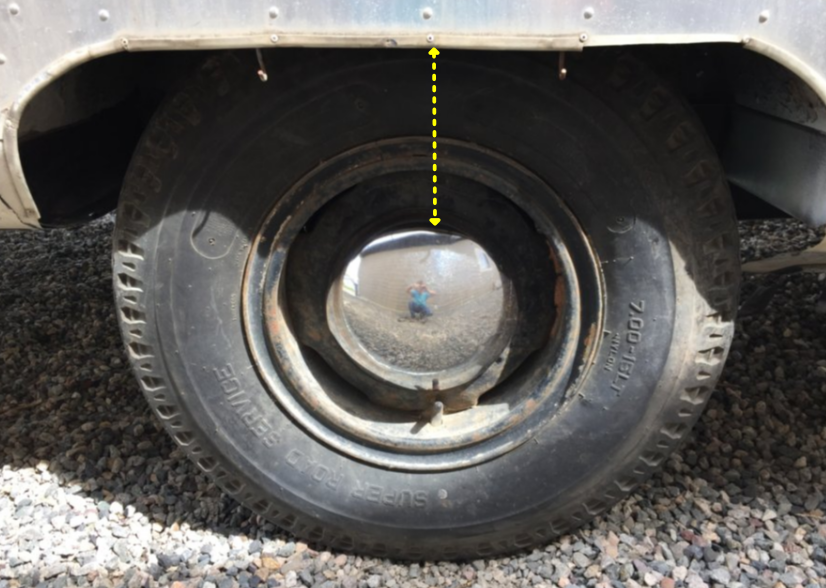
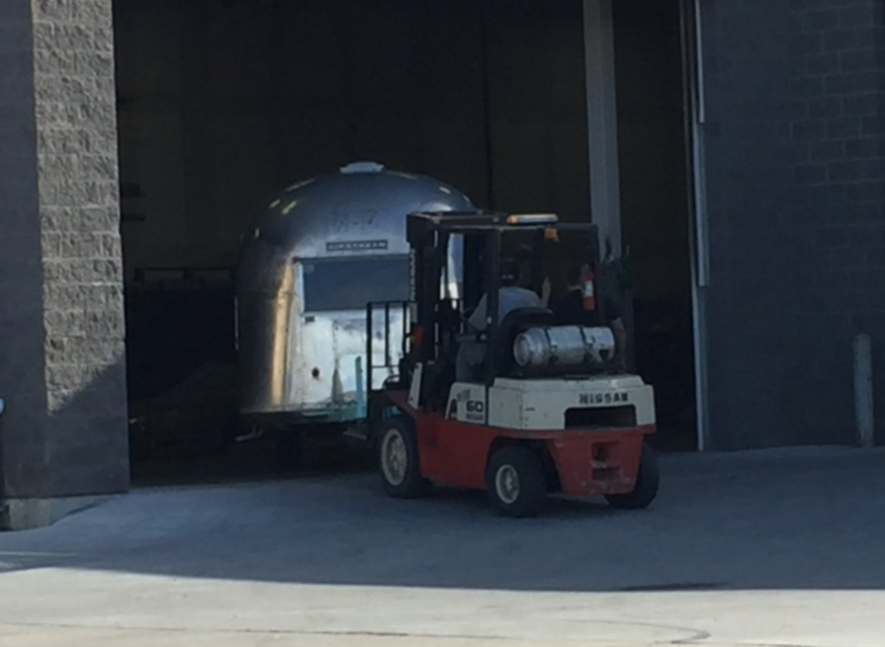 I'm pretty sure I babbled. That's the kind of thing I do when I'm nervous. I was turning over this baby that I've been working on for two years. Babbling is also the exact wrong way to communicate that I know what I'm doing. Awe, hell. I don't know what I'm doing. Eisley had a 55 year old axel. While many things are wonderful about a vintage Airstream, the axel is not one of them. I'm not an axel expert (which was abundantly clear to the folks at Ratco, more on that in a bit), but I understand that torsion axels have internal rubber rods under. The rubber rods flex as the trailer bounces down the road. Over time, however, the flex wears out. The torsion arm then sags and there's no flex in the system. In order to get a new axel, I needed to find someone who makes axels for vintage Airstreams. Fortunately, one of the gurus I mentioned in a previous blog makes brand-new replacements. After a few emails determining exactly what I need, Collin Hyde shipped out an axel. I chose an axel that has a slightly higher clearance, for the tanks and for mountain roads. However, buying the axel was the easy part. The old axel was welded on, so it needed to be cut off with precision. Next, a new mounting plate needed to be made so that the new axel has the right thing to mount onto. Third, the mounting plates needed to be welded onto Eisley. If the rest of it wasn't tricky, this is the step that gave me shivers. If the plates are welded even fractions-of-an-inch incorrectly, the alignment would be off. If the alignment is off, then the trailer pulls down the road cockeyed. Tires wear out quickly, gas milage is off, extra stress on the tow vehicle, etc. Finally, the axel gets bolted on. Suffice to say, this one was beyond my skills. So I had the axel shipped to Ratco, a local axel repair shop. Locally, they are very well known as the best in the business. Several people told me, "If you have an axel job; they're the best." 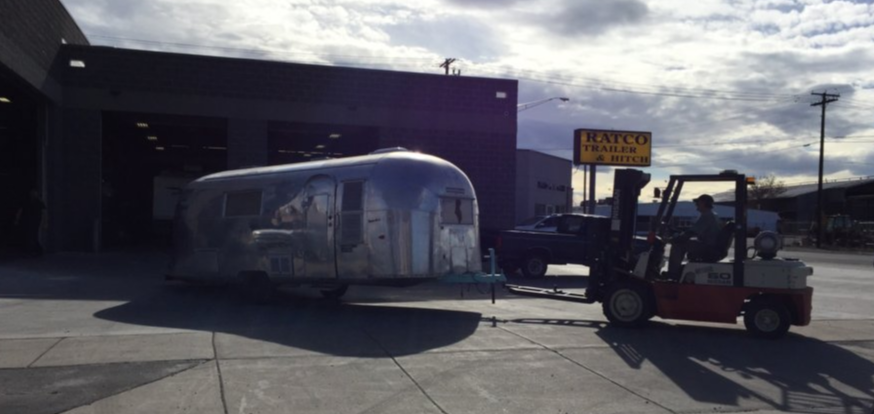 Despite their high reputation, I was a bit of a nervous wreck. They were professional and cordial, but I kinda had the impression that they were hearing my instructions much like I hear parent suggestions for my classroom. They smiled and nodded and then disregarded most of what I said. Fortunately, it's pretty clear they know their business better than me. (My sorry-but-not-sorry apologies to any parent offended...) When they called the next day, I was sure they were about to tell me about some problem (that's my story for all repairs on Eisley). Instead, they said I could come pick it up. Eisley was ready to roll. When I picked Eisley up, they wanted me to know that Airstream was 3/4" off when it built the frame. If I noticed a slight difference in where each wheel sits inside its own wheel well, it was because Airstream got it wrong, they hadn't. Ratco uses a laser to measure very precisely each side of the axel to the hitch, to get the alignment perfect. One wheel well is fractionally closer to the hitch than the other. So there is an appearance that one wheel is further forward than the other, but in reality the are precisely aligned. To be honest, I can't see it. I love that kind of precision and it certainly gives me piece of mind. Perhaps the easiest way to see the difference between the old axel and the new axel is where the wheel sits in the wheel well in the old and new system: I'm a little behind in my writing, Eisley's been home for almost a month and I've been working on the floor, split-rim wheels, shocks, and trim. Next time.
|
AuthorI'm not an Airstream Jedi, yet. Airstream Jedi would have sounded presumptuous, like I know what I'm doing. That couldn't be further from the truth. Padawan is a title I can hope to live up to. Favorite Links:Knots Per Hour
My friend Mike is building an airplane. Check it out. Archives
August 2018
Categories |


 RSS Feed
